Building a minimalist waveform lamp from unneeded leftovers
I had wood left over, I built a waveform lamp. Some projects are meticulously planned, for others it is just intuition and a good idea. I had some wooden pieces left over from my bookshelf built and decided to experiment a bit. The result is a very unique lamp in a waveform design.
From scaps to a great idea
I had finished my black pipe and oak wood bookshelf built which left me with a lot of pieces of wood small enough to not really be useful but too big to just get rid of. I knew I wanted to build a smaller reading lamp for ambient light near my couch. The pieces were still sitting in my living room so I took a closer look.
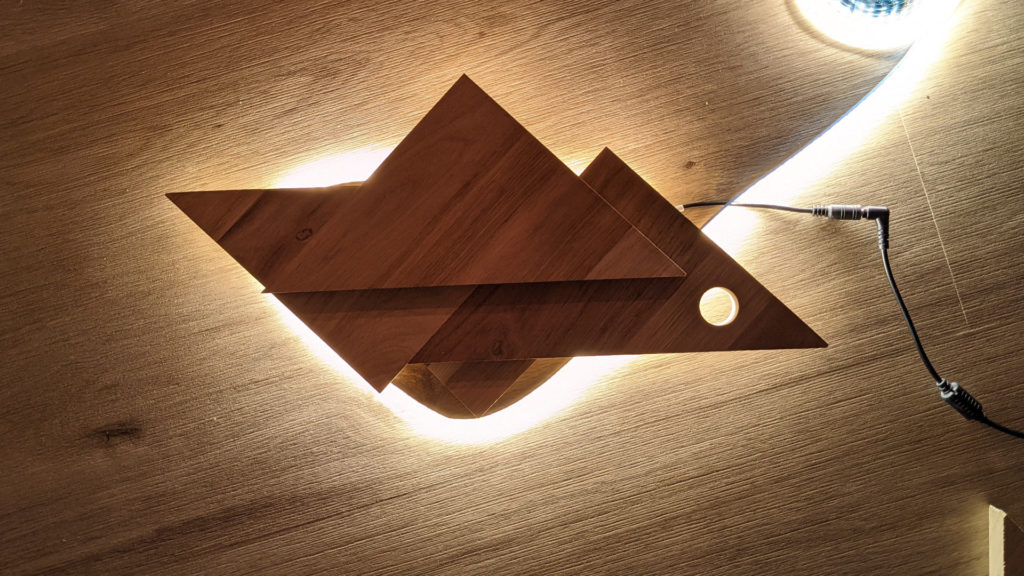
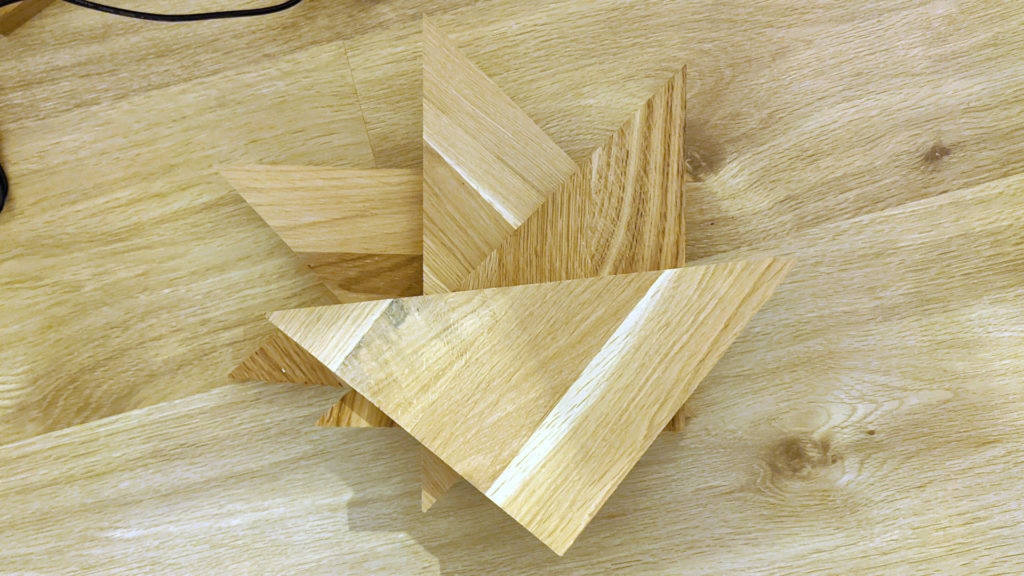
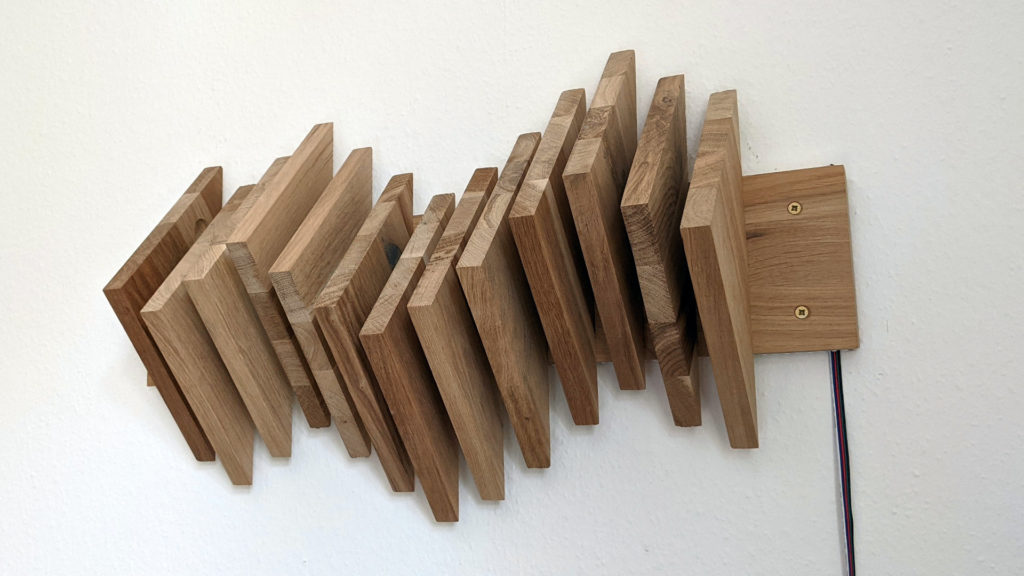
I had a bunch of big triangles left from where I cut the corner into each shelf board as well as a bigger piece of wood. That one I had used for testing so it has a hole on one side. This idea of a new light started forming in my head so I grabbed a couple of pieces and started experimenting.
I always have a couple of LEDs lying around so I got some of those and started combining them with the different wooden shapes trying to find something that can look good and be bright enough. I came up with a couple of designs I really liked. Both of those initial designs would have resulted in multiple smaller (and not as bright lamps), so I tried a third version using pretty much all of the wood.

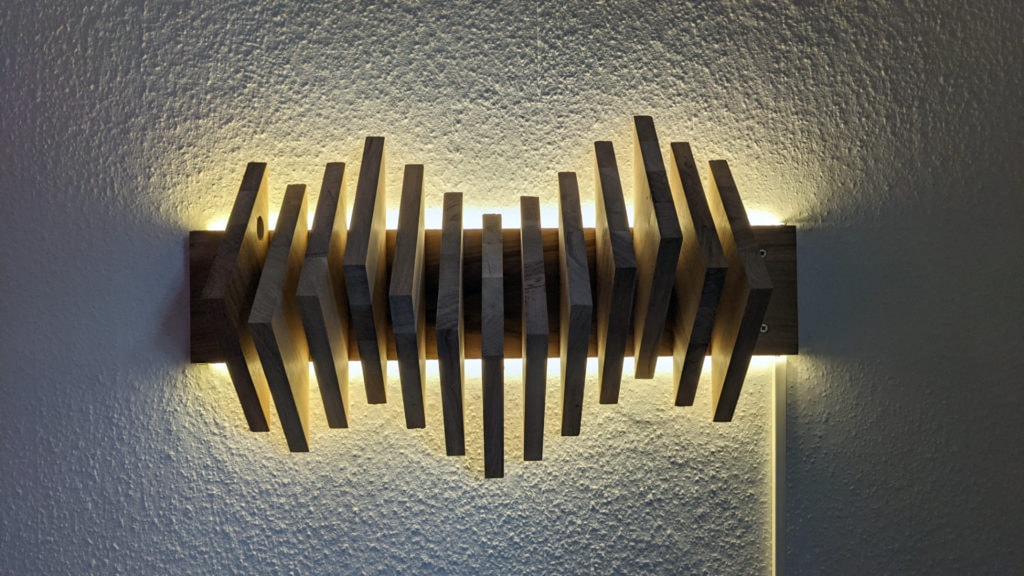
I honestly do not know where this idea was coming from but I decided to arrange the triangles in a kind of waveform pattern. This look very interesting and the big base board allows hiding a lot of LEDs for great indirect lighting.
Preparing the material
I designed this project in a way that did not need many additional cuts. The bunch of triangular wooden pieces was left unchanged, I just did some sanding to remove any possible splinters. All of the pieces are similar in size, there is only one with a whole drilled through. I decided to use that as a design element and put it as the first piece.
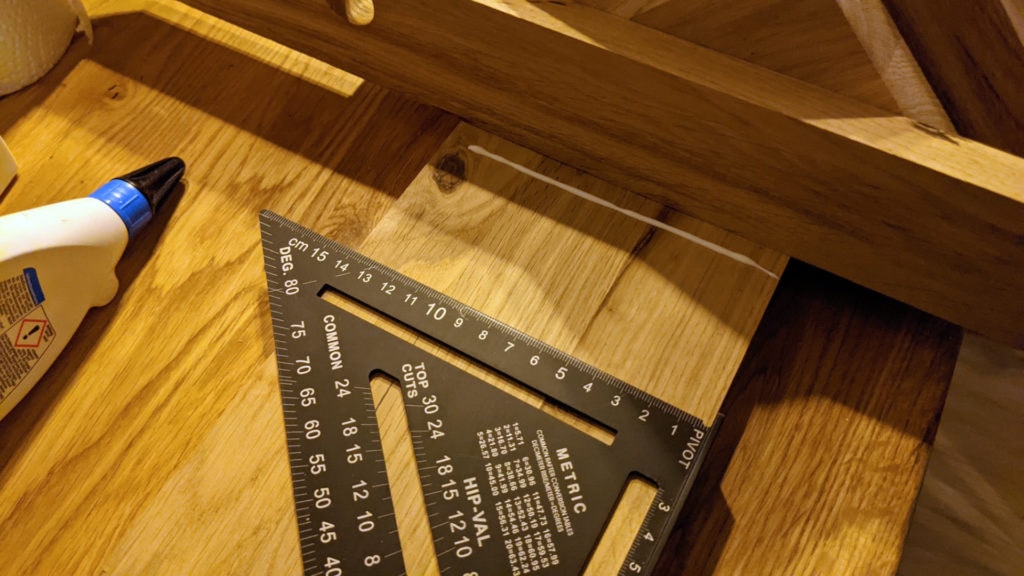
Next I used the table saw to cut the main piece to size and cut of the edge that was still one one end. I also decided to cut an angle of around 20° into each side to use it for the lighting later on.

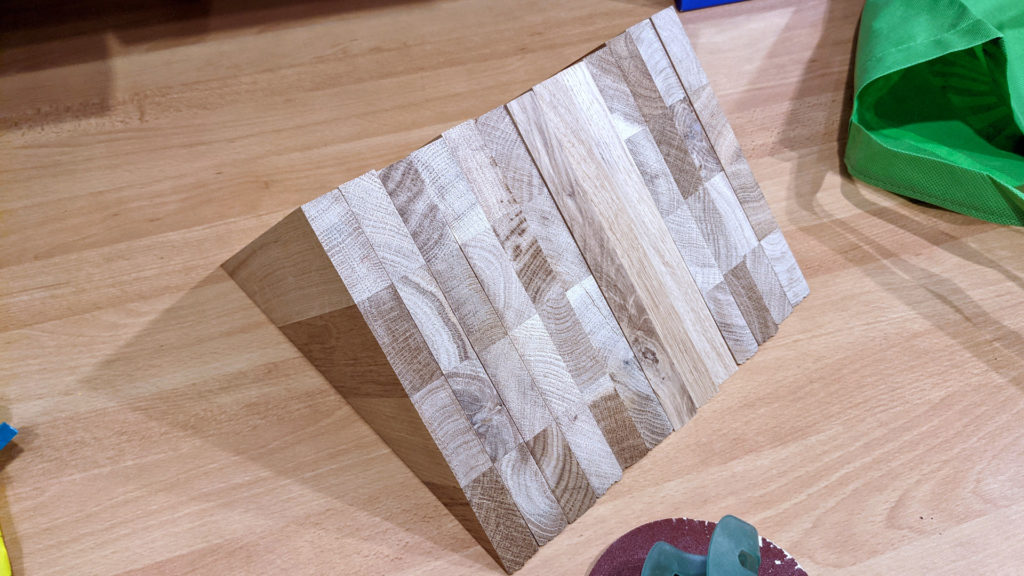
Then it was finally time to glue the pieces together. Before starting I experimented a bit by arranging the triangles in different forms until I hit a waveform like pattern that I liked. Gluing the pieces together is quite simple: I used a speed square to keep the triangles at a 90° angle to the main piece and a smaller piece of wood as a spacer. Then I just put some wood glue onto the board and put the next triangle on it. Finally I again used the speed square this time to check for 90° on the other axis.
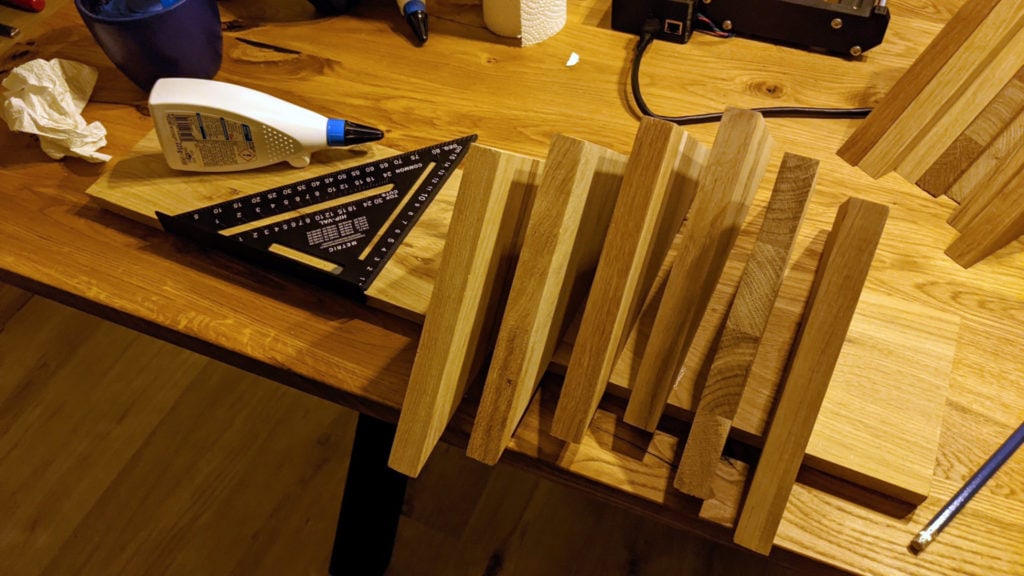
The process actually went quite quickly. I was able to glue on all pieces in under an hour. The important part was to keep a kind of constant up and down movement of the triangles for a good looking final form. Afterwards I let the glue dry over night before finishing the project.
Adding the LEDs
The “frame” of the lamp is done but it needed some light. I decided to go with LED strips: they are small, efficient, directional and easy to control. The idea is to have two strips running along the small sides of the main wooden piece. One on top, one at the bottom. The slight angle and the triangles will hide them slightly and they will be directed towards the wall. This results in nice indirect lighting.
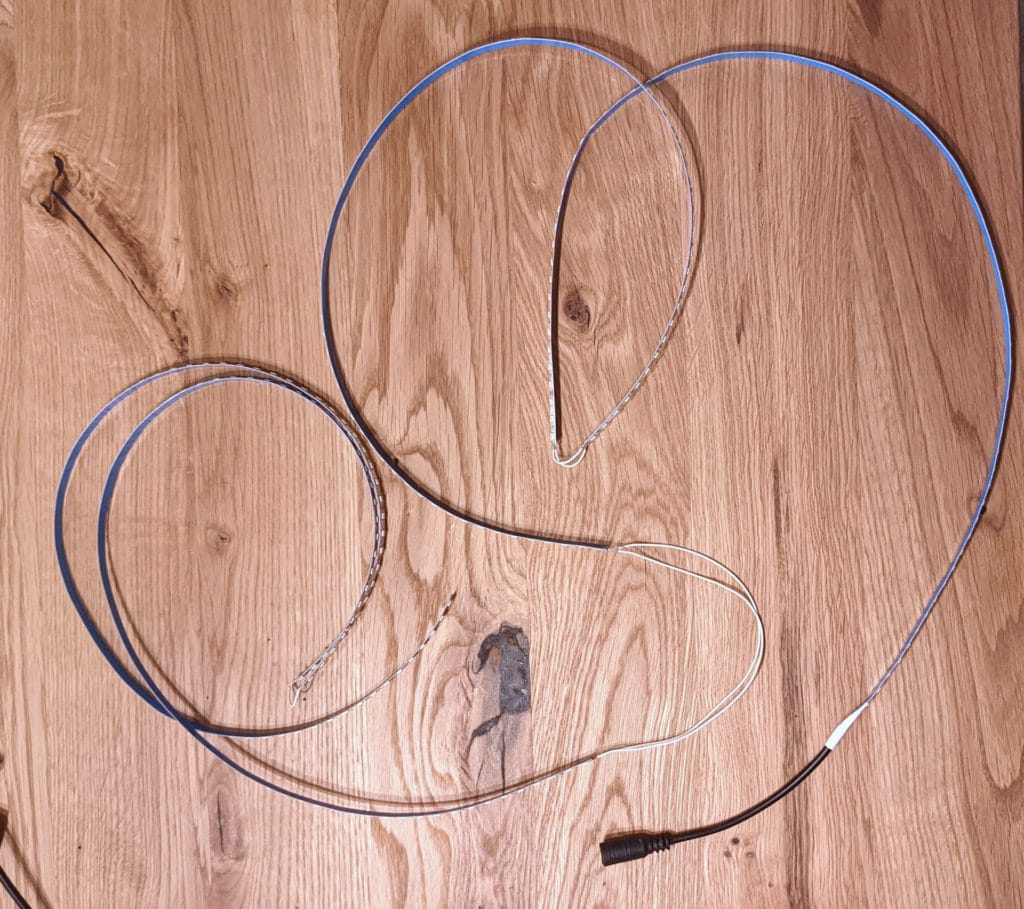
So I started preparing the strips. To get the maximum possible brightness I actually decided to go with two strips per side (the wood is just thick enough). So I started by cutting 4 strips to length and the connected them with small pieces of wire.


At the end of each run there are small connections running the current back to one side. On that one side I cut a channel in the back of the wood that I used to hide the longer connection between the top and bottom runs of LEDs. I also used some wire ferrules to the end of the cables that I later used to power the LEDs.
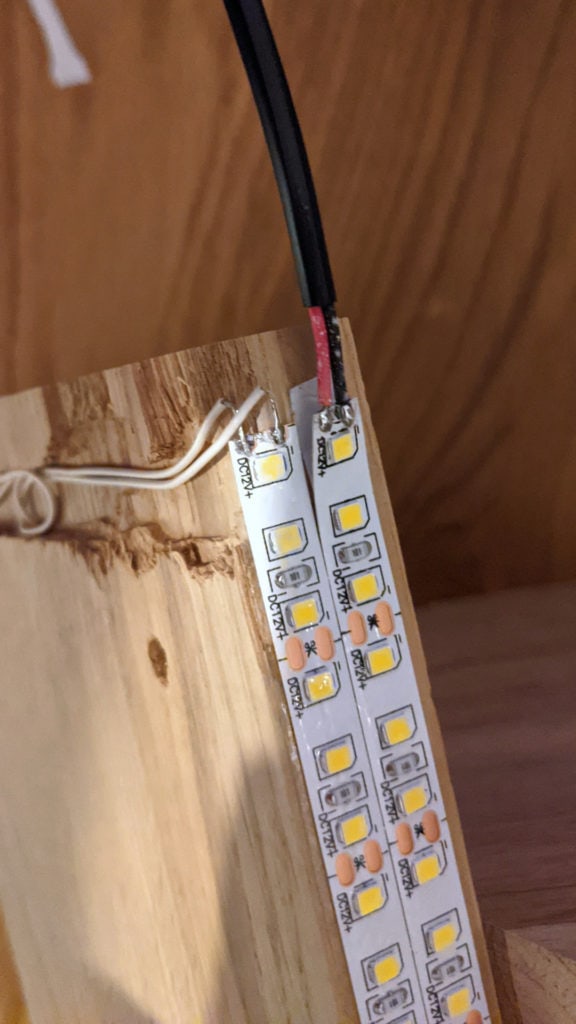
The adhesive on the back of the LED strips is often quite bad so I also used some additional 3m tape to securely hold the LEDs. This has worked really well, even after a couple of months now I do not see any loose LEDs.
Mounting the lamp
Finally it was time to mount the lamp to the wall. As all this wood is quite heavy I wanted to securely mount it. I drill and countersank four holes through the main piece of the lamp and transferred their position to the wall. There I drilled holes and used wall anchors to screw the lamp to the wall.
Controlling the LEDs
Finally I connected the LEDs to a H801 LED controller as I already described in my ultimate smart light guide. To power everything I used a good quality power brick to avoid any risk of fire. As I flashed it with Tasmota first it is really simple to connect it to Home Assistant. This allows me to have one button control my custom desk lamp as well as this wall mounted one, use it in automations or control it via Alexa.
If you are looking for components to built a similar waveform lamp and want to support this blog please buy them via these affiliate links.
H801 LED RGBWW controller
Small but bright LED strips I used
Power adapter (a bit overpowered just for this lamp)
Crimping tools
Table saw
For now I only used white LEDs but the 5 stranded cable and the controller allow even for control of RGBWW LEDs. In this case I think less is more though, the result is still quite stunning.
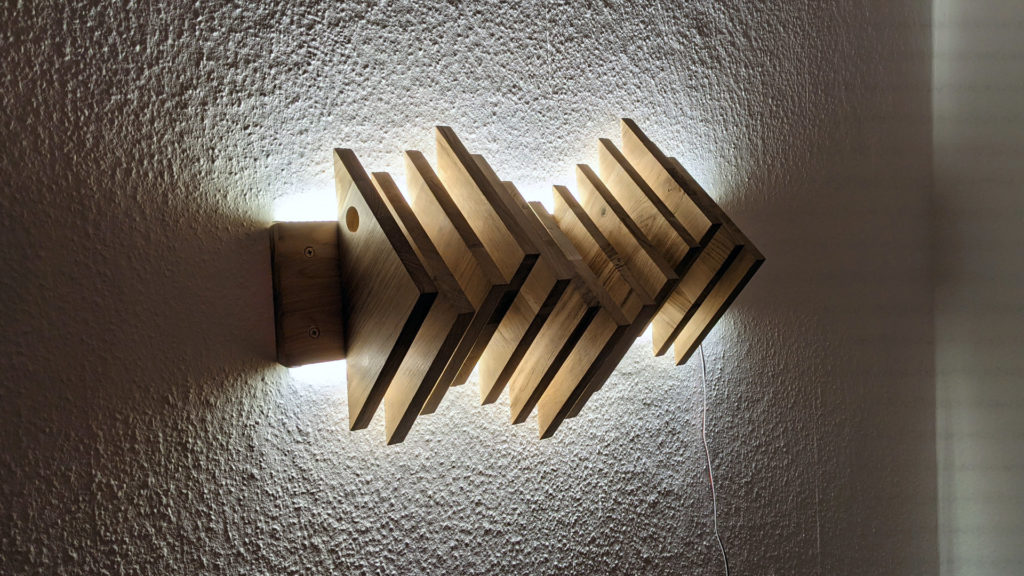
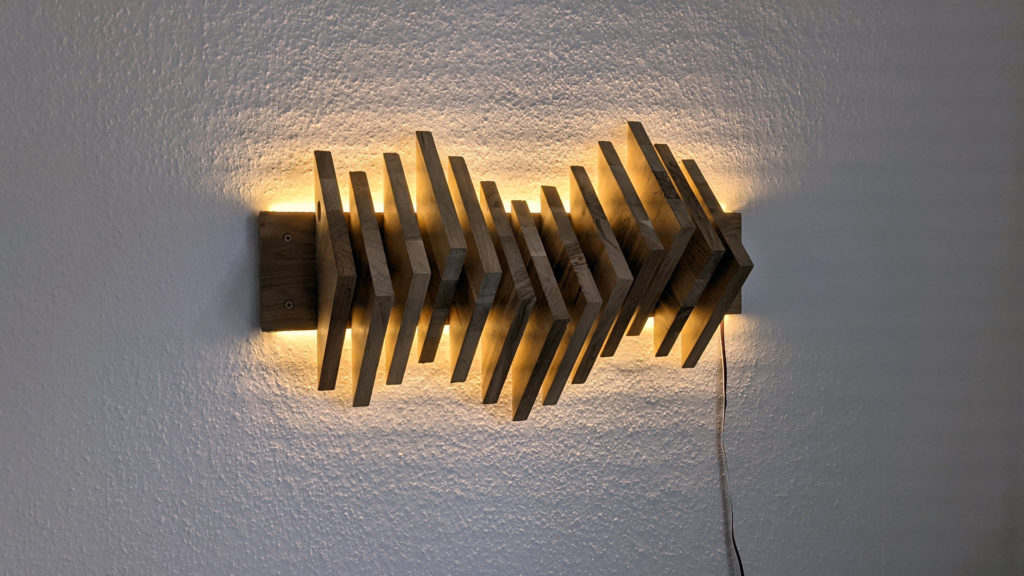
Finally I added a small cable duct afterwards to hide the cable a bit better. Now the whole lamp has quite a minimalist look. While it is not bright enough to illuminate a whole room it is perfect for reading or for indirect light when watching a movie for example. Overall it was a fun quick project!