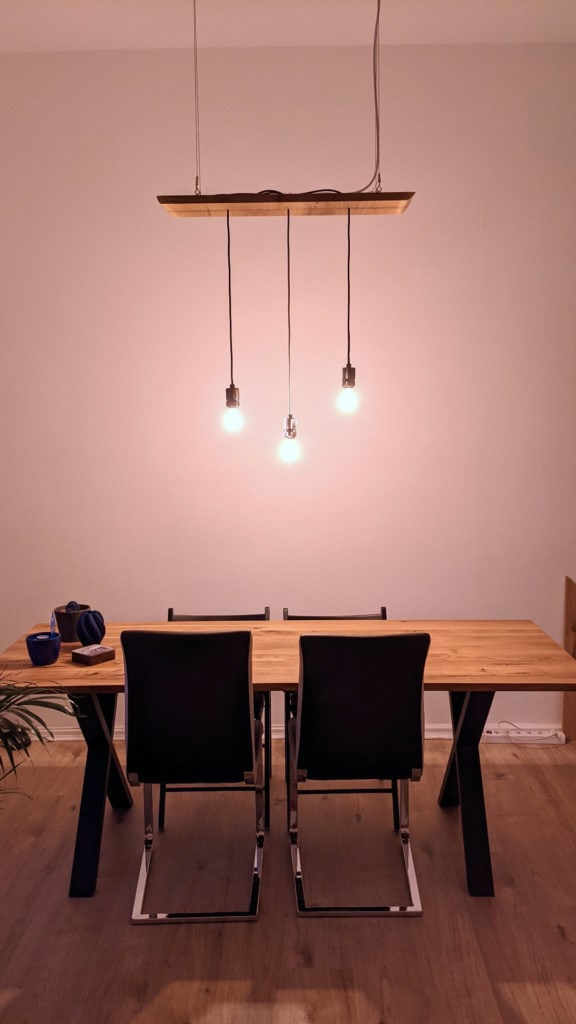
Building a unique custom ceiling lamp from wood -with smart filament LEDs
When I moved into my current apartment I wanted to built a custom ceiling lamp for my living room. The ingredients were clear: wood and filament LEDs hanging from the ceiling. With only a couple of hours of work I built this DIY lamp in a unique design.
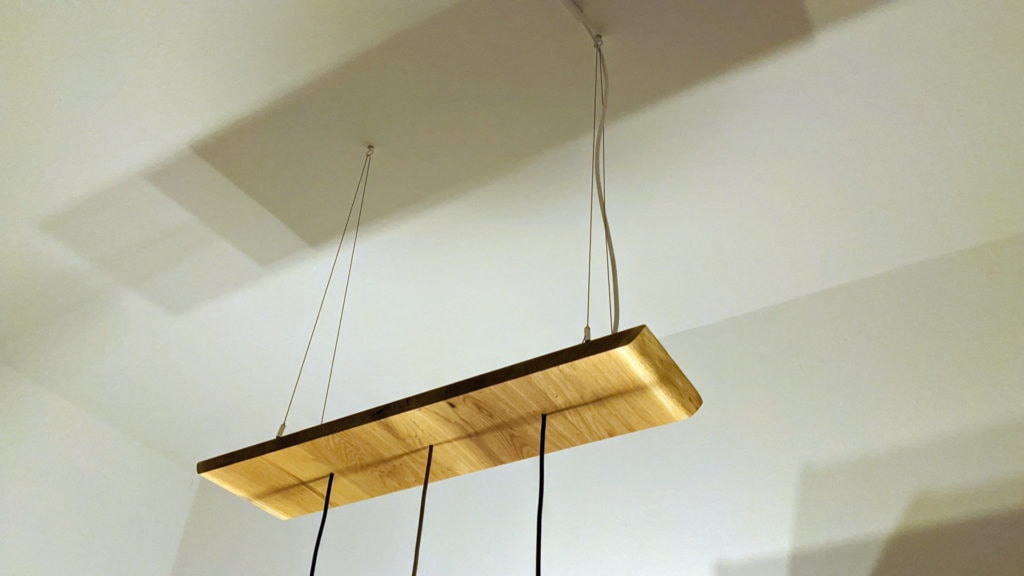
This is the lamp I am looking for
The design of this lamp really was a combination of three different factors. First I had bought a big slab of wood to build my desk out of. This worked very well (future blog post?!) but the piece was slightly too wide. I had to cut of a smaller strip of around 20x80cm and really did not want to waste the nice oak wood. So I decided to make it the base of my custom lamp.

The second part, the overall form of the lamp, was born from necessity as much as from a design standpoint. I had seen lights before with single bulbs hanging on their own long cables from the main body of the lamp and really liked the aesthetic. I decided to built something similar but my problem here is the very high ceiling in my apartment. At over 3m bulbs hanging directly from the ceiling would have looked pretty weird. Instead I decided to hang the main body of the lamp (the wooden piece) from the ceiling and then hand the single bulbs from that.
The final piece of the puzzle are (LED) filament bulbs. Those are (usually pretty big) bulbs with small LEDs inside that imitate the filament wire used in old lightbulbs. They can looks pretty awesome with different designs for the filament and usually have a nice warm white color. Combining this with a nice light fixture results in a great looking lamp.
In the end the lamp will be hanging centered over a dining table made from similar oak wood. The goal here was to match designs between the different pieces of furniture.
Choosing the right filament bulb
My next step was to look for the right light bulbs. Of course having a smart home means that I was looking for smart filament light bulbs that can be controlled from an open smart home system (currently HomeAssistant in my case). I mainly use the Zigbee protocol (and Zigbee2MQTT or ZHA, both are great) to control my light so started looking for compatible light bulbs.
The selection does not seem to be massive yet but both system I am already using offer some: Philips Hue and IKEA Tradfri both have filament light bulbs available.
The IKEA Tradfri filament light bulb
IKEA offers a pretty cheap filament light bulb for their smart home system. The reviews I have seen are pretty good but I personally did not like the design of the bulb that much. Usually this is not very important but these bulbs are going to be very much visible. The filament spiral is not very big and the glas of the bulbs has a weird tint that I do not find very good looking. Still this is a very viable option that I might use later for projects that are a little less noticeable.
The Philips Hue filament light bulb
The Hue system also offers a filament light bulb. While being more expensive I personally like the design much more. They offer three different types with changing bulb forms and either a longer filament spiral or a kind of helix. Both look pretty cool.
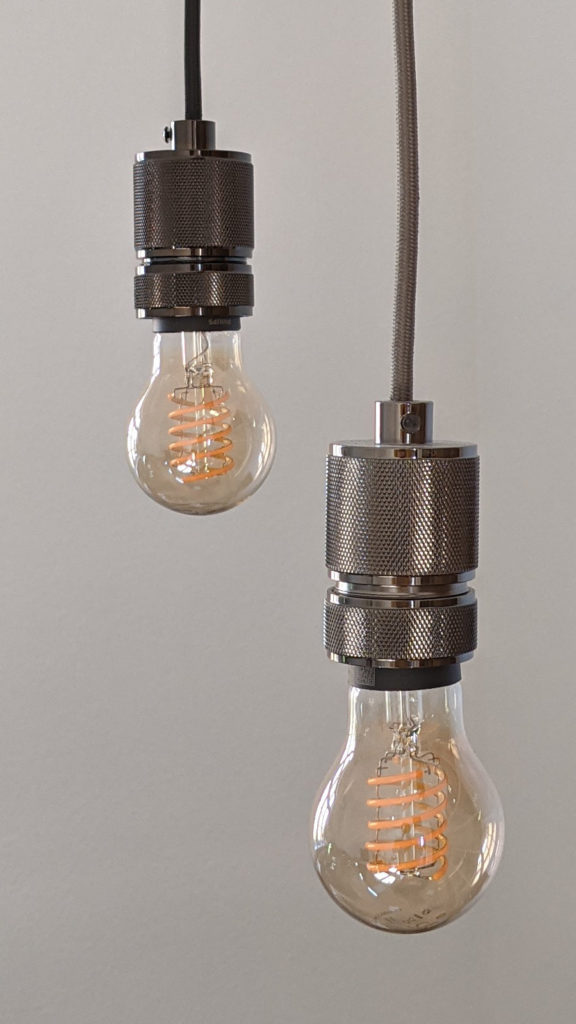

A set of Hue filament bulbs 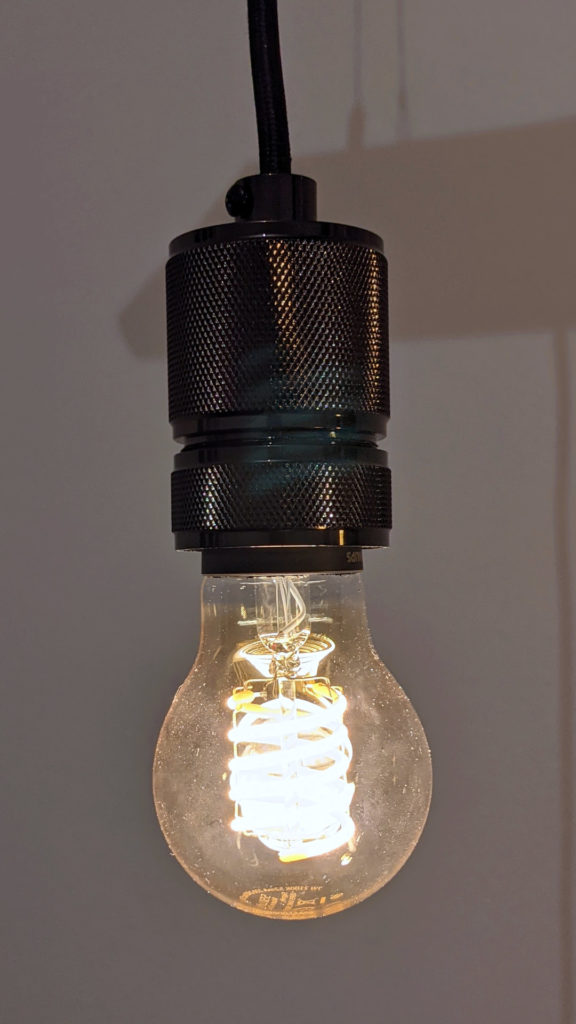
The (slightly dusty) Hue filament bulb
It also produces a nice warm light but has a little bit different tint to its glass. The bulbs can get pretty bright but also have great dimming, allowing me to dim them down to a very low level when needed. This is actually important as they are hanging right over a dining table at eye height.
One disadvantage though: why does Philips not build in a simple reset mechanism? Tradfri bulbs can easily be reset via switching the light on and off a couple of times, Hue not so much. This forced me to get a Hue remote control from a friend for a day to reset the bulbs before joining them to my network.
- The Hue filament light bulb
- The Tradfri filament light bulb
If you are interested in buying one of the light bulbs consider doing it via my affiliate links above. It does not change prices for you and supports this blog
In the end I decided to go with the Hue bulbs in the “normal lightbulb” form. For this project the higher cost is worth the better design for me.
Building a custom ceiling lamp
Fortunately I was able to source all the materials I needed on the last day before another COVID-19 shutdown and was able to order the filament bulbs online. Then I started building.
Preparing the wood
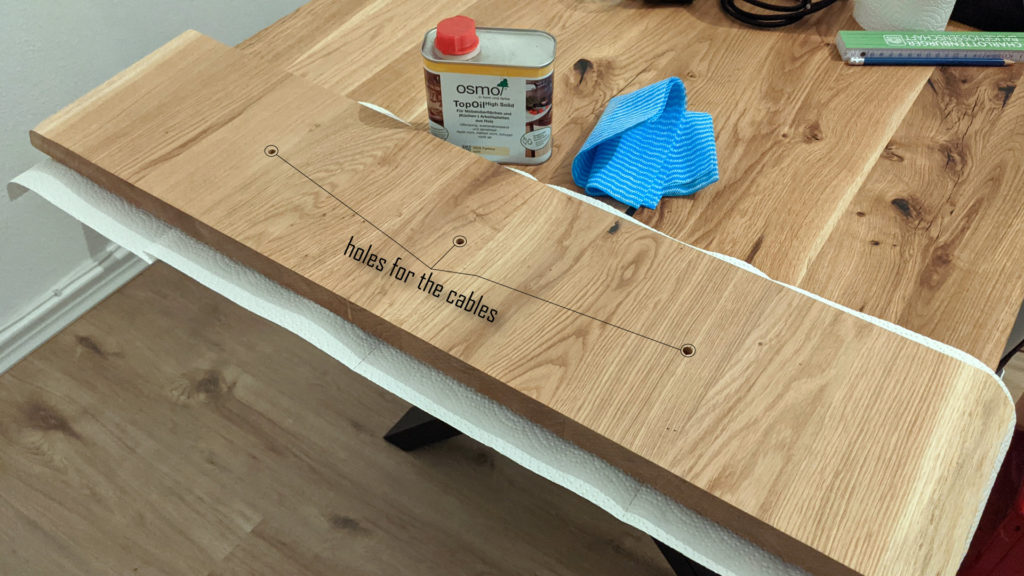
The wood I am using is raw untreated oak. The first step was to drill a couple of wholes through the wood that would later be used to pull the cables through. Afterwards I sanded everything down to 220 to get a smooth surface.
While maybe not strictly necessary I decided to also give it a layer of wax oil to protect the wood. I used the same oil I used for the desk below to achieve similar colors.
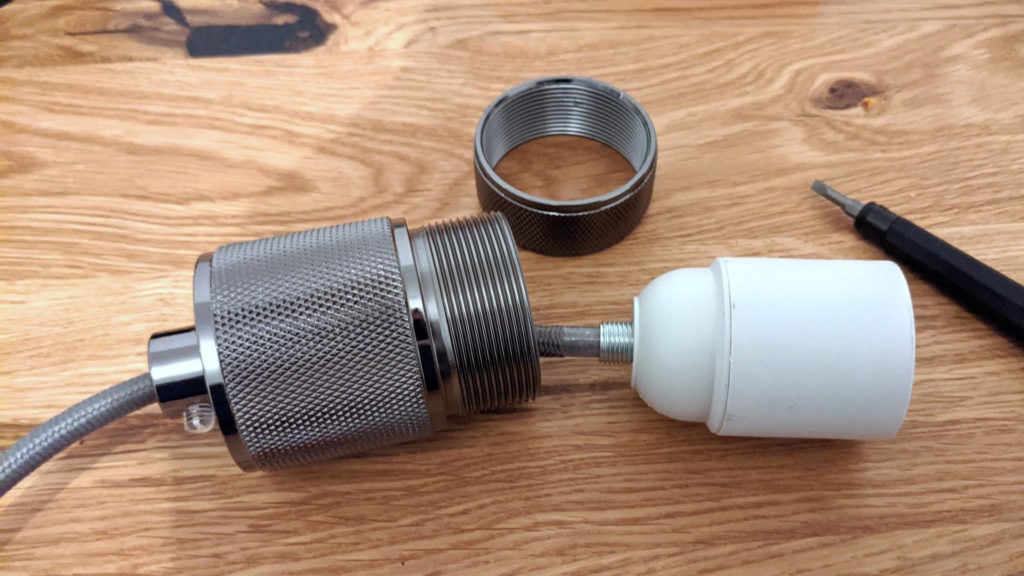
Assembling the lights
Next I prepared light bulbs. I got some nice metal fixtures and sleeved cables for the light bulbs to match the aesthetics of the filament bulbs. To prepare the lights each cable has to be connected to one fixture. Of course be careful here, electrical work has to be done by professionals.
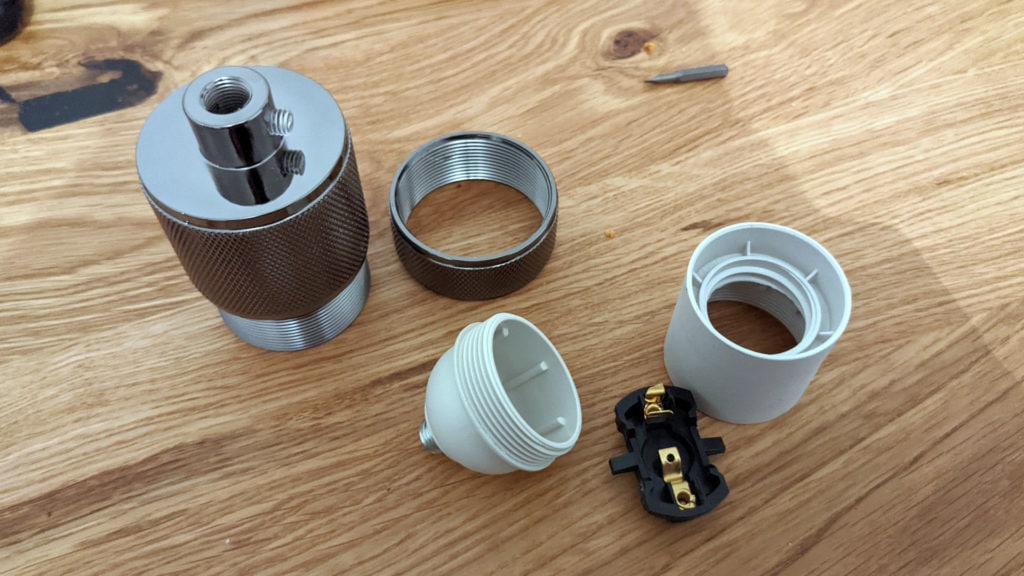

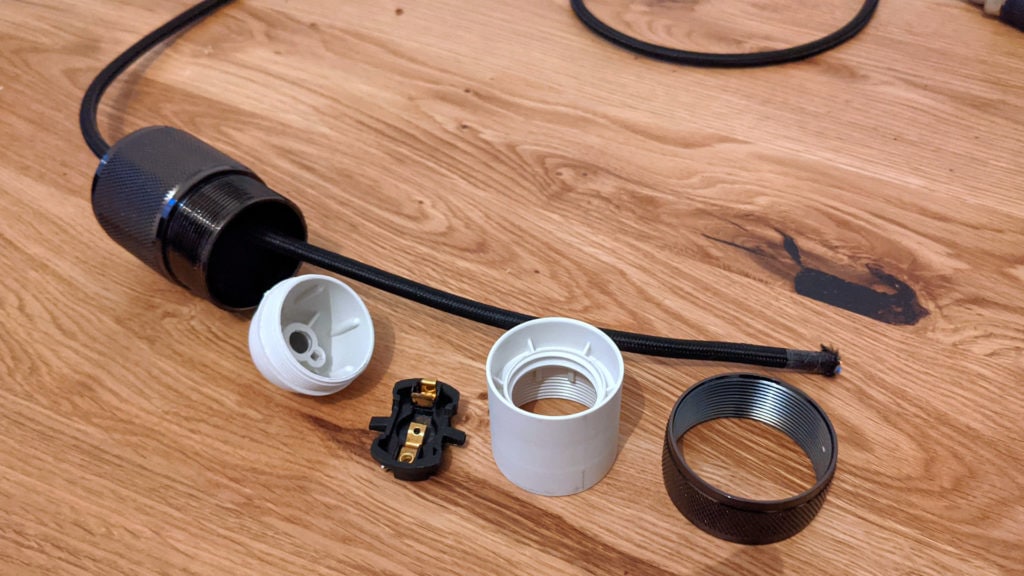
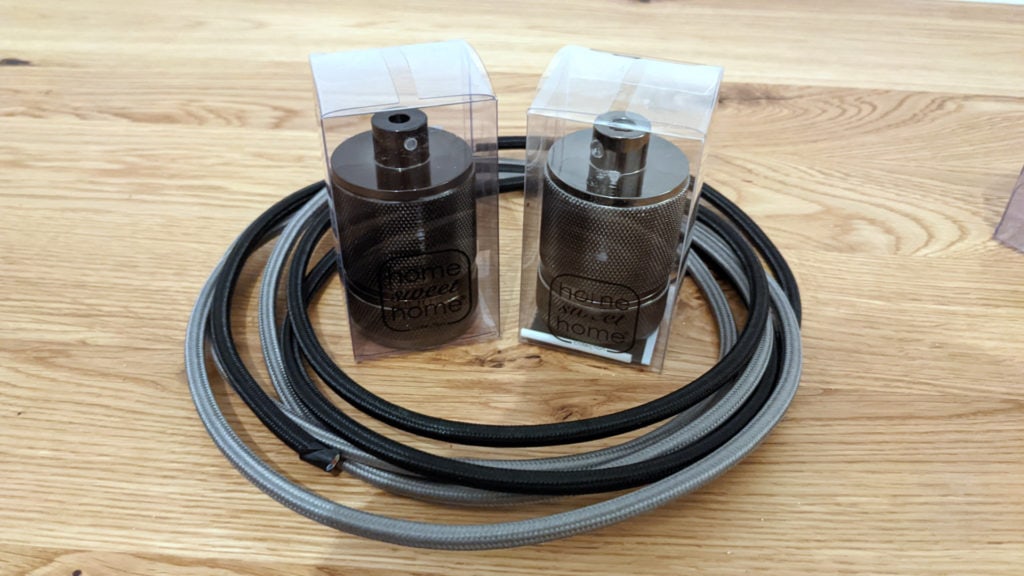
Fixtures and cables for the lamp
To make it a little bit more interesting looking I bought two black fixtures with black cables and one silvery one with a grey cable. Overall they match the black parts in the wood very well I think.
Each fitting has to be disassembled, the cable has to be stripped and the connected to the fitting. Unfortunately the admittedly very nice looking fittings have one major flaw: some of them (why not all?) have small plastic screws at the top that are supposed to fixate the cable. Small screw + plastic + high torque = nearly broken screw 🙁
Hanging the board
Next I prepared the board to be able to hang it from the ceiling. I bough four hooks with a thread/screw on one end and screwed them into the (pre-drilled) wooden board. I also got a set of thin steel wires with a loop on one end and a carabiner like mechanism on the other end.
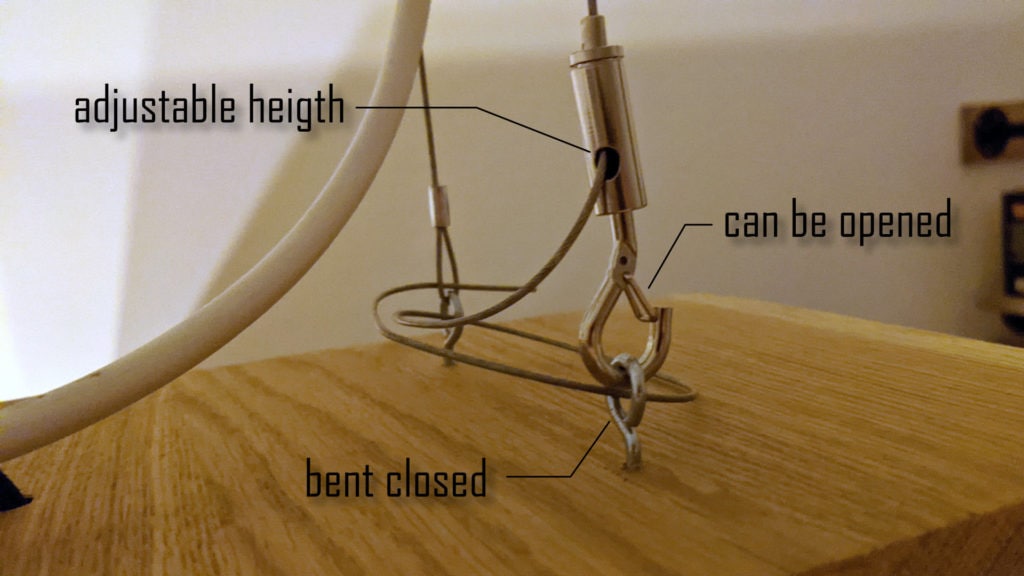
After hooking the loop end through the screw I used pliers to bend it into a closed position to secure the wire. The other side can always be opened via the builtin mechanism if needed.
Then I drilled some holes into the ceiling and used dowels to screw a set of rings into the ceiling centered over the desk. Feeding the steel wires through these rings and then securing them to the two screws each they can hold the base of the lamp at around a one meter distance from the ceiling.
Connecting everything
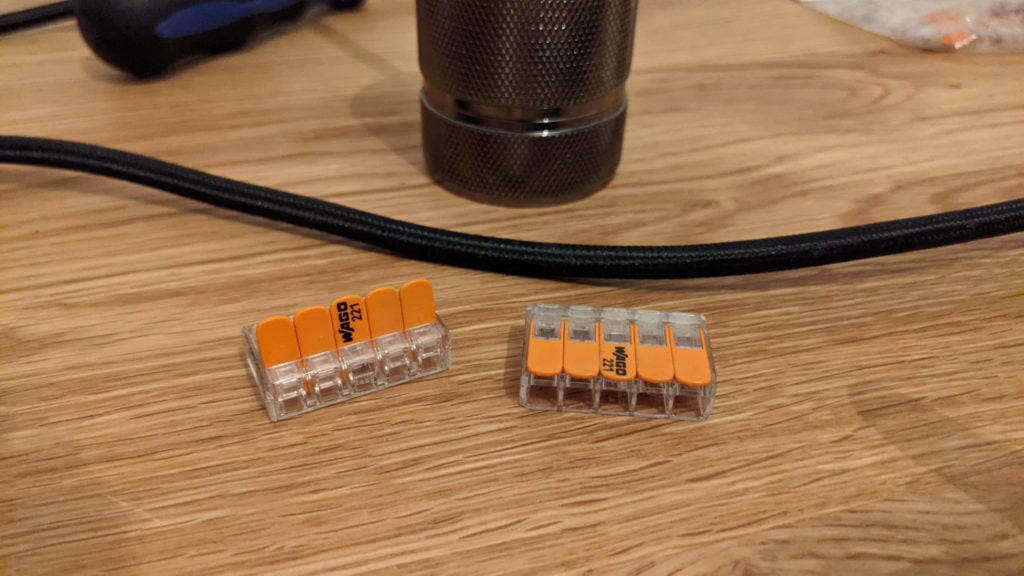
The final part of the project is about connecting everything. After feeding the wires of the lamp through the pre-drilled holes all the cables have to be connected. This has been done via Wago clamp connectors.
All these cables are then also connected to a main wire which runs from the connection at the ceiling down to the lamp itself. It is wrapped around one of the steel wires to keep it in place and hide it as good as possible.
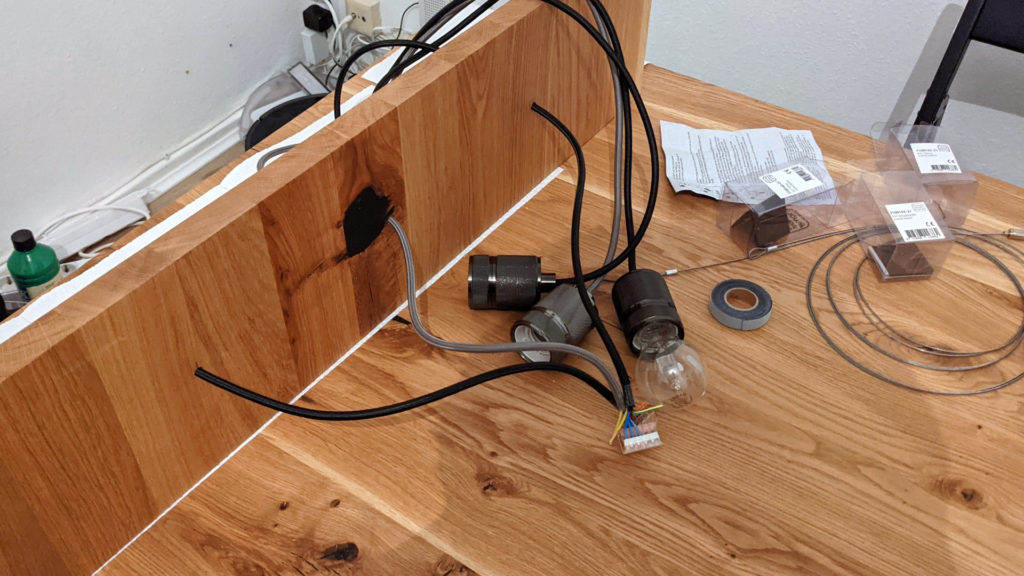
After then mounting everything in place I organized all the wires and connectors to lie flat and centered on top of the wood. That way the are hidden as you can’t see them from below.
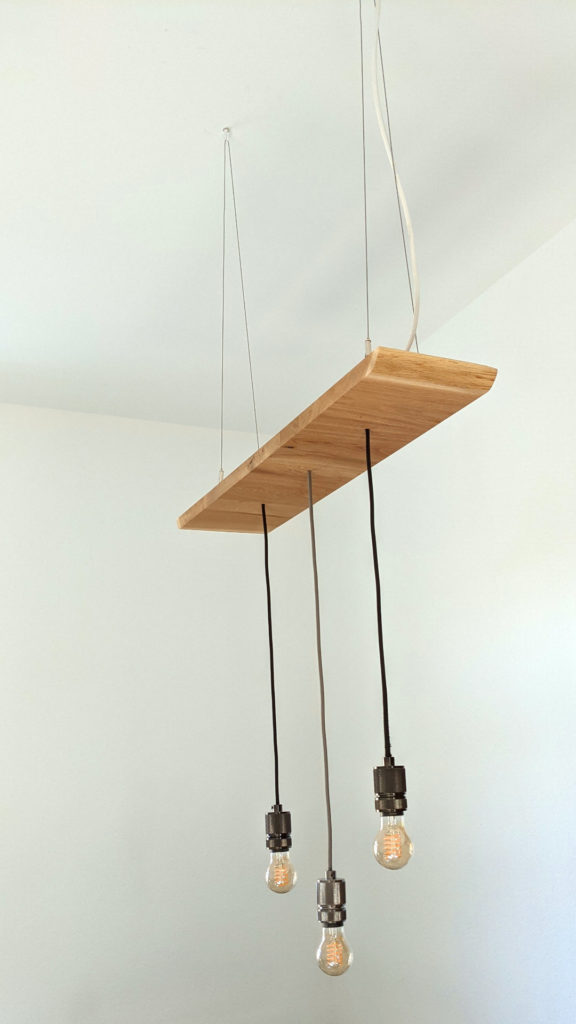
Thats it, the hardware part is done. And I really really like the result.
Connecting the light bulbs to my smart home system
Finally I connected the three new filament light bulbs to my smart home system. Connecting them to ZHA via Home Assistant is pretty easy as I described in that earlier post. One click on “add device” in the ZHA Integration and it starts searching. Now the problem is that the bulbs can only be found if they are reset (at least without the Hue bridge).
For some reason Hue does not seem to offer any simple way of resetting bulbs without their hub. It might be possible via Bluetooth and their App but in the end I borrowed a Hue remote control and used that to reset them. Seconds afterwards ZHA found them and now I can control them from Home Assistant. I am using my own smart Aqara switches to control them now but of course they can also be coupled to motion sensors or really anything else.
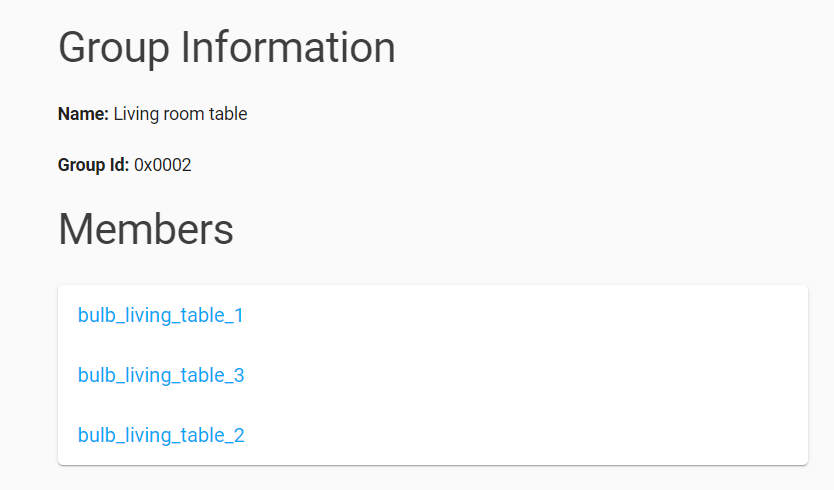
For simpler control I also added a new Zigbee group via ZHA which includes the three light bulbs of my DIY lamp. That way the can all be controlled together with one click.