Setting up a new smart home with Home Assistant – Part Two: Adding Zigbee and Tasmota devices
Home Assistant is an awesome free home automation system. To properly utilize it you need to add smart home devices though. This is how to add Zigbee and (Tasmota) Wifi devices to Home Assistant.
I recently started working on my new smart home server and build up the hardware as well as installed everything. Installation was really simple using my docker-compose files. Now it’s time to add some devices.
How to integrate anything into Home Assistant
I am new to Home Assistant (coming from OpenHab 2) so I should be able to explain all of this for beginners. Fortunately Home Assistant works very similar to OpenHab in regards to adding new devices. While in OpenHab you install bindings in Home Assistant you have to add an integration. The list of all integrations can be found here on the Home Assistant website.
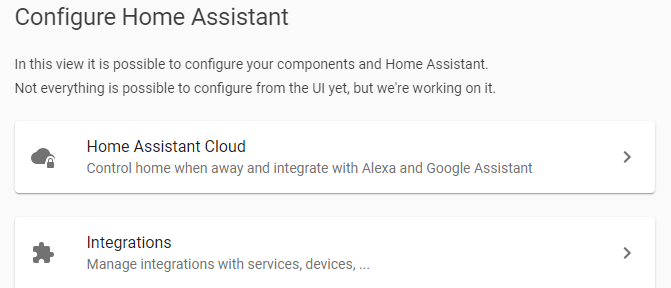
To install an integration simply go to the configuration menu and click the “Integrations” button.
The majority of my devices are either Zigbee based or Wifi devices flashed with Tasmota. In both cases you can get great value out of pretty cheap devices. Fortunately both are also very well supported by Home Assistant.
Adding Zigbee devices
In general there are several ways you can use your Zigbee devices (like Hue, Tradfri, Aqara) in your smart home. The manufacturers gateway (which is easy but you may need a lot of different ones and you are dependent on them and your Internet connection) and custom local solutions.
The most used local solutions I know are based on the Conbee2/deCONZ which I have not personally used and the two systems ZHA and Zigbee2MQTT. Both of them are great, both of them have different advantages and disadvantages. Both are working with Home Assistant.
Zigbee2MQTT with Home Assistant
I have been using Zigbee2MQTT with OpenHab 2 for quite some time and it worked really reliable. Using some tips and tricks I learned over the time and the Zigbee2MQTT assistant for easier management all was fine. So I gave this system a try with Home Assistant.
Using Zigbee2MQTT with Home Assistant is actually really easy. If you have your Z2M system and the MQTT broker already set up you just need to change a couple of settings. Here is the official guide. Update your Z2M configuration to enable device discovery.
homeassistant: true
permit_join: true
mqtt:
  base_topic: zigbee2mqtt
  server: 'mqtt://localhost'
serial:
  port: /dev/ttyACM0
advanced:
  network_key: GENERATE
devices:
  // ...
Next go to your Home Assistant configuration.yaml file and add some code for auto discovery.
mqtt:
   discovery: true
   broker: [YOUR MQTT BROKER]
   will_message:
     topic: 'hass/status'
     payload: 'offline'
Save the changes, restart Home Assistant and your devices should automatically start showing up in Home Assistant.
If you are interested in buying the CC2531 Zigbee USB stick (preflashed or with a debugger) or the Conbee II consider doing it via my affiliate links. It does not change prices for you and allows me to pay for the servers 😉
While Zigbee2MQTT works really well and supports a lot of devices there are also a couple of disadvantages though: you need to run additional software (MQTT broker), the integration into Home Assistant is good but not great and most important in my case: you need to have the Zigbee coordinator (in my case the CC2531 USB stick) plugged directly into your machine that’s running Home Assistant.
If you are using Home Assistant there is another great solution though: ZHA.
ZHA with Home Assistant
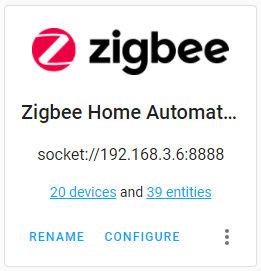
ZHA is an alternative Zigbee control system that can be installed directly via Integration in Home Assistant. Just go to the Integration tab as described above and look for “Zigbee Home Automation” or ZHA.
Before you do that you need to prepare your Zigbee bridge though. The supported devices can be found here. I personally decided to use the Sonoff Zigbee bridge. It is a small, pretty cheap device that has a Zigbee and a Wifi chip. This means you can position it anywhere in your home for better Zigbee coverage and are not constricted to the position of your server.
- CC2531 Zigbee USB stick (preflashed or with a debugger)
- Sonoff Zigbee bridge (you need to flash Tasmota)
- USB to serial 3.3V stick needed to flash Tasmota
- Alternative: the Conbee2 stick
- Some nice Zigbee devices like the Aqara motion sensor, the Aqara switch or the Hue ambiance adjustable white bulbs
If you are interested in buying Zigbee devices for your smart home consider doing it via my affiliate links above.
Before you can use this bridge for ZHA you need to flash the open source firmware Tasmota. Fortunately it is not really complicated, I described the process in the linked post. Once done install the ZHA Integration and let the setup process begin. Select “Enter manually” when asked for a device path and choose “EZSP” as the device type. Afterwards you can use socket://<your bridge IP>:8888 as the serial path and 115200 as the port speed. This will connect to your Zigbee bridge directly via TCP.
Now it is time to actually connect some Zigbee devices to your setup. To do that just click “CONFIGURE” and then “add device” in your ZHA integration. ZHA will now start searching for new devices. Now all you need to do is put your devices in pairing mode. This is usually done by pressing a certain button for some time. A list of compatible devices and how to pair them can be found on this website.
After a couple of seconds devices will now start showing up in the ZHA integration. Each one will have a default name. Change that name and optionally assign a room here, then continue with the next device. Once you are done just close this screen. All your Zigbee devices should now show up in Home Assistant.
I was able to connect all my Zigbee devices, 20 by now, without any problems. Only my smart blinds are sometimes a little bit slow to answer. This might not be ZHA’s fault at all though.
Adding Tasmota devices
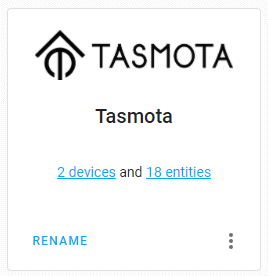
Where I am not using Zigbee devices I mostly use Wifi based devices that can be flashed with Tasmota to give me full local control. Adding those to Home Assistant was even easier than the ZHA Integration as there is an Integration for those devices too. While it is still officially in beta it works great for me.
Before adding any Tasmota devices it might be a good idea to update them though as version 9.2 or higher is required for this to properly work. In each device’s console you need to also set SetOption19 0 to enable the automatic discovery. This was already enable on most devices for me, but make sure to set this setting if something does not work.
The only other prerequisite is a working MQTT integration in Home Assistant. If you follow the Zigbee2MQTT integration guide above you are already done with this, otherwise add this to your configuration.yaml file:
mqtt:
   broker: [YOUR MQTT BROKER IP/NAME]
Save and restart Home Asisstant. Now you can again go to the Integrations tab in Home Assistant and install the “TASMOTA” Integration. That’s it. All your devices should now show up automatically.
If some devices are not showing up check your MQTT broker to see if they created an entry in the discovery topic. If not double check the MQTT settings and the SetOption19 for this device.
Conclusion
I have been using Home Assistant for a couple of weeks now, how do I like it? In general I still really really like it. Integrations of most of my devices work flawlessly and even better than in OpenHab 2. I miss the configuration via text files but I have to admit that this is much more accessible. I do have a couple of minor problems with the system but I am solving most of them and the updates for Home Assistant keep coming.
In the next post I will show you how I added some automations to properly use my smart home devices.