Displaying Home Assistant data on your MagicMirror
A MagicMirror is the perfect display to show your smart home condition. Here is how to display data from Home Assistant using the MagicMirror system for smart mirrors.
What is a MagicMirror?
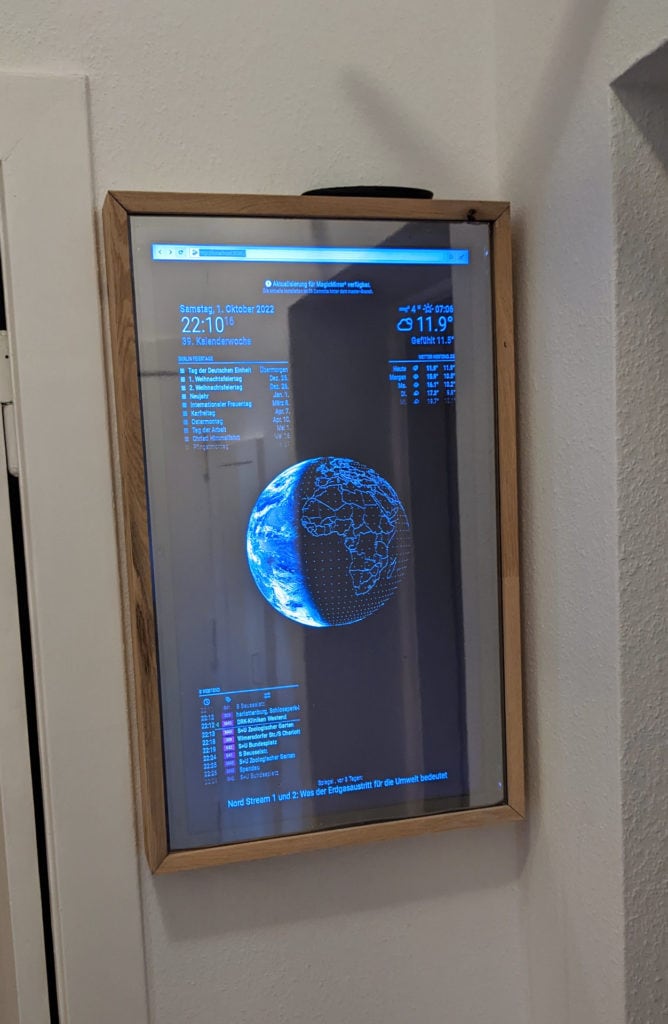
A so called magic mirror is a very futuristic and cool looking piece of furniture. It is basically a screen hidden behind a semi transparent mirror. If done right you can use that to show text that appears to float in your mirror.

I built such a magic mirror some time ago. All you need is an old screen, a special piece of glass (or foil), a Raspberry Pi and some time. At the time I used a Pi Zero but now I have migrated to the much more powerful Pi 4.
Why do you need the Pi 4 you ask? Well you need some computer to display an image. The trick is to show only white, or otherwise bright colors, on a black background. In theory you can display anything you want but for easy of use I would recommend using the MagicMirror² software. It has a lot of modules which add additional capabilities.
Installing the homeassistant-sensors module
Of course any tech I have I try to connect to my smart home that is run by Home Assistant. In the past I already figured out how to turn the screen of the magic mirror on or off from Home Assistant based on motion. This still works pretty well (although the TV is a bit slow to turn on) but I was still missing some simple way to display information from Home Assistant on the mirror itself.
Now I finally took the time to fix that. Luckily there is a simple module that helps with the task: homeassistant-sensors. This module from the user leinich makes it very simple to display any sensor data from Home Assistant on the screen. Installation is quite simple. Go to your modules folder, clone the repository and (if you want to use icons) clone the material webfonts repository in the same folder too.
cd ~/MagicMirror/modules
git clone https://github.com/leinich/MMM-homeassistant-sensors.git
cd MMM-homeassistant-sensors
wget https://github.com/Templarian/MaterialDesign-Webfont/archive/master.zip && unzip master.zip
Now the module should be ready. To use it we first need a token (a kind password that allows access) from Home Assistant. Switch to your HA web UI, click on your username and scroll down until you see long-lived access tokens. Create a new one here (name does not really matter) and make sure to copy the token as you won’t see it again.

Connecting MagicMirror to Home Assistant
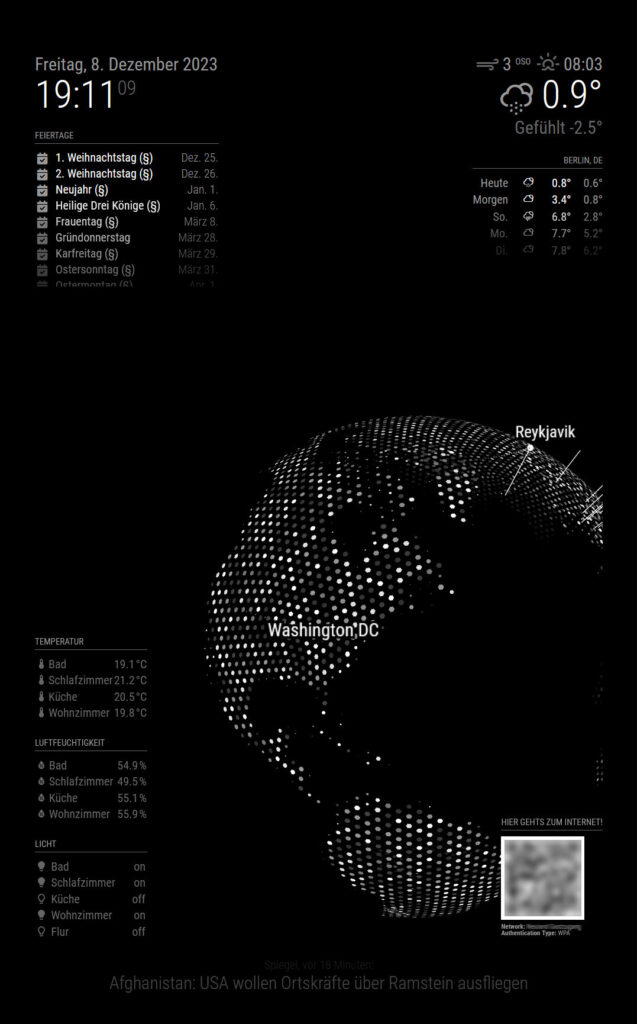
Now we can finally jump to the configuration file of MagicMirror (config/config.js) and add the new module there. I decided to add the module three times to show temperature, humidity and light status in my apartment. This is how it looks like:
{
        module: 'MMM-homeassistant-sensors',
        position: 'bottom_left',
        config: {
                title: "Temperatur",
                host: "homeserver",
                port: "8123",
                https: false,
                token: "putTokenHere",
                prettyName: true,
                stripName: true,
                debuglogging: false,
                values: [
                                {
                                        sensor: "sensor.lumi_lumi_weather_25d76b03_temperature",
                                        name: "Bad",
                                        icons: [{
                                                "default": "thermometer"
                                        }]
                                }, {
                                        sensor: "sensor.lumi_lumi_weather_d7226508_temperature",
                                        name: "Schlafzimmer",
                                        icons: [{
                                                "default": "thermometer"
                                        }]
                                }, {
                                        sensor: "sensor.lumi_lumi_weather_temperature",
                                        name: "Küche",
                                        icons: [{
                                                "default": "thermometer"
                                        }]
                                }, {
                                        sensor: "sensor.lumi_lumi_weather_28778b06_temperature",
                                        name: "Wohnzimmer",
                                        icons: [{
                                                "default": "thermometer"
                                        }]
                                },
                ]
        }
},{
        module: 'MMM-homeassistant-sensors',
        position: 'bottom_left',
        config: {
                title: "Luftfeuchtigkeit",
                host: "homeserver",
                port: "8123",
                https: false,
                token: "putTokenHere",
                prettyName: true,
                stripName: true,
                debuglogging: false,
                values: [
                        {
                                sensor: "sensor.lumi_lumi_weather_25d76b03_humidity",
                                name: "Bad",
                                icons: [{
                                        "default": "water-percent"
                                }]
                        },{
                                sensor: "sensor.lumi_lumi_weather_d7226508_humidity",
                                name: "Schlafzimmer",
                                icons: [{
                                        "default": "water-percent"
                                }]
                        },{
                                sensor: "sensor.lumi_lumi_weather_humidity",
                                name: "Küche",
                                icons: [{
                                        "default": "water-percent"
                                }]
                        },{
                                sensor: "sensor.lumi_lumi_weather_28778b06_humidity",
                                name: "Wohnzimmer",
                                icons: [{
                                        "default": "water-percent"
                                }]
                        },
                ]
        }
},{
        module: 'MMM-homeassistant-sensors',
        position: 'bottom_left',
        config: {
                title: "Licht",
                host: "homeserver",
                port: "8123",
                https: false,
                token: "putTokenHere",
                prettyName: true,
                stripName: true,
                debuglogging: false,
                values: [
                        {
                                sensor: "light.bulb_bath_level_on_off",
                                name: "Bad",
                                icons: [{
                                        "state_on": "lightbulb",
                                        "state_off": "lightbulb-outline"
                                }]
                        },{
                                sensor: "light.licht_schlafzimmer",
                                name: "Schlafzimmer",
                                icons: [{
                                        "state_on": "lightbulb",
                                        "state_off": "lightbulb-outline"
                                }]
                        },{
                                sensor: "light.licht_kuche",
                                name: "Küche",
                                icons: [{
                                        "state_on": "lightbulb",
                                        "state_off": "lightbulb-outline"
                                }]
                        },{
                                sensor: "light.licht_wohnzimmer",
                                name: "Wohnzimmer",
                                icons: [{
                                        "state_on": "lightbulb",
                                        "state_off": "lightbulb-outline"
                                }]
                        },{
                                sensor: "light.ceiling_led_hallway_light",
                                name: "Flur",
                                icons: [{
                                        "state_on": "lightbulb",
                                        "state_off": "lightbulb-outline"
                                }]
                        },

                ]
        }
},
# dont forget to close the array of all modules here and put the proper brackets
In each module you will have to at least change host/port/token settings so that it can reach your installation of Home Assistant. The important part of each module is the array of sensors. It is important to provide the correct sensor entity id here. You can find that by selecting any entity in Home Assistant and clicking the gear icon to see details. Make sure to copy the full id including the light/sensor/… prefix.

You can also set icons, either a default value or one per status for your sensors. You can find all possible icon names here. More details about possible statuses and the module in general can be found in its readme. And here is the result:

And here is another real picture of the setup. In the background you can see my DIY bookshelf and my 3D printed sunglasses holders.

Quite cool I think! I am sure I will play with this some more in the future and figure out what data I really need to show here. There is also a updateInterval setting which is set to a very long 5 minutes by default. I will also experiment with lower values and the impact on performance.


