Building a wooden MagicMirror – this is what hardware you need
A MagicMirror is a mirror with a screen behind it “magically” showing information on the mirror. Here is how I built an elegant and powerful MagicMirror with an oak frame.
The screen
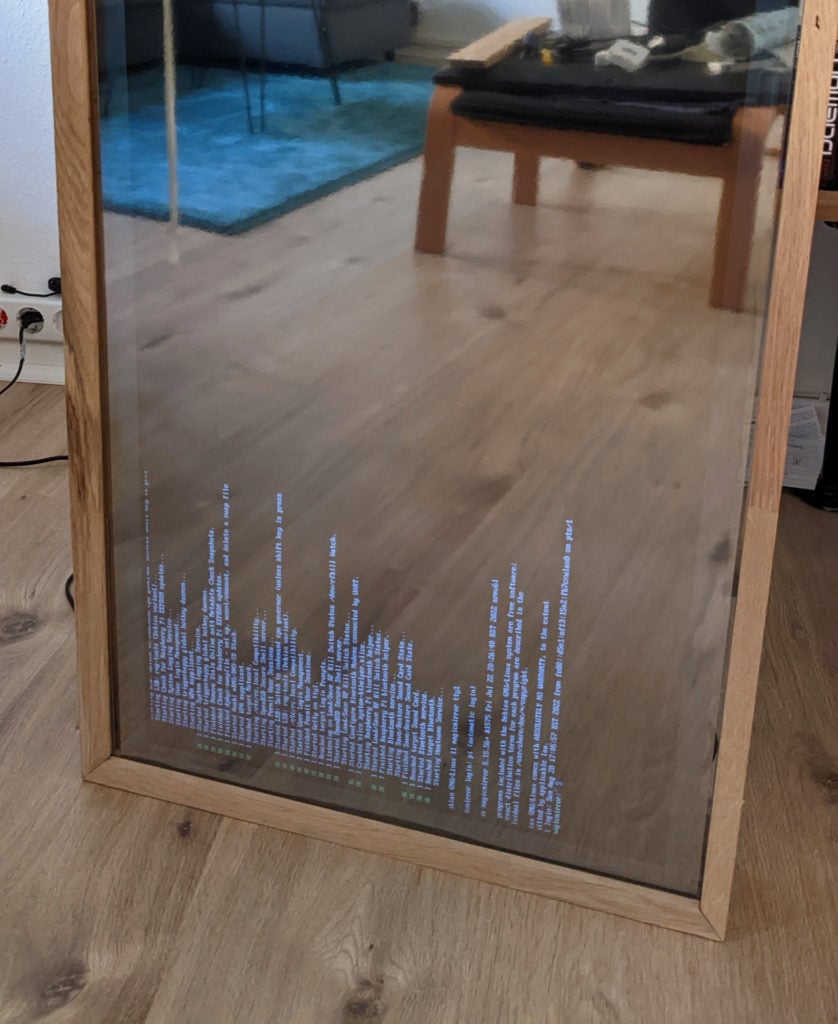
The “Magic” mirror works by using a semi transparent mirror with a screen behind it. If the screen is set to black with white text on it (or something similar with high enough contrast) it will show on the mirror appearing to be floating on it. There is already a whole community of people on the Internet who built their own smart magic mirror. There is even an awesome free software to run it: MagicMirror².
Before getting started though you need a screen. I used an old TV but flat screen panels from notebooks can be a great alternative too! A full TV is of course pretty big, I was going for something a bit more slick and thin looking so I disassembled the whole TV.
There is a list with all the parts I used at the end of this article.
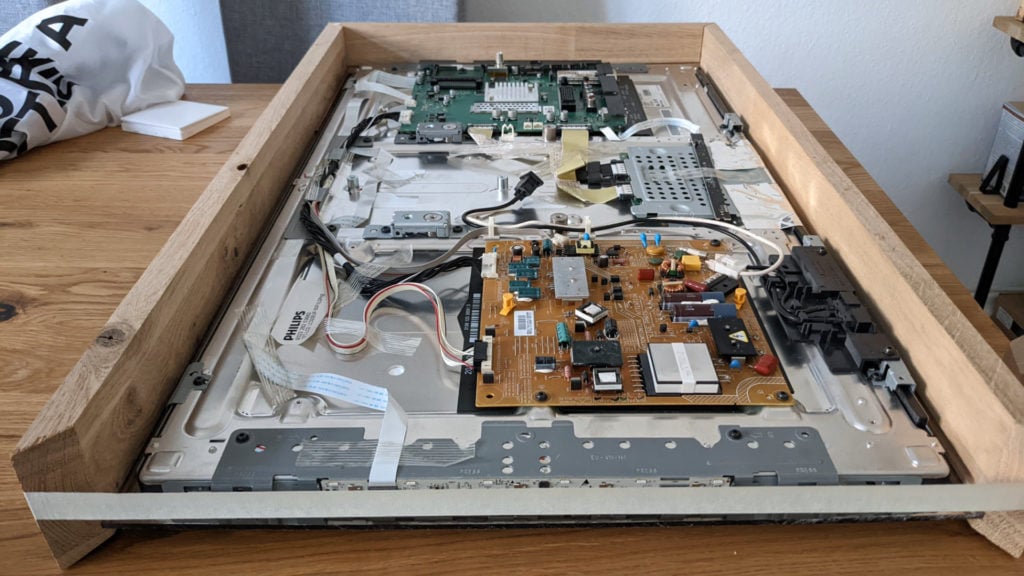
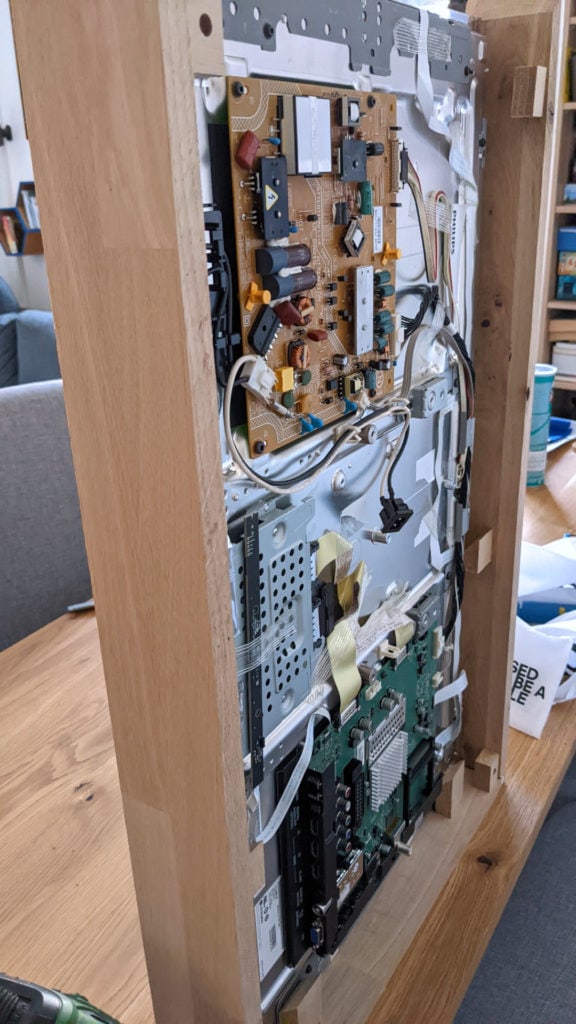
After unscrewing lots of screws, peeling the plastic shell away and removing some unneeded components (like the foot and some built-in speakers) I was left with only the panel of the screen and the driver as well as the power supply mounted to its back. Of course be careful when opening such devices that are connected to mains voltage!
After testing that it still works like this the next step was to build a new frame for the mirror as well as the TV panel and all the needed electronics.
The frame
I love wood and wanted the Magic Mirror to match my existing projects, like the nightstand, the living green wall and my oak and pipes bookshelf. To match those designs I decided to use oak wood again and make it as slim as possible.
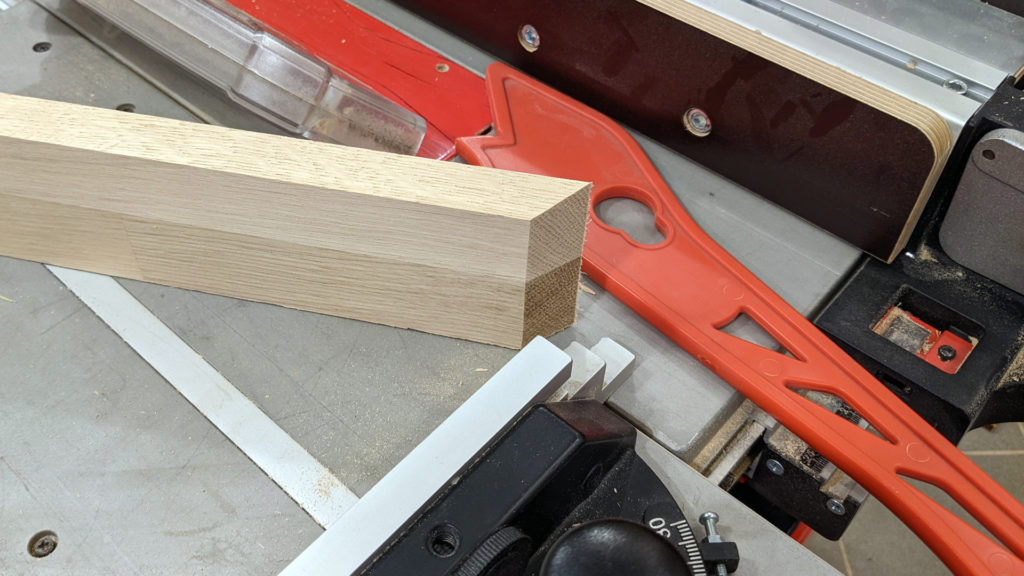
I came up with a frame that is around 50cm by 80cm and fits in its intended space. I used a table saw to built it, cutting 4 strips of wood with the edges in a 45° angle to make a simple box. To make it a bit more interesting I also added small 15° miter cut on the top side angled towards the inside of the frame.
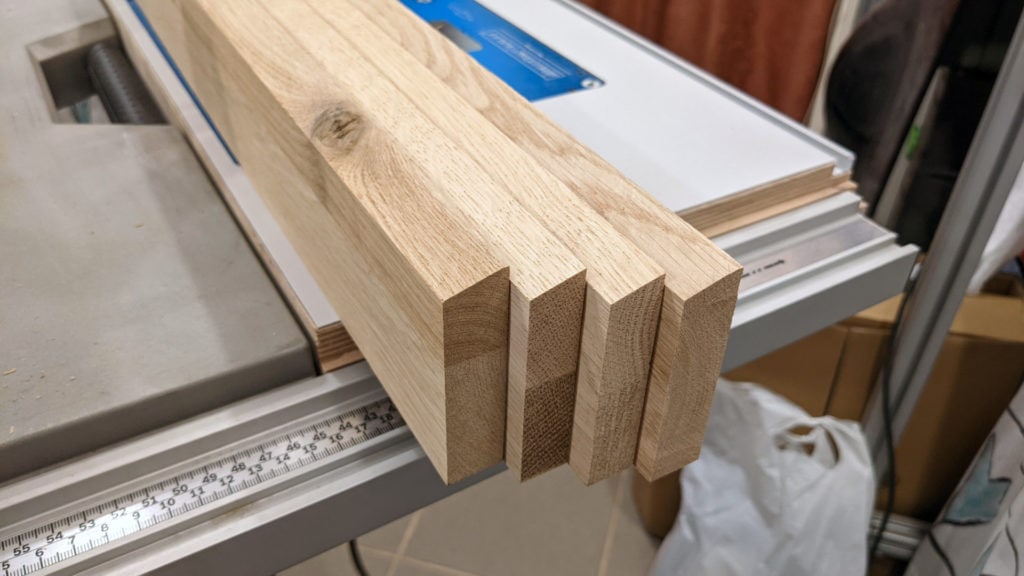
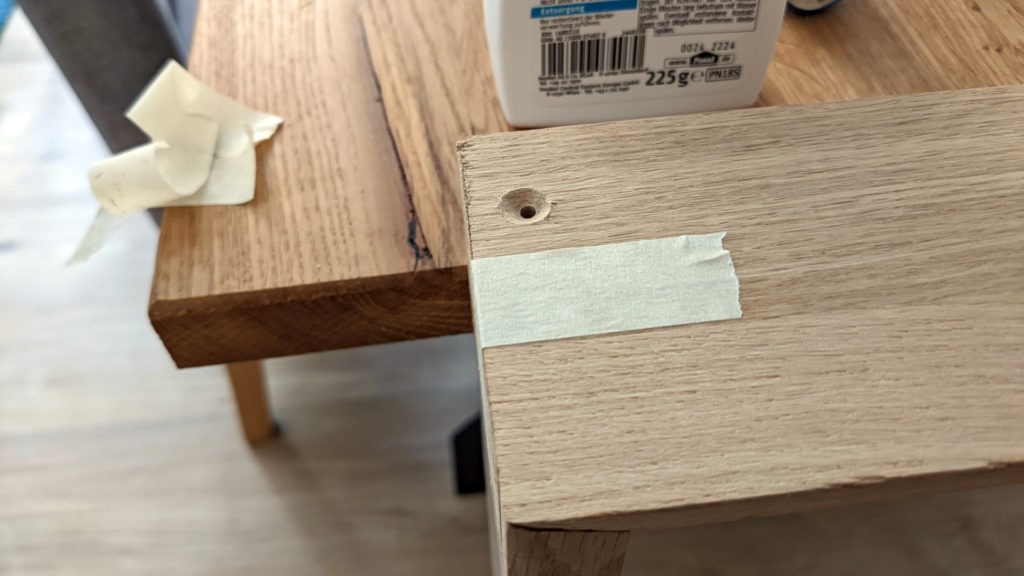
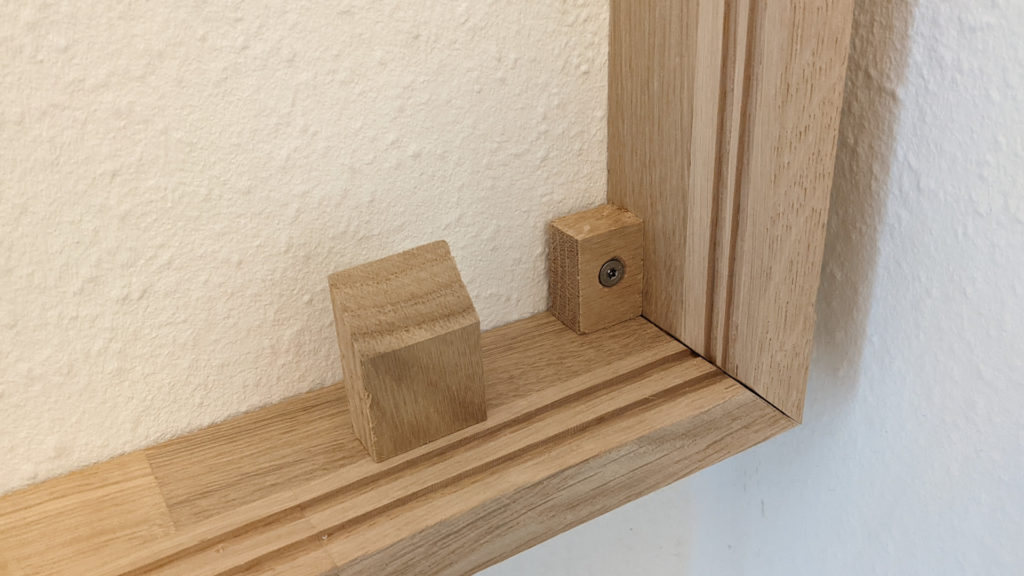
Finally I glued three sides, the bottom and both sides, together using wood glue and some tape to keep everything in place while the glue sets. The top side was also added to keep everything square but was only held in place by tape so I could remove it again later. Instead I added some wholes here to be able to use screws to fasten it to the rest of the frame.
Before the glue-up I also used a router to route small groves into each side of the frame that were just big enough to hold the mirror later. I used a width of 5mm here and inset them by a couple of millimeter for visual purposes.
Finally I also added some brackets to hold the TV screen in place behind the mirror. To do that I inserted the mirror into the groove in the frame and put everything flat on a desk. Then I added the screen on top of it and used some angled wooden pieces glued to the side to keep it in place.
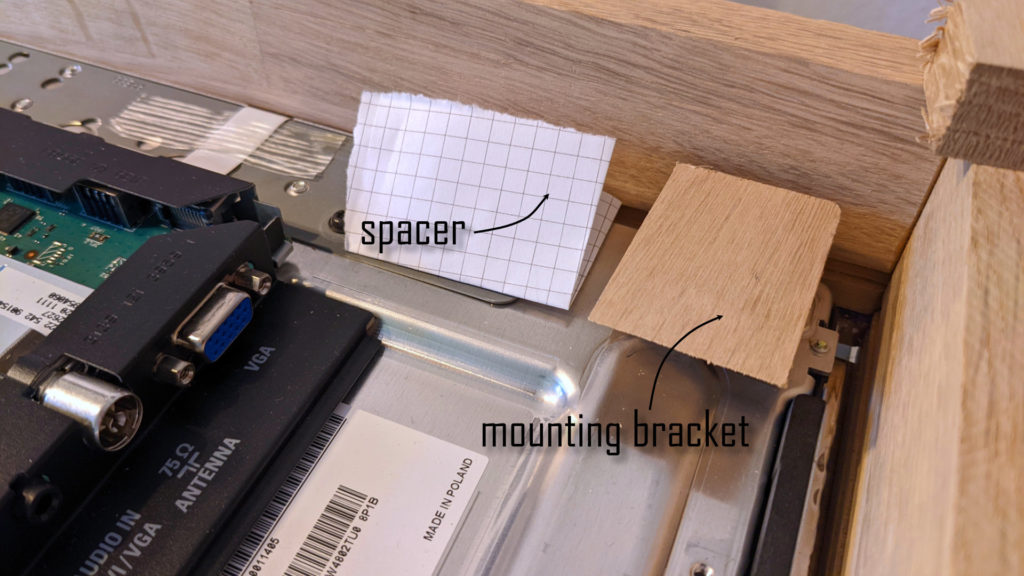
To not get too tight of a fit I used some paper spacers between the wooden brackets and the TV. I also put a 45° angle on the brackets so that later the screen will be guided into position by them and pressed against the mirror in front of it. More on that later.
There are a couple of brackets on the bottom and some on the side. When placing them it is important to check that every part of the TV screen below this bracket will also be able to pass it later. Finally I also added four more wooden pieces (two at the bottom, two further up) at the back of the frame that have some wholes I can later use to mount the full frame to the wall.
The mirror
I already talked a bit about the mirror here but how does it actually look like? I am currently looking for a professional glass mirror (remember it has to be special semi transparent “spy glass”) but for the first version I simply used Plexiglas and reflective film. To apply the film I sprayed the Plexiglas with lots of water and then used a scraper to get any bubbles out from under the film.
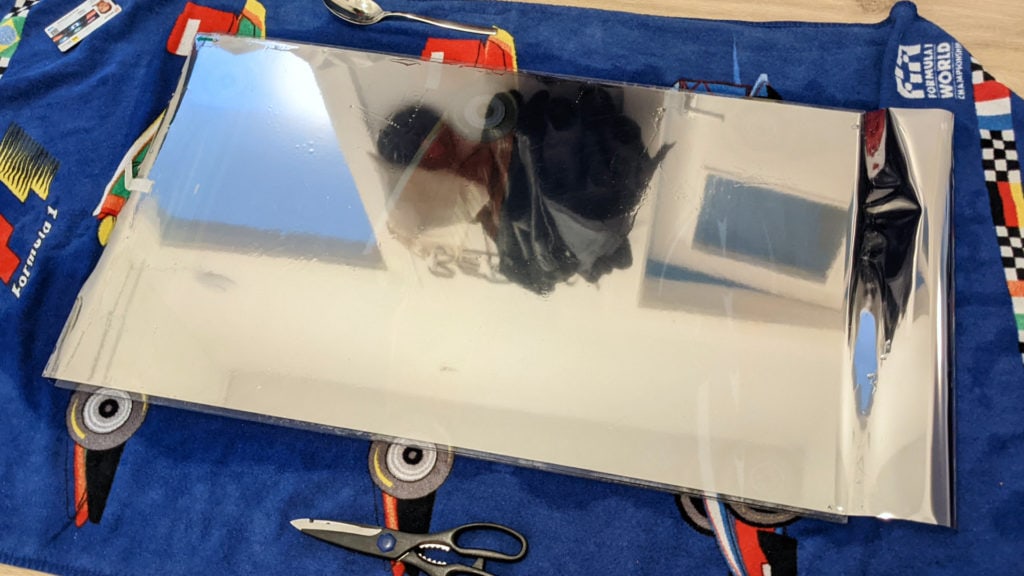
Afterwards I trimmed the film to fit the glass. It was not quite wide enough but that is fine and the edges will be hidden inside the groove in the frame anyways. The bubbles you can see in this picture went away after some time when the water underneath evaporated. You can find the film I used in the list at the end of this article. It worked very well for its price altough the mirror effect is not perfect (to be fair its not made for that).
The computer
Now after building the frame and preparing the mirror as well as the TV the last missing component is some source for the images that the TV should show in the mirror. For these projects I love using Raspberry Pis. They are powerful enough, do not need much energy and are cheap. Well unless there is a global supply crisis driving prices to stupid high levels.
Instead of buying a new Raspberry Pi 4 for hundreds of Euros I decided to reuse a small Pi Zero W I had left over from an old project. This comes with Wifi on board and has a mini HDMI output… perfect! Only problem is that it is not officially supported by the MagicMirror² software I used. I found two ways around that problem though, managing to install it on the Pi Zero anyways. You can find the required steps here.
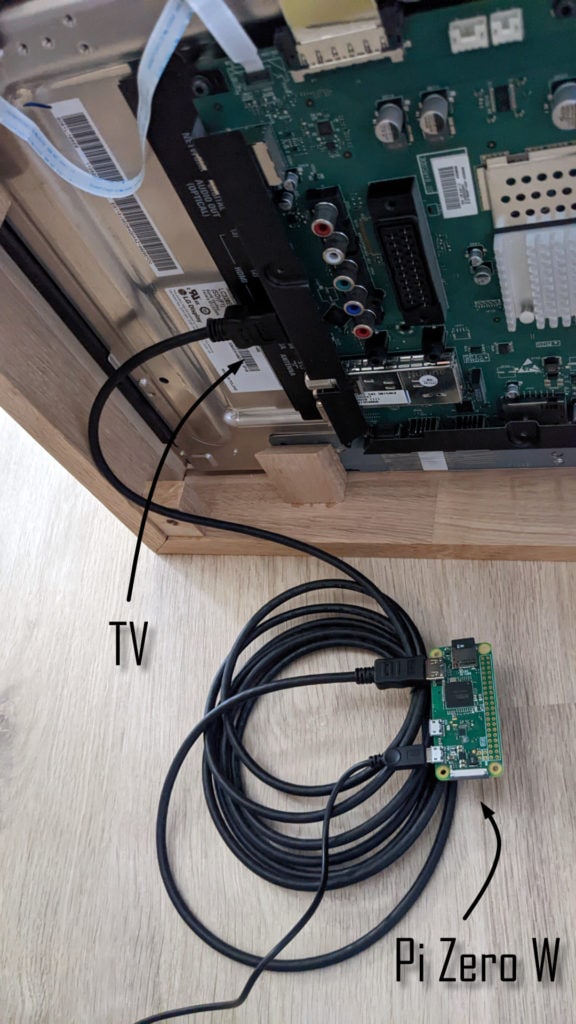
The Pi is connected to the TV with a mini HDMI to HDMI cable and also has a micro USB power supply. I then simply taped it to the back of the TV. There are really no more components needed, just make sure that it does not touch the mains voltage part of the power supply on the TV.
In my experience the Pi Zero is powerful enough for this project, if barely. Setup and startup is a bit slow but you will not notice it when it actually runs. It is even able to control the TV via CEC and the HDMI cable. Also more on that in the installation article linked above.
Mounting the MagicMirror to the wall
With all the components in place I started mounting the mirror. The first steps is to drill some holes into the wall and mount the frame using the small wooden brackets I glued in earlier. I love using Torx head screws for these cases by the way, they are just so much better than normal phillips head screws.
Next I found a place inside the frame and drilled another slightly bigger hole, this time through the whole wall. I have no outlet near the frame but a power source on the other side and used that to provide a power cable for the TV as well as the Pi. This way the mounting points and power supply are fully hidden.

The next step is to slide in the mirror from the top making sure to keep the power cables at the top.
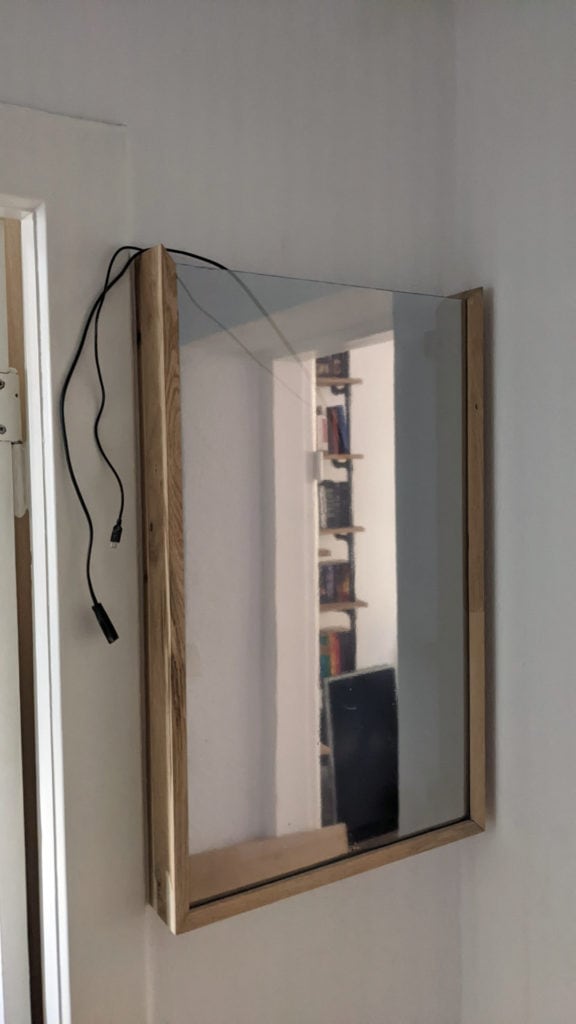
Now comes the part that is a bit cumbersome: you have to lift the TV and Pi to the top of the frame, connect the power cables and then carefully slip it into the frame behind the mirror. It requires a bit of endurance and patience but I was able to manage it on my own using a ladder.
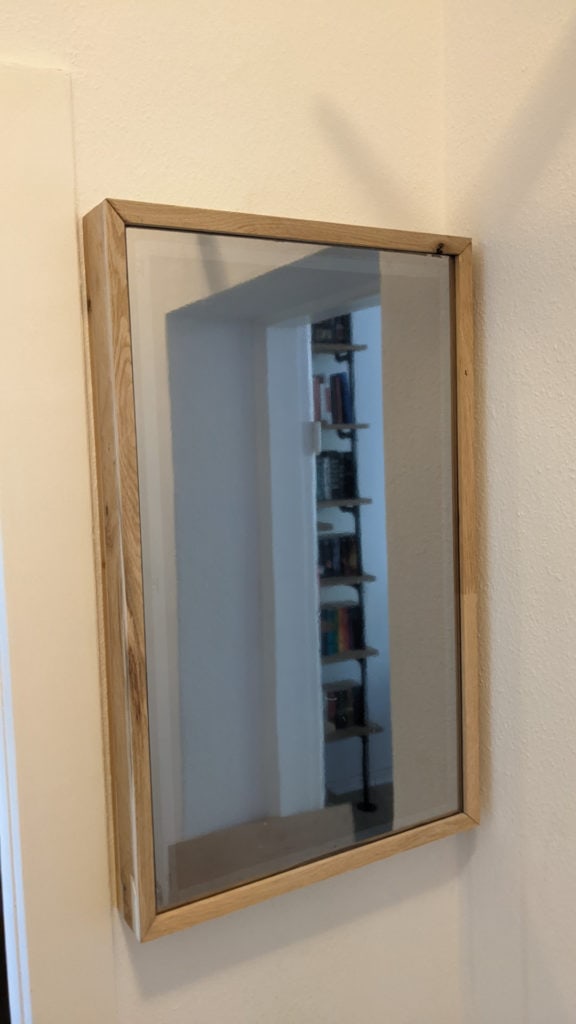
The last step is to screw the top of the frame into place making sure that the groove properly aligns with the mirror. The two screws are on the top in the back so the whole frame appears to be magically “glued” into place, no mounting hardware is visible. I very much like the result I only wish I had been a little more careful when cutting the 45° angles so that they would fit slightly better. Nothing a visitor would usually notice though.
Full hardware list
Here is the full list of hardware I used:
If you are looking to build your own smart magic mirror consider buying via these affiliate links to support the blog:
Plexiglas
mirror film
oak wood (German hardware store)
wood glue
Pi Zero W
SD card 32GB
micro USB Power
HDMI to mini HDMI cable
Any TV or notebook screen
A couple of Torx screws and wall ankers
Setup and more to come
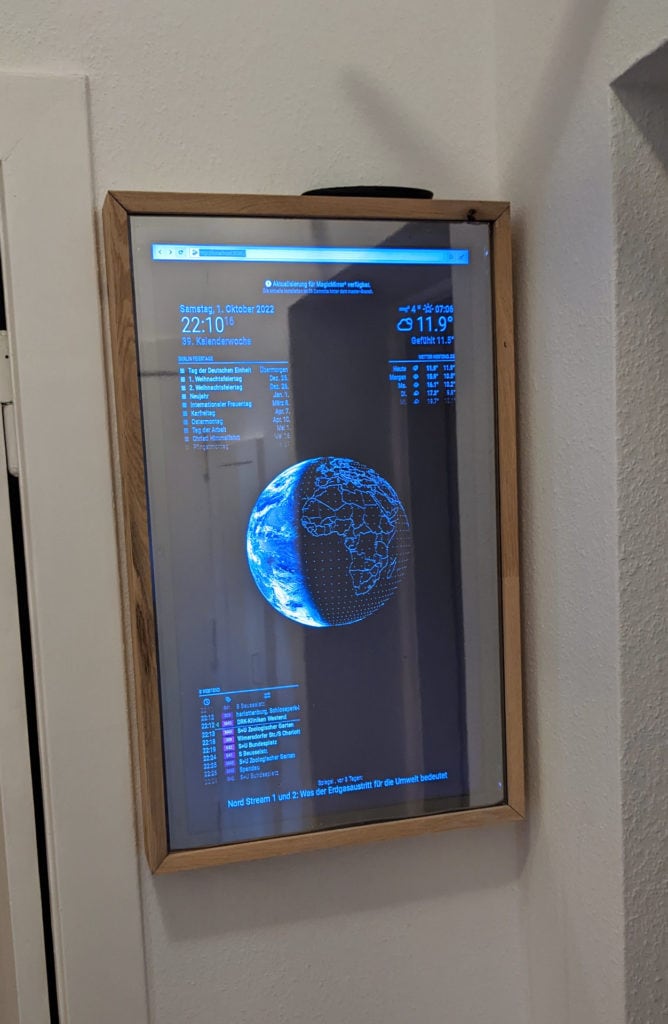
I am still experimenting wit the exact setup of the screen itself but for now I am showing time and weather, a calendar of public holidays, news, buses and trains leaving at the closest train station and a live picture of the earth from a satellite!
I have lots of more ideas how to upgrade my magic mirror though. I am looking to replace the Plexiglas with a real glass mirror for a better reflection. I am also looking to display some data from my Home Assistant setup and integrate it in some way. I definitely want to be able to automatically shut down the mirror and only enable it when someone is close by to safe on energy.