Building a DIY oak wood slat accent wall
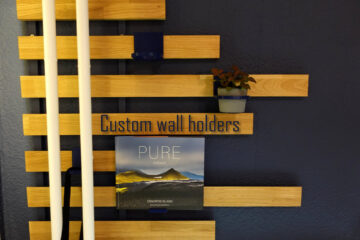
Decorating a colored wall with matching wooden slats can improve the look of the room and make it a loot more interesting. I build such a wooden slat wall and combined with with a french cleat system to have a modular option of hanging different things like books and flowers from the wall.
Upgrading a boring wall
Most of my apartment is using pretty basic colors: all the walls are white with a combination of red-ish oak wood and black glass and metal. Accent pieces are usually using similar colors, sometimes gold but mostly blue hues.
After some time in this place I decided that I need to do something to make at least one of the walls a bit more interesting. I was mostly looking at one pretty high wall next to my bed. Before this project only the custom LED nightstand and my IKEA Fyrtur shades were mounted to this wall. I also hang a small piece of art and next to it there is my custom world map.
Overall it looks fine but pretty boring. As a first step I decided to use it as an accent wall. As it includes a window even a darker blue color, which I decided to use, works well with such a naturally bright space in my opinion. This is why I went with a “dark ocean” color from the local hardware store and painted the whole wall, making sure to pull the colored part around the corners onto the next walls for some cleaner lines (none of the walls are really straight in such an old building).
Planning a wood slat accent wall
Once I was done painting the wall I pretty quickly noticed two things: the oak nightstand seems to glow with the dark blue as background and the white tubes running in front of the wall to the heater “waste” a lot of space on the other side of the wall.

After some time I came up with an idea that would incorporate both those facts. I had seen many pictures of wooden wall accents before and decided to combine this with a french cleat system like used in many workshops. For that you simply cut a 45° angle into the top of the wooden slat that is mounted to the wall. Now another piece with a similar 45° angle can be “hooked” onto the top of the piece, securing it in a strong but very easy to remove way.
As this is a solid brick wall I can not easily shoot nails into it to secure the wooden pieces like done in many videos online. It is also quite crooked in some places. To combat both these issues I decided to screw all the pieces into two thin horizontal pieces. These would be painted to be less obvious and can slightly bend around uneven parts of the wall. Also this means I would only need to screw these into the wall.
Finally there is one part of the wall where the heating pipes are secured to it. To be able to still mount the wooden accent pieces I needed to split them into two parts: one to be mounted below, one above this position. Good for me as this makes both pieces way easier to handle.
A lot of cutting and sanding
With the planning out of the way I bought my material: two longer 2x2cm pieces of cheap wood and four sets of 80x20cm oak wood panels. Also a lot of smaller screws as well as some bigger ones and matching wall anchors.
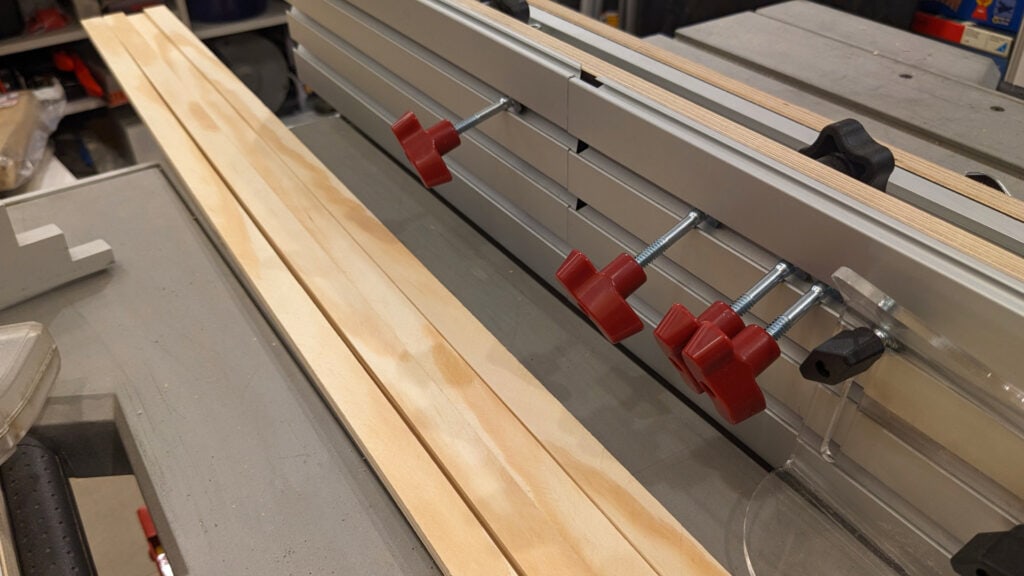
The first step was to rip all the oak pieces into similar around 6cm wide pieces and to cut the needed 45° angle into one side for the french cleat system. I did this on a table saw which makes such repetitive cuts pretty quick and easy to do. I also split the 2x2cm pieces in the middle resulting in two 1x2cm flat ones.
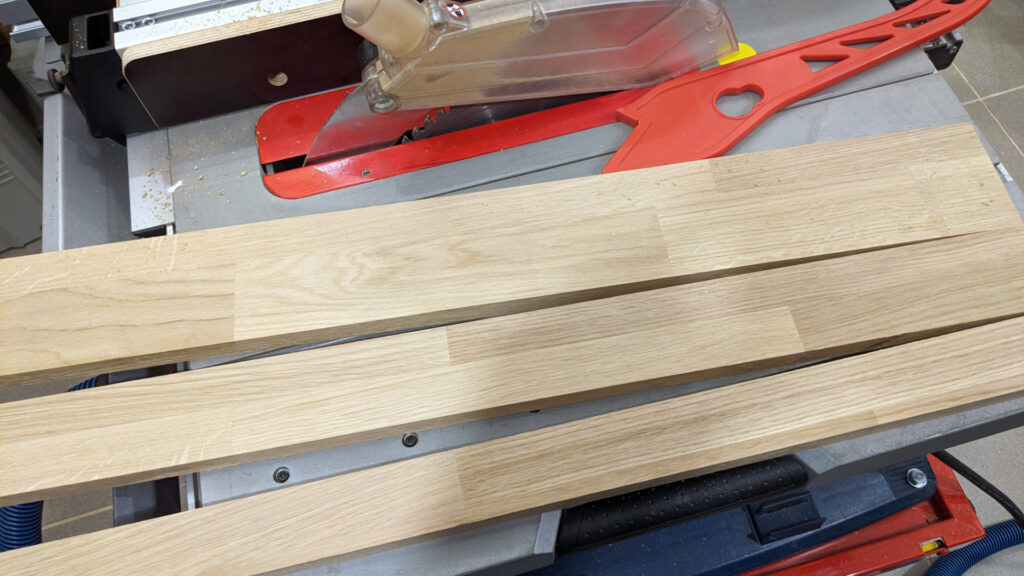
Finally I started cutting the oak wood into sets of more or less randomly decided lengths. I went with 5-10cm jumps with the goal to have a set of matching pieces of different lengths to combine into my feature wall and make it even more interesting to look at.

Then I spent way too much time sanding every single piece of wood down to 120 grid to clean up the sides and slightly break all the edges. This is always an annoying step but one that really changes the outcome of the projects overall.
Painting and finishing
To make them less obvious I decided to use the wall paint to also paint the backing strips holding up the wooden slats. Painting those blue worked quite well and makes them blend in with the wall behind them. Next I also wanted to protect the wood and make the grain pop a bit. To do that I used a oil based finish that can simply be rubbed onto the surface of the wood. After drying for a night everything was ready for the final assembly.
Assembling & mounting the slat accent wall
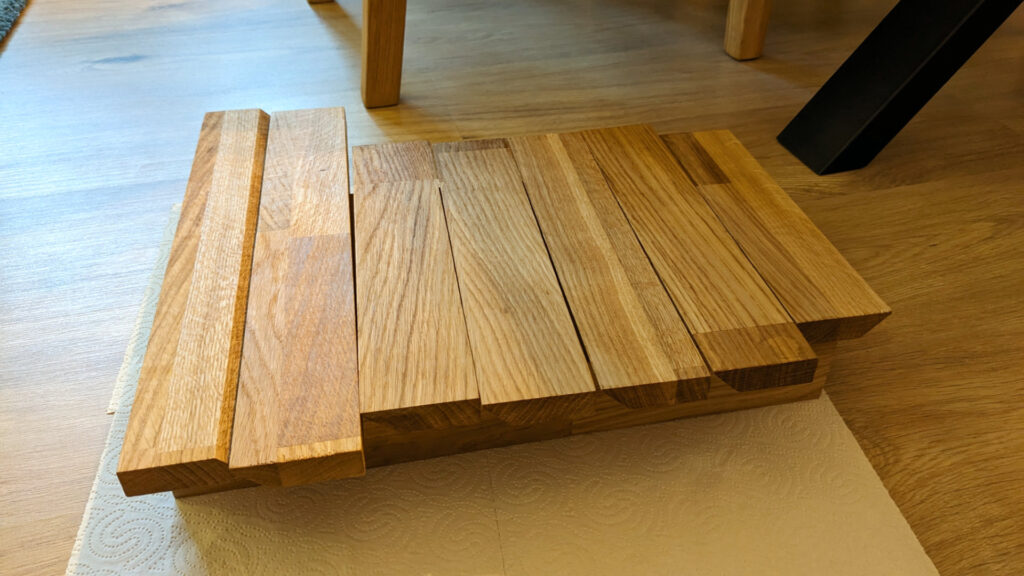
Then it was finally time to assemble everything. I decided to first lay out the boards on the floor to find a combination that works best for me. The idea here is to have a wave like motion going from bottom to top.

Once I was happy with the overall layout I started to connect the slats to backing pieces of wood. To do that I drilled through the the back of the backing pieces making sure to also countersink the holes. Using small enough screws I could then connect both pieces of wood without any screws being visible from the front.


Make sure to think twice before drilling … I had redo some pieces as I initially had them mounted inverted. To keep the spacing equal I used some cut-off pieces of wood. It is also a good idea to use a speed square to check if both pieces are connected at a proper 90° angle.

Finally mounting both pieces to the wall is a two person job but not a complicated one. Just drill four holes into the wall, add wall ankers and screw the backing pieces into the wall. I tried to position these mounting points very close to the slats so that they are mostly hidden. Maybe in the future I will also put a bit of blue color on top of the screws to hide them even further.

What is next?
I am really happy with how the accent wall turned out! The next step is to 3D print some custom holders to be able to display a small flower and a book on the slats. The great thing about using this french cleat system is that I can always move them around and add new pieces later on.