Building a custom oak nightstand – everything is better with wood and LEDs
Need a nightstand matching your bed? Build one! I built a matching bedside table for my oak bed customized to match the space and including LED lights (of course)
Designing the bedside table
Some time ago I bought a new bed made from nice oak wood matching a lot of my other furniture. After assembling it I noticed pretty quickly though that I am missing some place to store my phone, a book and similar small things during the night.
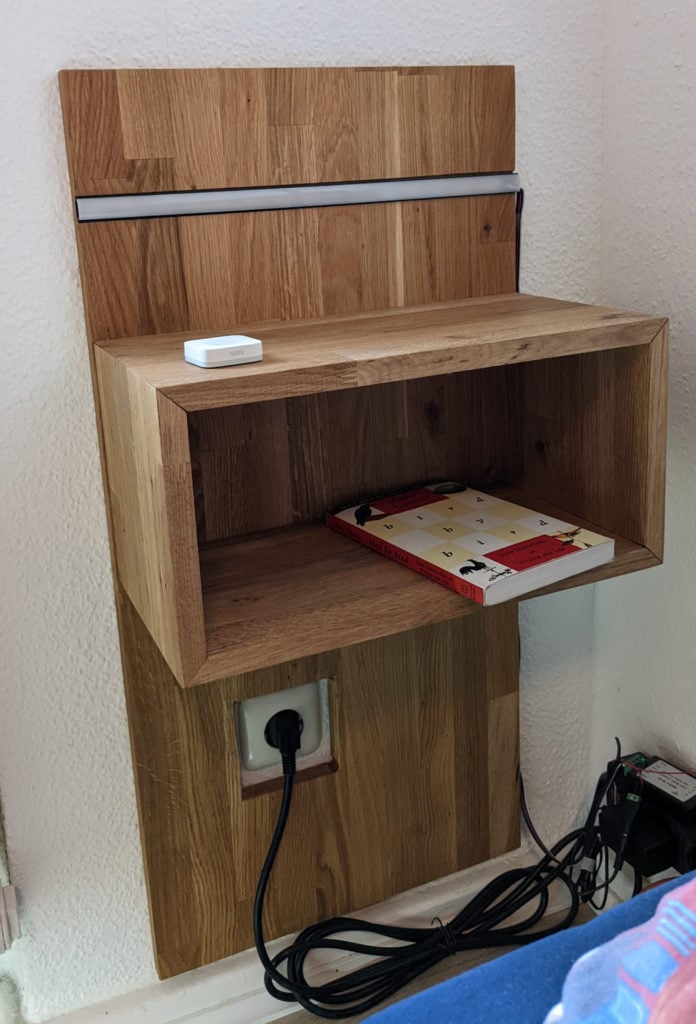
The best spot for the nightstand is pretty limited though. There is only about half a meter between the wall and a window that can be used. There is also an outlet and a pretty warped wall to deal with. Finally I was also looking to integrate some light source and keep everything from the floor to make cleaning easier. My robot cleaner Jarvis can not clean very small spaces between legs properly.
After looking around a bit for a good bedside table to buy I did not find anything that I really liked and that matched the requirements. So I went back to the old solution of just building one myself. The design I came up with included a big backplate that covers the warped wall and gives me many options to secure it to the wall in places where the lines running to the outlet are not in danger. It also contains a cutout for said outlet.
I also added a box like structure to store things in with the option of adding a door or a drawer later. Finally of course I had to add some LEDs too! Here is how I built it.
Cutting and routing the wood
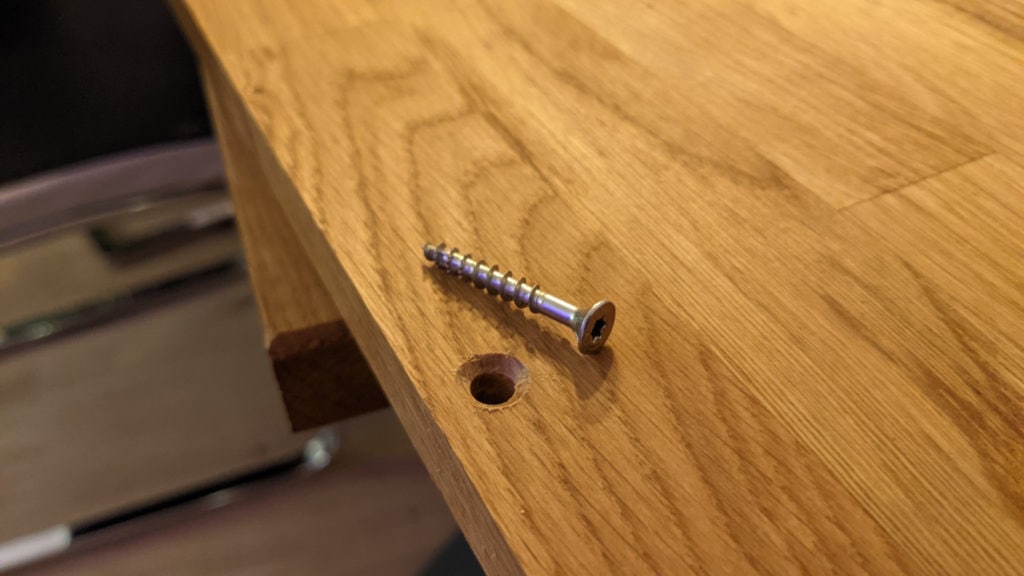
First I started preparing the back plate of the whole construction. One piece of oak wood in the right size and sanded – I just had to add a cutout out using some drill bits and a jigsaw. I also added some countersunk screw holes to mount it to the wall later.
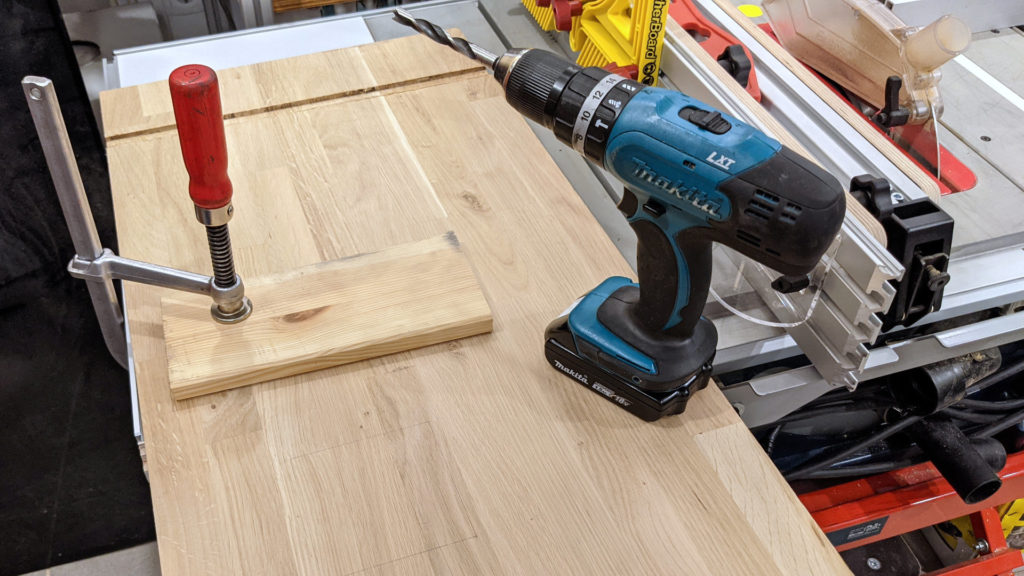
The cutout is done a bit oversized so I have some play later on to position the nightstand on the wall exactly center.
I decided to add some LEDs to this bedside table and to do it by adding a recessed aluminum channel with a diffusor. This was a bit of work and I am honestly not 100% satisfied with the result – the channel is slightly too big and not quite deep enough. Still it looks good.
I used a router with a flat bit to create this channel in the wood. I had to do a couple of passes, both because the bit was not big enough and to not go too deep at once. You can see the channel in the first image.
Finally I decided to treat the whole project with some wax to make it a bit more resilient while keeping close to the original color.

This can be done using a simple rag and some paper towels to protect the floor. Make sure to wear gloves as this stuff is quite hard to get off of your hands. For those interested, this is the wax I used (from a German hardware store, I am sure you can also get it somewhere else).
Building a box
I don’t have any images of building the box part of the build but the idea is exactly the same as with my towel rack – only with 4 pieces instead of 3. Basically I cut the pieces to size adding a 45° angle on each corner. Then I but some tape on the outside laying the pieces close together. Then I added some glue on the inside and folded them upwards. Finally I added the last side in with some more glue and added more tape. The tape keeps everything pressed together until the glue sets.
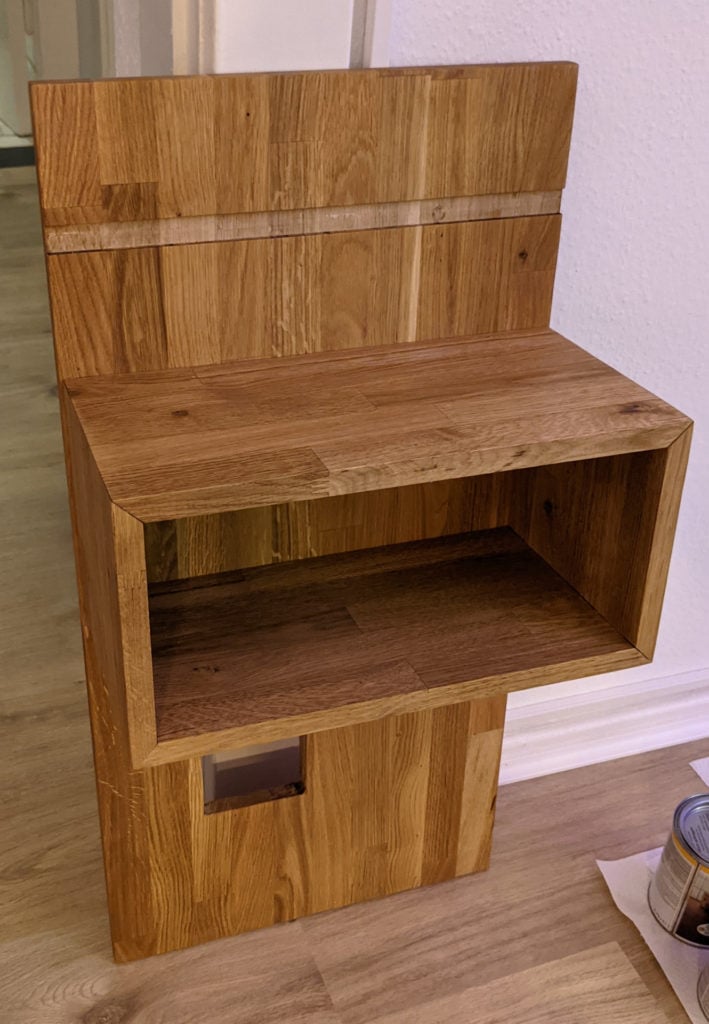
The box is then just glued to the back plate I prepared before. Wood glue is plenty strong enough for that. I though about adding a door or some kind of drawer here but finally decided against it for now. There is not much space between the nightstand and the bed so using it might be awkward. I can always add it later though.
Mounting and final assembly
Now with everything ready I could mount the nightstand to the wall. I drilled 4 holes inside the box so that they are a little less invisible and transferred their position to the wall. After drilling holes into the wall and adding wall-ankers I screwed the whole nightstand to the wall.
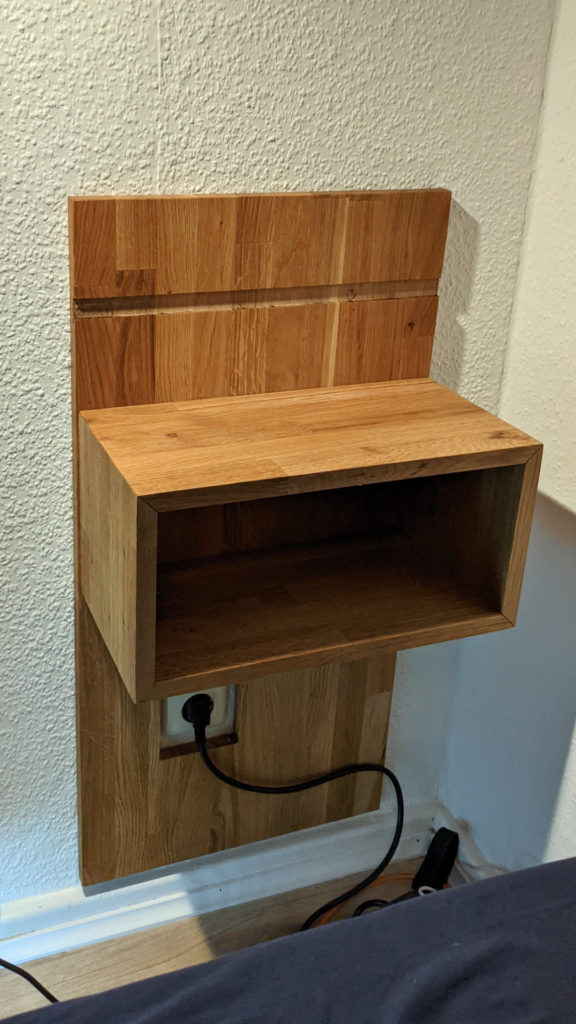
Then it was time for the final step: preparing the LEDs and gluing them in place. I cut a piece of aluminum LED channel to length and soldered some wires to a similar length of LED strip. The LED channel is just glued into the recess in the wood, the cabled are glued to the side of the back plate with some hot glue. I could have routed a channel for them into the back of the back plate to fully hide them but using the router takes time and create a huge mess…
Of course the LEDs need to be integrated into my smart light system! I used a H801 LED controller flashed with Tasmota like described in that project to connect it to my Home Assistant instance. If you want to use Zigbee instead of Wifi I can also recommend this Gledopto LED controller.
The final result
I really like the result of this project. The nightstand perfectly matches the wood of my bed, offers a lot of storage space and includes (smart) light. The outlet is still usable and the floor is free of stuff.
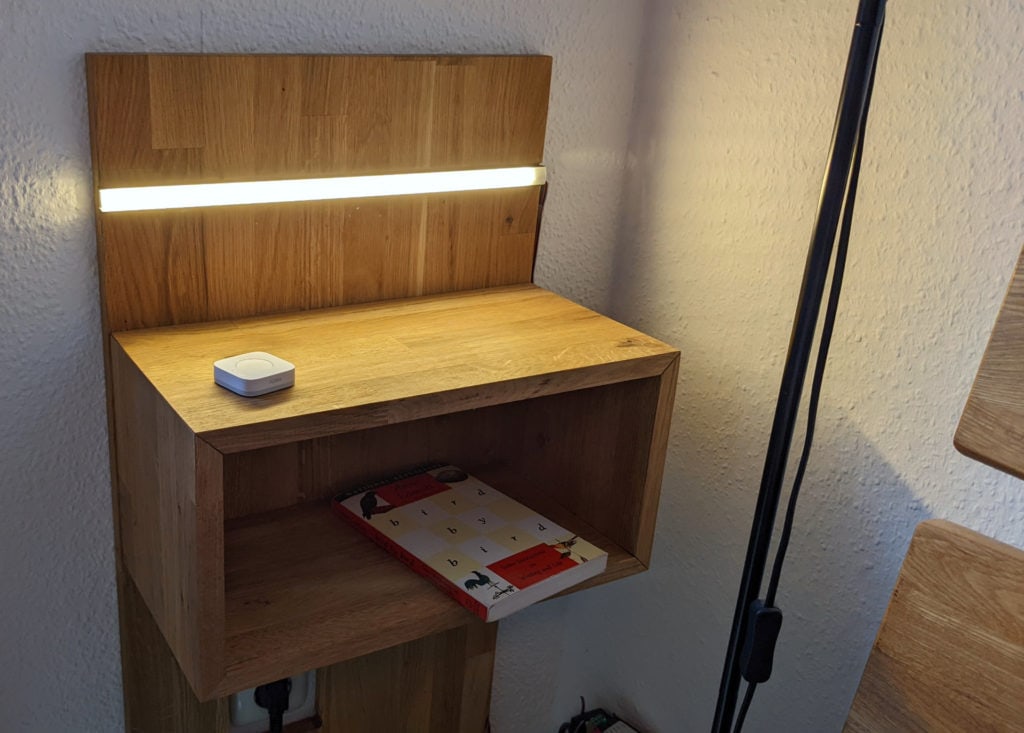

The table also holds one of my small Aqara mini switches that is used to control the lights and the blinds according to my automation.