Custom towel rack – building a premium shelf the DIY way
I needed a way to store some towels in my bathroom in a out-of-the-way location. I built a nice premium looking towel rack – a shelf out of bamboo and Plexiglas. Here is how to do it.
The idea & the materials for the towel rack
The whole project started when I was looking for place to store some towels directly in the bathroom. I was looking for a sturdy but nice looking solution. The room is pretty narrow so space is of the essence. I did not find any storage that was small enough to fit, yet big enough to store the towels while also looking good. So as always: time for some DIY solution!
I decided to move the shelf to a place over the actual door of the room. I am pretty big so I can still reach it and this way it is out of the way. I also came up with a design with as few components as possible.
The shelf is built from bamboo which is easy to get from the local hardware store and fits very well into a bathroom in my opinion. I tried to keep it down to few components and pure wood. For one piece I used transparent Plexiglas to make it as unobtrusive as possible. I also used miter cuts to leave the illusion of one continuous piece of wood.
If you are looking to buy materials like these here are some links. These are affiliate links you can use to support this blog.
Bamboo pieces –local hardware store / Amazon
Plexiglas – local hardware store / Amazon
Towels – Amazon
The shelf is also designed in a way to store the towels in rolls. This is again saving a lot of space (compare to flat /folded towels) and actually looks pretty nice in my opinion.
The build process
After taking some measurements I bought some wood from the local hardware store. They have 20x80cm pieces of bamboo which I used in this build. This depth works pretty well for the towels. I decided to go with a long bottom piece and two sides with miter cuts connecting the pieces at 45°.

As the walls are sometimes pretty crooked and not super great looking I decided to also add a back to the shelf but you can also leave that pieces if you are building something similar. I cut these pieces on a table saw but you can also do it with any handheld saw.
I also added a groove into each side (inside) of approximately 5cm length and 6mm width. This will later be used to hold a piece of Plexiglas to stop any towels from dropping off the shelf. I decided to go with Plexiglas for this piece to make it blend in as well as possible. It becomes basically invisible.
To assemble everything I went with glue. It is pretty easy to do this, nearly no clamps needed. Instead I used tape on each of the corners of the pieces.

You just have to lay all the pieces on a flat surface and connect the pieces of tape. The inner sides of the miters have to look up. Then add some glue there and fold them upwards until the pieces meet. If this is done with all pieces at the same time (and you add some final strips of tape in the end) everything is hold together very well by the tape until the glue dries up.

In the back you can see my custom black pipe and oak wood bookshelves.
Finally I added the back of the shelf. This can either be screwed into the other pieces or be glued too. In my case I decided to place it between the sides and the bottom pieces and glue it. Be sure to check for 90° angles after the glue up (and before the glue dries!).

Mounting
As a final step the shelf needs to be mounted to the wall. I went with a simple solution and screwed through the back of the shelf into the wall behind. The screws are countersunk and will be hidden by the angle (shelf is mounted high up on the wall) and the towels in front of them.

Finally I added a small bar of Plexiglas to the front of the shelf. This way the towels are prevented from every falling down by accident. If the bar gets in the way of removing or adding towels it is very easy to remove by just sliding it upwards.
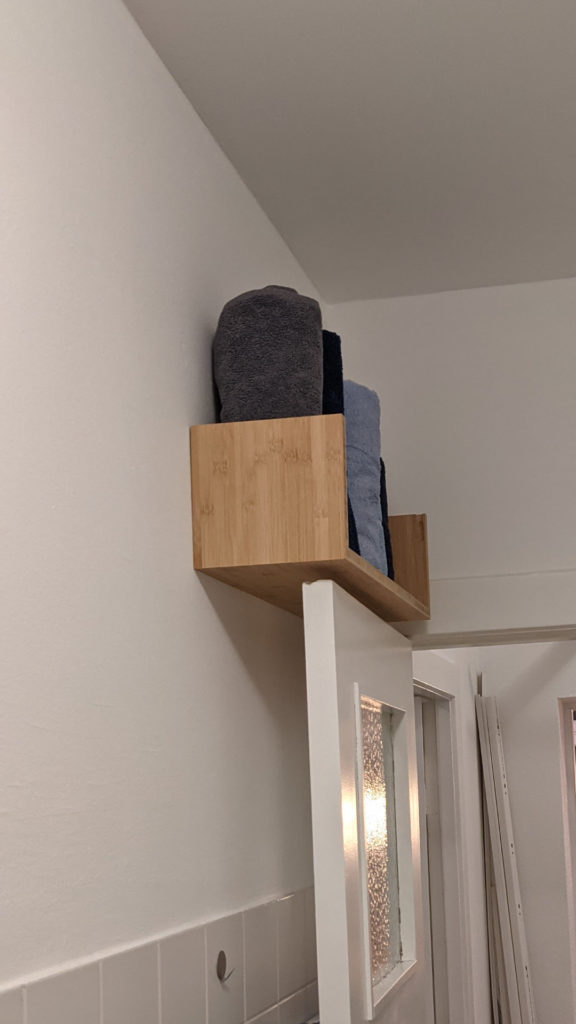
Here is the end result. A couple of hours of work resulted in a very sturdy yet good looking solution that solves all the problems I tried to solve here. I have been very happy with this so far.