How I built a fully automated eye-catching living wall of plants
Living wall, green wall, vertical garden: there are many names for it. Putting some plants onto your walls is a recent trend that can result in beautiful rooms with better air quality. Ready made solutions are really expensive and do not necessarily match the look I was going for. So as always I decided to build my own solution.
From an idea to a plan
I have seen some building sized green walls all over the world and they always look really impressive. Building my own never occurred to me until I saw some smaller versions online. Most of those are still pretty big and made for offices but you can really scale them to all sizes.
- These are the materials I used. The links are affiliates links, so if you like this built and want to support the blog please consider buying via them. It won’t cost you extra and helps me out.
- 4x Oak wood plates 80x20x2cm : local German hardware store or Amazon
- big coated plywood (“Siebdruckplatte” in German) backplate 120x150cm from any hardware store or Amazon
- Flower box (as a water reservoir) from local German hardware store or Amazon
- 4x 90° metal angles from local German hardware store or Amazon
- woodscrews
- screws and washers
- water resistant foil
- felt pockets for the plants from Amazon
- hot glue gun (I am always borrowing mine 😉 )
- PVC compatible glue, I suggest to get more than you expect Amazon
- + equipment for automatic and mounting I will describe in the next post
Over time I started collecting quite a lot of plants for my apartment which quickly ran out of space. Floorspace is limited and plants on the ledges block the windows. Back then I found another great alternative: simple plastic plant holders that can be mounted to the wall around a window. They come with a very neat trick: the inside pot with the plant is actually smaller than the outside one. This means it can be used as a reservoir of water that will be sucked up by the plants via small pieces of rope.
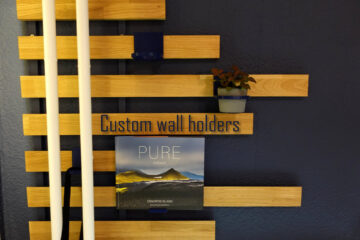
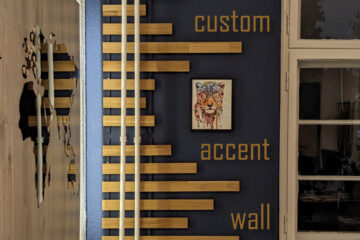
When I moved to my current apartment I kept most of those but I started looking for something more permanent and more in line with the rest of the interior, like my wooden desk, the custom ceiling lamp, my waveform lamp and the nice custom wood & pipe bookshelves. That is when I remember the old idea of the living wall or vertical garden. I was looking for a clean look with oak wood.
The planning took quite some time to figure out all the right dimensions and materials needed. I also found a similar project on a German website that had some nice inspiration, especially the automated watering system. Some details did not look nice enough to me though, so I decided to customize this a bit further.
The final idea consists of a couple of different parts: a strong and water resistant back plate to hold everything together and mount the whole construction to the wall. A trim made of oak wood around the sides to keep water in and for aesthetic reasons. A water reservoir at the bottom to provide water and to collect redundant water, and a water resistant film to guide the water downwards and protect the wood. Finally a set of felt pockets to contain the actual plants.
Preparing the backplate
After a trip to my local hardware store I started building the main frame for the living wall. The backplate is a 12mm thick wooden piece with a water resistant coat on the front. I wanted something stable that I can trust to bear the weight of the whole installation and the smooth surface makes it easy to work with. It being resistant to water is a bonus: if for any reason water gets onto the wood it will not get damaged.
The edges are open plywood though, not very resistant and in my opinion not looking very stylish. I decided to build a frame around the edges of the backplate to fix these problems and make it look more professional. For the material I chose the same oak wood I used for my book shelves.

The wood comes in bigger pieces so I had to cut it down to size on a table saw. I also cut some 45° angles into the end of the pieces to be able to join them later. Unfortunately I could only get pieces that are too short for the sides of the frame though. Instead I cut multiple pieces per side and joined them together with dowels. I used my drill to drill two holes in the front of one of the pieces, used some sharp dowel pieces to copy the placement of the holes to the second piece, and then drilled them again.

This is where my limited tools and my building knowledge (I was trying this for the first time) failed me a bit. Without anything like a drill press it was impossible for me to drill exact 90° holes so in the end both pieces did not fit exactly. I was able to fix most of the visible gaps though by mixing glue and some sawdust, spreading it over the gaps and sanding everything down afterwards.

The final step was to drill and countersink some holes through the new pieces and screw them to the side of the backplate to build the actual frame. I decided to not glue them on to be able to disassemble everything if I ever need to move the whole thing.

Adding a water reservoir
I had also planned from the beginning to add a water reservoir at the bottom of the frame. This serves two purposes: it will catch any overflowing water from the plants above and it allows me to add a pump for automatic watering. I was looking for a reservoir in the right size and found a very cheap solution: a flower box. For a couple of Euros I got a one meter long white version that can hold a lot of water.
There are brackets made for mounting these but they were really expensive and I wanted to hide the whole reservoir anyways. So instead I bought some cheap 90° brackets from the hardware store and mounted them with screws to the bottom of the backplate.


Screws mounted to the backplate 
Bevel for the front cover
Then I joined two bigger pieces of the same oak wood from the frame (same method as earlier with dowels) and cut a slight bevel of around 15° on one long side. This angle is matching the angled side of the flower box. After drilling some wholes into this side I mounted them with some wood screws to the holes in the same 90° brackets.

This way the whole reservoir including the pump is hidden from viewers and the wood plus the brackets securely hold the plant box reservoir in place. I intentionally left some overhang on each side to fully hide the reservoir but also to be able to hide further equipment like LEDs if ever needed.
Finally I also drilled five bigger holes into the backplate that can later be used to mount the vertical garden frame to the wall. Three at the top to hold the weight and two more at the bottom to keep everything stable. I placed them close to the sides so that I can still access them easily but left about 5-7cm of material so that there is not danger of the screws ripping out of the wood.
Adding water resistant foil
Next I needed something to make sure the whole thing is water prove and any excess water will be collected in the water reservoir again. I decided to use water resistant foil made for ponds for this. The plants will sit in pockets of felt which only stores a tiny amount of water before letting the excess drain though. This is intended as the water should flow from the top rows of plants down to the ones below. It also means that everything behind it needs to be resistant to water.
The backboard is already pretty resistant but I also needed something at the bottom to slightly curve away from the backplate into the water reservoir. The foil is perfect for this. I bought a bigger piece and cut it to size, which was more difficult than expected as it is quite flexible and tends to wrinkle.

Afterwards I secured the foil to the backboard with some PVC compatible glue. Make sure to get special glue for this usecase, most of them tend to damage PVC surfaces. I also noticed that I needed way more glue than expected. I had two 200ml normal sized packages, I would advice getting a full canister of at least half a liter to properly secure the foil.

After securing most of the foil to the backplate I cut into each of the top corners at a 45° angle to be able to properly fit them into the corner. Then I used some hot glue to attach the foil to the wood in the corners between the backplate and the frame. Hot glue is strong enough to hold everything in place but can still be removed later if I ever need to disassemble this frame. I left out some parts at the bottom and the top so that I can still access the holes to secure the whole thing to the wall.

At the bottom the foil is not glued to the backplate but instead slightly overlaps the water reservoir, guiding excessive water running down the foil back into the reservoir. A simple solution that works very well. I intentionally spilled a lot of water onto the (empty) flower pockets and all of it gets safely guided back into the tank. No spilling anywhere.
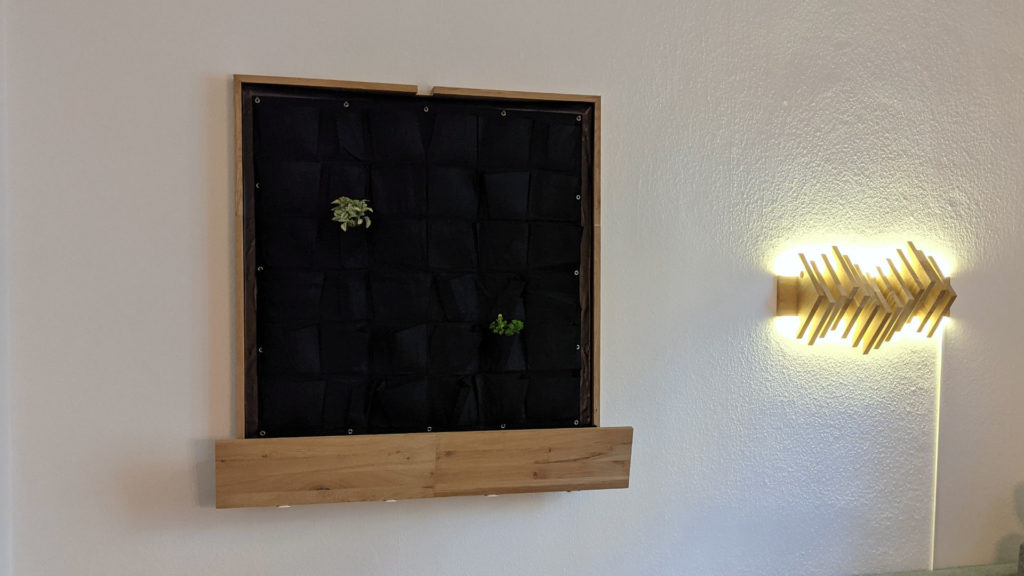
The plant holder
Then it was time to add the final missing piece for my living wall: the pockets that the flowers will sit in. I bought a one by one meter set which includes six by six pockets for the flowers. I had initially wanted to secure this thing to the foil by using the same glue but after using it for the foil I did not really trust it to hold that much weight.
Instead I decided to use the reinforced holes at the top to hang it from a couple of screws. I had wanted to avoid screwing through the foil and backplate to keep everything water proof but this seems to be the safest solution. I used five screws and they are all placed at the top above all the plants, so no water should reach this point. Additionally I also used some clear nail polish to cover up the seams around the screws.

The felt pockets are then only hanging on these screws. This has the additional advantage that I can always remove them very quickly if needed and the screws can hold a lot of weight securely. They also secure the foil to the backplate if the glue ever fails.
That’s it. The construction is done, in the next blog post I am showing you how I mounted this to the wall and how I added plants and automated everything. It is a very robust construction that I hope will hold up for a long time. I took quite a lot of time, more than expected, but I think it nicely fits in with the rest of my custom furniture.