LED control has never been easier – setup WLED with Home Assistant and the web installer in 5 minutes
WLED is a really powerful free software solution to control your LEDs in a smart way. It used to be complicated to set up bit that has changed. Here is how to get your LED setup ready in just five minutes.
What is WLED?
If you are looking to build your own smart light system you can use two different kind of lights: analog and digital ones. For analog LED strips the whole strip can be controlled to show one color. You can use something like this great Zigbee LED controller I tested but you will always only have one color at a time. This works for most scenarios but sometimes you want more control.
In those cases you can use so called smart or digital LEDs – sometimes also NeoPixel. Instead of one line per color they have two powerlines and one line for data with a small micro controller inside each LED. This way you can set every single LED to a different color at the same time – thus having more control and even animations.
Great power comes with great responsibility though 😉 This means you need to actually control all of this which can be quite tricky. Fortunately there is a free and even open source solution to all of this: WLED. This software can run on a small and cheap micro controller like the ESP8266 and control hundreds of digital LEDs.
This is the hardware I used – if you are looking to build something similar consider buying via the affiliate links to support the blog:
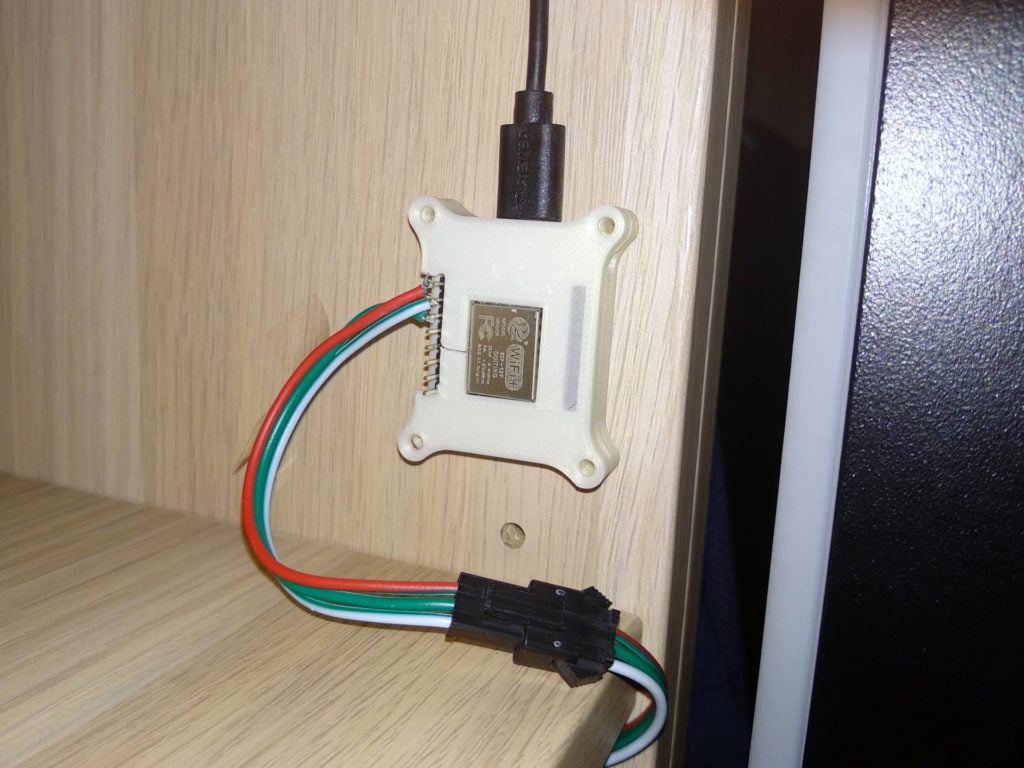
D1 mini controller
digital LED strips (WS2812B, you might not need the waterproof version)
power supply (5V, 1A, be careful – there seem to be some bad selers)
WLED supports lots of animations out of the box, can be updated wirelessly over the air and even synchronize animations between multiple LED strips.
How to install WLED – the easy way
I used WLED two years ago for my smart wardrobe lights. Opening and closing automatically turns the lights on or off, even using animations. This worked well for some time but was a bit more complicated to set up as I had to manually flash the ESPs using Tasmotizer, another program and the right files. At some point the over the air updates stopped working as apparently I bought the wrong version of the ESP with too little storage.
Recently I decided to update this setup and bought two new, cheap, micro controllers. This time I used a newer and way easier installation method – I took me not even five minutes for the modules to be ready and working. Here is how to that.
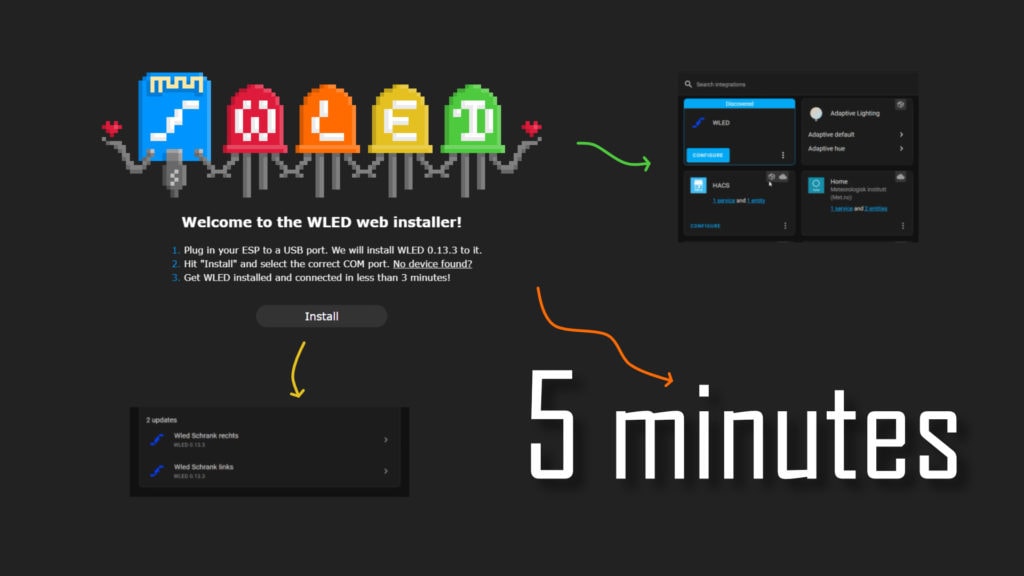
I bought two D1 minis and connected them (one after another) to my PC using a micro USB cable. The next step is to got to the WLED web installer page in your browser (Chrome or Edge) and select the version of the software you want to install. Usually the latest one is preselected and you do not need to change that setting. In my case it was 0.13.3.
Now click install and select the COM port of your D1 mini from the popup menu. The installation should now start and might take a minute or two.

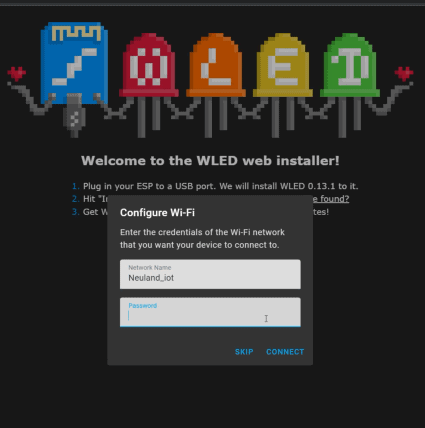
After the installation is done click the next button and configure the Wifi by supplying the name and password of the Wifi you are looking to use. Depending on your setup it might make sense to use a separate network with a different VLAN for your smart devices. If you need some inspiration I described my network here.
Now wait a moment until the ESP has connected to your network and you should get a new dialog allowing you to visit the devices’ web UI or add it to Home Assistant. This might work for you, in my case it did not. No problem though as that very easy to do.
Adding WLED devices to Home Assistant
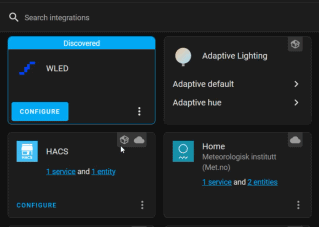
Once you have a WLED device in your network (has to be reachable from Home Assistant of course) it is quite easy to include it in your HA setup. Simply go to your Home Assistant dashboard and select the integrations menu.
In most cases you should already be greeted by an automatically discovered WLED device there. Simply click on configure, submit and select an area of your smart home that the WLED devices should be added to. That’s it – you now have a new device called WLED in your dashboard.
To change that name simply find the device and click the edit icon in the top right corner to change it. The device has a couple of settings and informational fields like the firmware version or current speed and intensity settings for the animations. The most important one is a simple switch though which can turn on or off the lights or (via a click) shows the full color and brightness control.

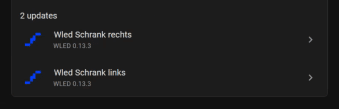
Now you can control pretty much everything about the WLED device from your Home Assistant instance. You can easily add it to your dashboard or control these lights from automations. Maybe the best part is that Home Assistant will even automatically check the firmware version and show you a notification in the settings menu when it is time to update. A simple click on the notification will start the upgrade process. Neat!
Simple yet powerful
Of course you need to now also connect your LED strip to the Mini D1 (or similar) controller. You can find more in-depth information about that here but usually you have to connect at least GND, 5V or power and D4 for the data line. Once connected you should also go to your WLED web UI, select config and LED preferences and set the right LED type and amount of LEDs

This whole setup process is so very easy and literally takes a couple of minutes yet enables you to build awesome automations and make your smart home even better. The hardware here is cheap (Mini D1 is about 2-5€, + LED strip and power supply) and for shorter LED strips you can even power them directly from the D1 mini board (there is a configurable auto brightness limit for safer operation).
To me this is how smart home tech should look like. It is open source, local without cloud reliance, but still easy to set up and update later. I did not know about the web installer before so I am sharing the “news” here as this is quite a big step in the right direction.


