Hardware for a professional smart home network – Next level network with Unifi equipment
To make your smart home network more reliable and secure you can build a network based on prosumer components like the Ubiquiti Unifi line. Everything in your smart home relies on a robust network, so I decided to built a new & better network including several Wifi networks, VLANs, a nice monitoring interface and integration into Home Assistant.
Choosing the right hardware
Your default home network hardware (often provided by your ISP) is rarely very powerful and sometimes not even under your full control. Wherever possible I would always use my own gear. For years I have been using an AVM FritzBox (very popular router in Germany) at the heart of my network. While they include a lot of great features and get updates for a long time they do miss some important advanced features.
For security reasons I was looking to separate smart home/IoT devices from my core network and the FritzBox just does not support such kind of setup (unless you want to use the guest network but then you can not reach those devices from your main network).
After reading up a bit on the topic I noticed that most devices seem to fall into one of two categories: either made to be as simple to use as possible but sacrificing finer control or made for professionals but at a high cost and a steep learning curve.
Fortunately I also found a couple of product lines targeting “prosumers” with more advanced device without the high price tag of professional gear. While I found a number of other similar manufacturers like Mikrotik I finally decided to go for Ubiquity and their Unifi line of devices. I read a lot of good things about them, they have a nice unified user interface that you can host yourself and I was able to get many of the needed devices for cheap second hand.
Planning your smart home network
The first step is planning your network and finding out what components you need. My advice: connect as many devices via cable as you can. Only use Wifi where this gets too complicated or is impossible. A wired connection is just more stable and usually faster. I ran CAT6 cables too each room and important position (like my home theater) by hiding flat cables under my flooring and drilling a few holes.
In a usual network you need three general devices: a router to manage your network and separate/connect your different network parts, an access point to provide wireless access to your network and a switch to to provide wired access. Often (especially in cheaper hardware) all of these are combined in one device. With more professional gear like the Unifi devices these are split up into different physical devices (although the dream machine for example also combines them). These separate devices are then better at fulfilling their more specialized tasks and you can scale everything independently. Adding a new access point for better Wifi coverage does not mean that you need to install a full second router for example.
The gateway
The first part of the network is the gateway. Usually you have some kind of modem that is connect to your Internet Service Provider and outputs a normal RJ45 connection which provides an up & downstream (your Internet connection). I decided to keep using the device provided by my ISP as a modem and called them to put it in a so called “bridge mode” where it does not do any routing/firewall tasks and simple provides an Internet connection.
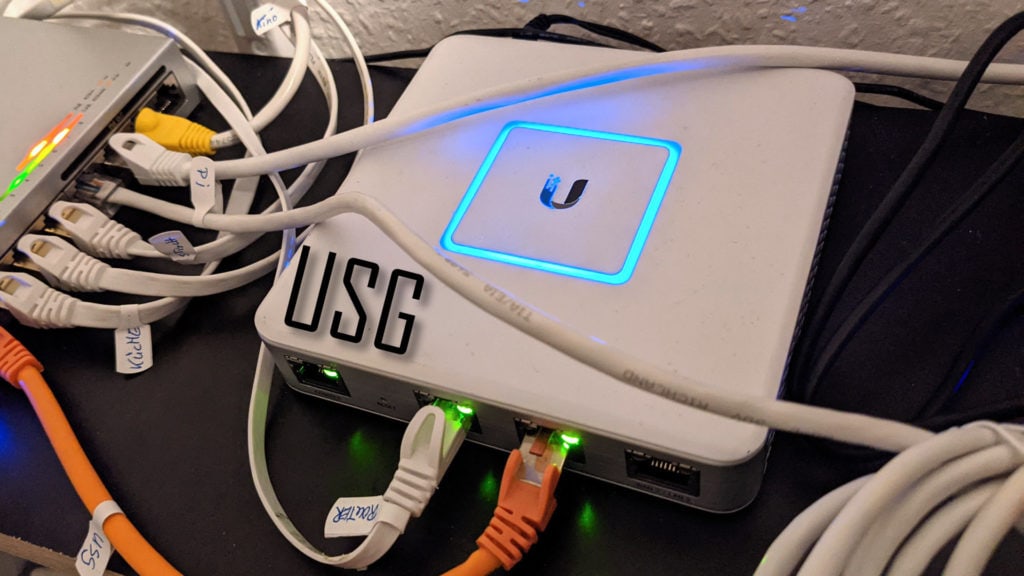
Next comes the router and firewall part. You could also use your ISP provided device for that but my FritzBox does not support multiple networks and VLANs so I got the Unifi USG instead. This small box has one input for the WAN (Internet connection) and one (optional two) outputs to connect your network devices to. It allows you to get statistics about your network traffic and to set firewall rules to separate your different networks and control their Internet access.
The switch
As already mentioned I prefer to connect as many devices as possible via cable. The USG only has one outbound port so you need an additional switch. You can use any (unmanaged) switch here but if you want it to support VLANs and allow you to put different connected devices into different networks than you need a more complex managed switch. I decided to go with the Unifi US-8-60W. This switch has eight ports (so you can connect your USG and 7 additional devices) and four of those are POE enabled. Power over ethernet allows you to power devices connected to this port directly via the LAN cable. No additional power cable is needed for them. This is very handy in connection with the access points I am using.
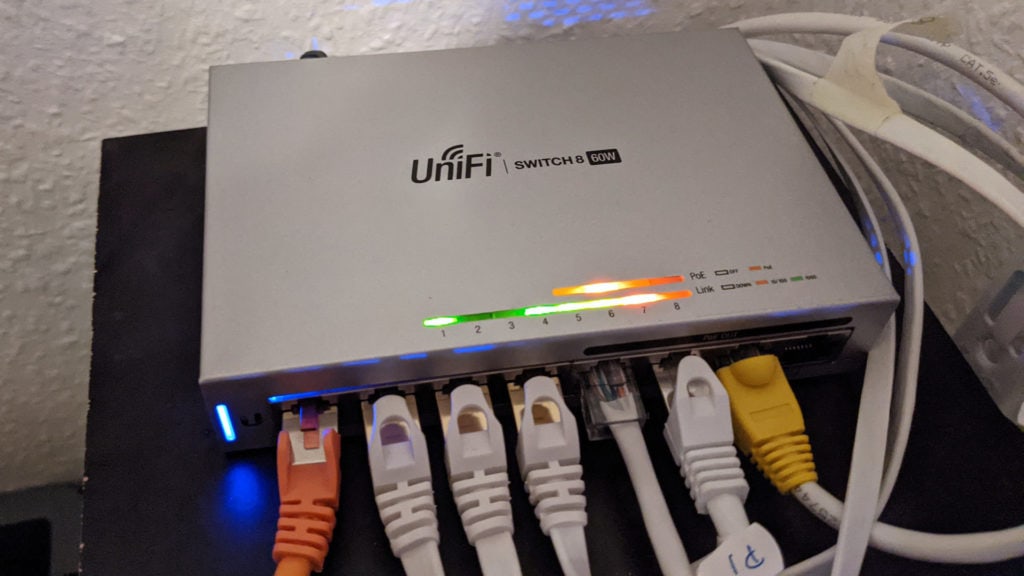
You can also get cheaper devices without POE or bigger switches but the POE features saves you some additional cables and the eight ports are enough for most small networks so I think this is a great device for beginners. You can always add more switches in the future.
The access point
The access point is where you maybe have the biggest range of available devices. There are long range variation, one for high density environments, one for installation inside a wall and so on. As I am building my network for only about 50 square meters I decided to go with the simplest and cheapest device: the Unifi AP AC Lite. In my (subjective) experience it performs at least as well as my FritzBox and seems way more stable. It also allows me to create multiple different Wifi networks (I have three at the moment) in the 2,4 and 5GHz band.
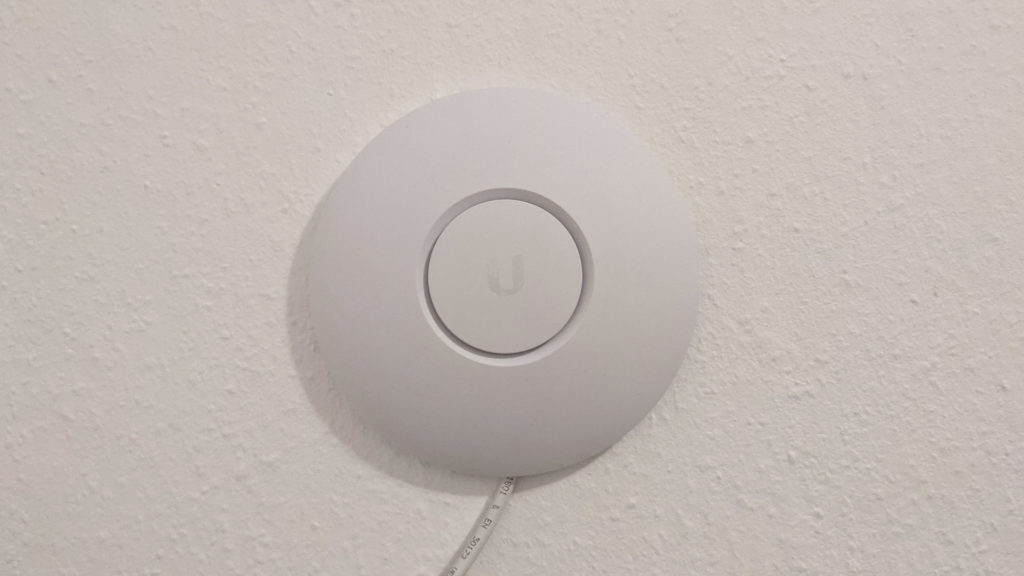
A couple of weeks after I bought my device Ubiquiti release the newer Unifi WiFi 6 Lite which is a very similar but better device that now supports the new Wifi 6 and seems to be even faster than most of the other alternatives. I would now suggest getting that as the price is the same at only 79€.
All of these access points can be managed from the same user interface as all the other devices and they support POE. This means you can just connect them with one Ethernet cable to your POE switch (that is why I recommended one with POE) and don’t need an additional power connection.
If you are looking to buy your own new network gear consider doing it via these affiliate links to support this blog. The prices will stay the same for you.
Unifi USG Security Gateway
Unifi US-8-60W Switch with POE on 4 ports
Unifi AP AC Lite can be powered via POE
Unifi Lite 6 the newer model, also with POE
Unifi dream machine to combine all of this into one device
Unifi cloud key gen 2 if you do not want to host the controller yourself
Alternative: the dream machine
If you dislike using that many different devices there is another alternative for you: Unifi also offers the dream machine, a small pill like device that combines a USG, a 4 port switch and an access point in one device. It also has a bit faster processor than the older USG and can host the controller software for you (more on that later). The problem here is the not yet perfect software.
I tried this device before I got the 3 separate ones and while I like the design and the smaller form factor I found the software to not be 100% reliable yet. It also does not allow you to place the access point somewhere high on the wall which I feel increases its range by quite a bit. Lastly it forced me to create a Unifi online account and use it to log in. I was unable to use a local account, which is a no-go for me.
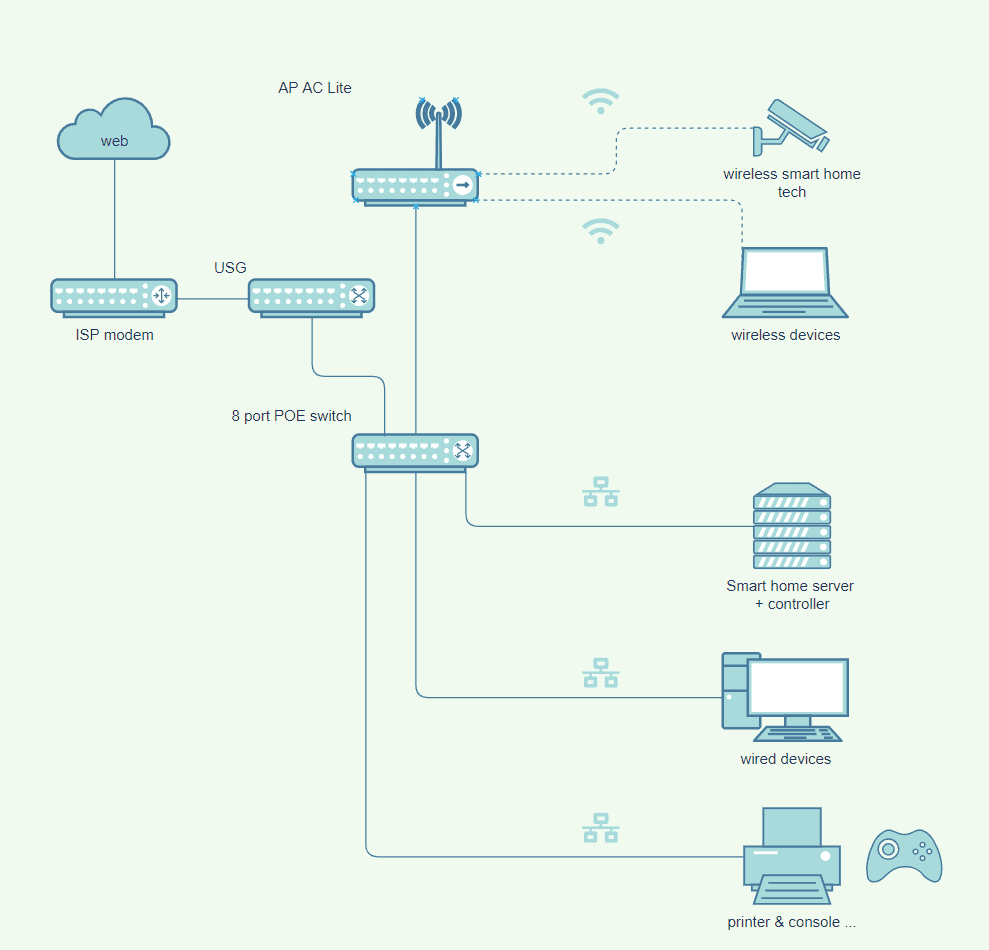
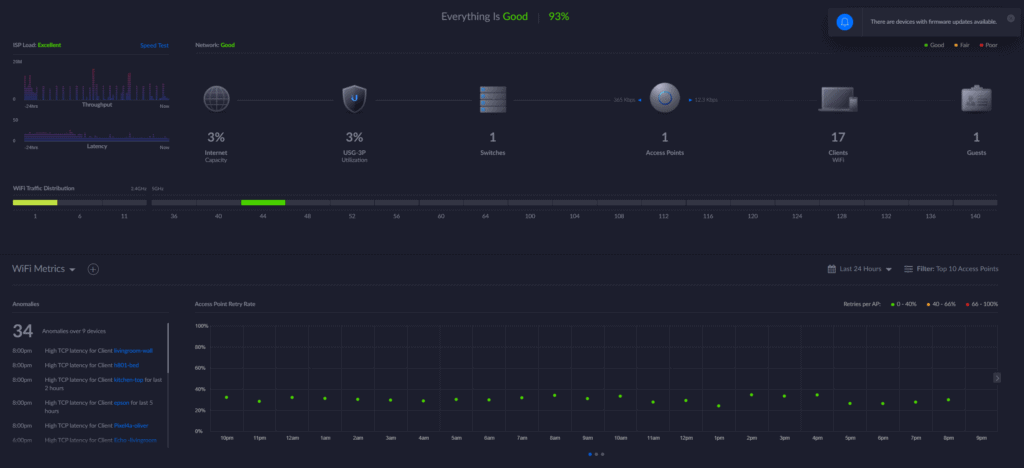
My network overview
So this is how my final network looks like. The old ISP router as a modem, the USG as a router and firewall, the switch to connect all wired clients, including the Raspberry Pi that runs the controller software. It also powers the Lite access point via POE which creates multiple WiFi networks for my wireless clients and smart home devices.
The controller software
More professional devices like the Unifi line of products handle setup & configuration a bit differently and you might be used to from simpler devices. Usually you do not have to set up each device separately by logging into it but instead you have one dedicated software controller that manages all your devices and pushed configuration updates to them.
In case of Unifi this is done via the Unifi controller – a Java based software you can download for free and run on pretty much any device that supports Java. Unifi sells a device called cloud key which can host this software for your network but I decided to skip that and run it on my Raspberry Pi based smart home server. The Pi 4 is more than powerful enough to run the Unifi controller. Installation is very simple via Docker. You can find the docker-compose files in my GitHub repository.
The controller does not need to run for your devices to work but it is needed for setup and to collect statistics and events. For that reason, and because I already have an always-on server, I keep it running all the time.
Setup of the controller software is simple. Wait until the container startup is done and go to https://yourServerNameOrIp:8443/ and follow the setup wizard. There are a couple of things you should be aware of though. First go to the settings - controller and update your “Controller Hostname/IP” settings by pointing it to the (external) IP of your docker host. Otherwise the controller will use its Docker network’s internal IP address and will not find new devices on your network. Also check the box next to it for override.

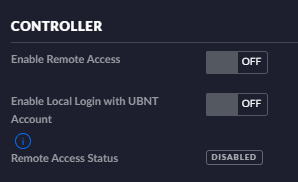
As there have been a couple of security issues lately on Ubiquiti’s side I would also advice to disable remote access to your device and use a local login instead. You can go to the admins tab to create a new user for that. This prevents anyone outside your network from accessing your controller and (in my case at least) visibly speeds up the login process.
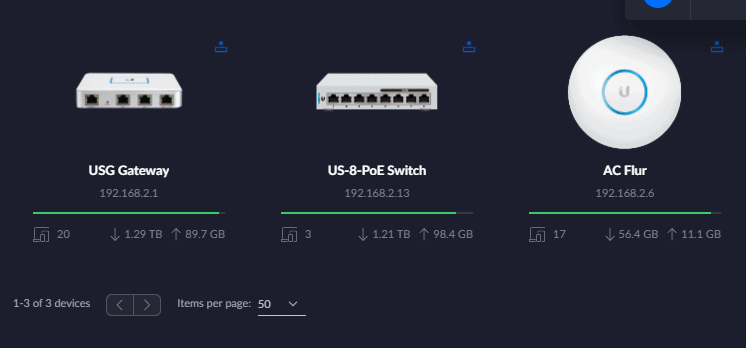
Now you can start adding your USB, access point and switch to your network by connecting them via cable. Afterwards go to the devices tab in your controller software and they should show up as new devices. If you hover over the device you should see a button to adopt the device to your network. Click it and wait some time until the process finishes. Your controller will now push all your settings to that new device. Afterwards it will change its status in the software and the ring on the device will glow blue. You can now use it. Repeat with all other devices.
If you do not have Internet access yet you need to also go to the IP address of your USG and update the WAN settings. The right settings here depend on your ISP. All your connected clients will show up in the clients tab of your controller where you can also find details about the network they are connected too and their IP address. More on that in the next article.
Switching from an old setup
In most cases you will already have an existing network and want to switch to the new Unifi based one with only a short interruption. If you want to keep using as much of your old network as possible you could just disable your old Wifi and connect a Unifi access point to your existing router. Install the controller on your PC, set up the AP and you are done. Of course this does not give you more control but at least a stable Wifi in most cases.
I went for a full switch. To make that as easy as possible I connected all the new devices together and then to my PC while leaving the old hardware untouched. I installed the controller on my Pi home server and set everything up. Then disconnected the old hardware and connected all Ethernet devices and the cable from the modem to my USG and switch. All devices should show up in the controller afterwards. Then I created a Wifi with the same SSID and password as my old and enabled it. Now all my Wifi devices also showed up and the switch is complete.
Afterwards I had enough time to move devices to separate networks and setup VLANs and firewall rules one by one without loosing connection to my devices. More on that, as well as the integration into Home Assistant, in the next article.