Custom wallmount for the Sonoff Dongle plus
The new Sonoff Dongle plus is a great Zigbee coordinator. I designed and 3D printed a wallmount for the dongle to run it without interference from the Raspberry Pi it is connected to.
The Sonoff Dongle plus
The new dongle is a Zigbee to USB adapter that is great for ZHA or Zigbee2MQTT if you want to run your own Zigbee network. I have migrated my own network from the Zbridge (Wifi) to the USB dongle recently and it works well so far. The only problem that I have run into is interference from other wireless components and the USB ports.
I run the stick connected to my own smart home server running on a Raspberry Pi 4. The Pi is a great solution for that (if you can get your hands on one) and plenty strong enough for my need. However the Wifi and bluetooth wireless capabilities as well as the external SSD connected to it seem to create enough noise to actually interfere with the operation of the Zigbee stick if it is connected directly to one of the USB ports.
To fix this issue short term during the migration I connected a USB hub I had lying around and just left the whole thing dangling. Not great but it worked.
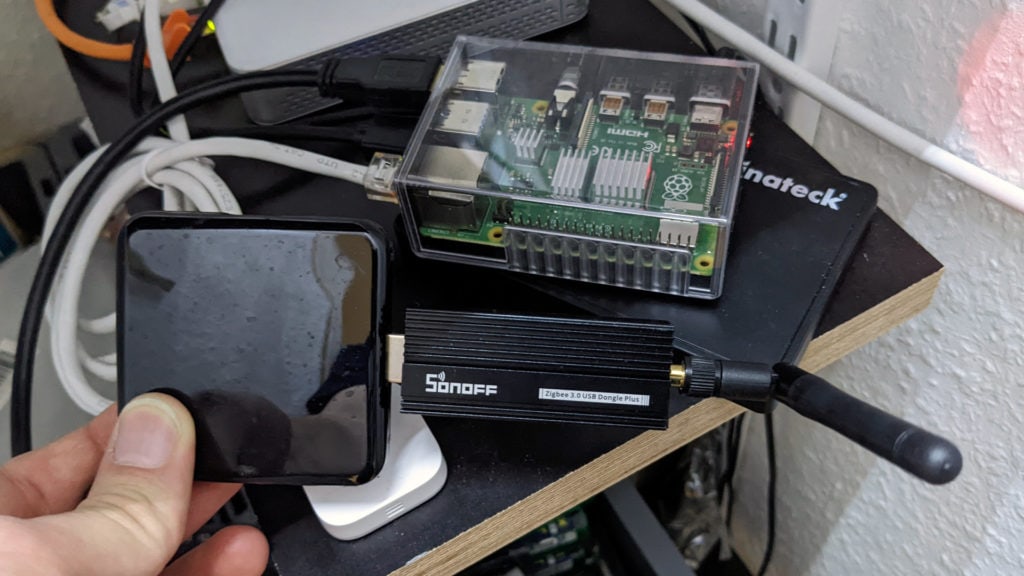
I don’t really like that solution though. The hub is overkill and having the whole thing dangling in the air is less than ideal. So I decided to model a proper wall mount and get a USB extension cable.
Modelling a wallmount
I used some calipers to measure the USB dongle and started modelling in my favorite 3D software. A backplate with some mounting holes, two side holding the stick in place and finally a bottom part that stops it from sliding out. Then I removed as much of the material as possible without making it too weak and started printing it on my Prusa mini 3D printer.
If you want to support the blog and need similar components consider buying them via these affiliate links:
Rasperry Pi 4
USB extension cable
Sonoff Zigbee dongle plus
The first iteration was a bit too tight, making it hard to push the USB dongle in. I also bought a proper USB extension cable which has quite a big connector. To be able to fit this connector I also made the bottom outlet part a bit bigger.
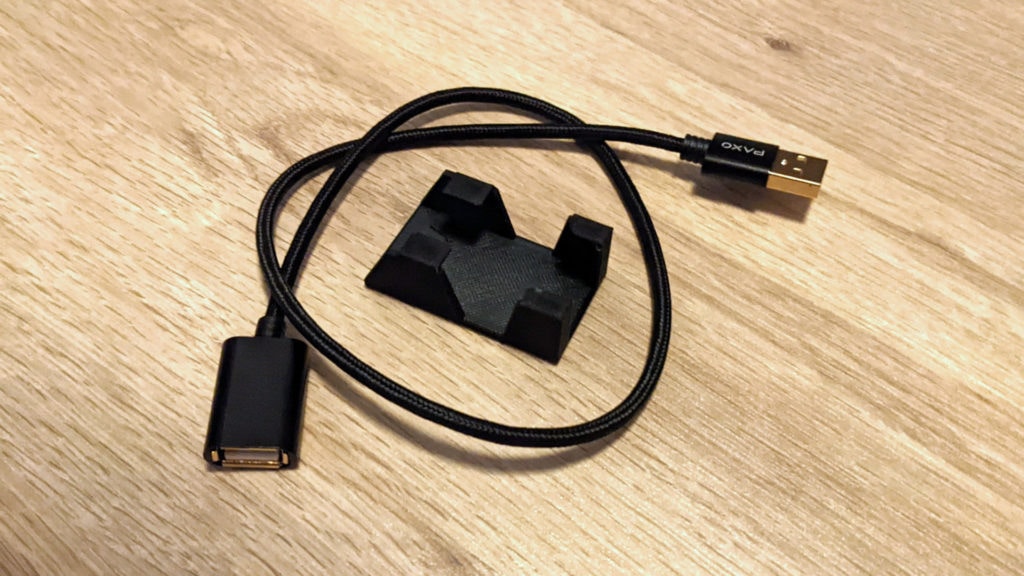
The second iteration works great. I can easily slide in the USB stick even connected to the cable and it is still securely hold in place.
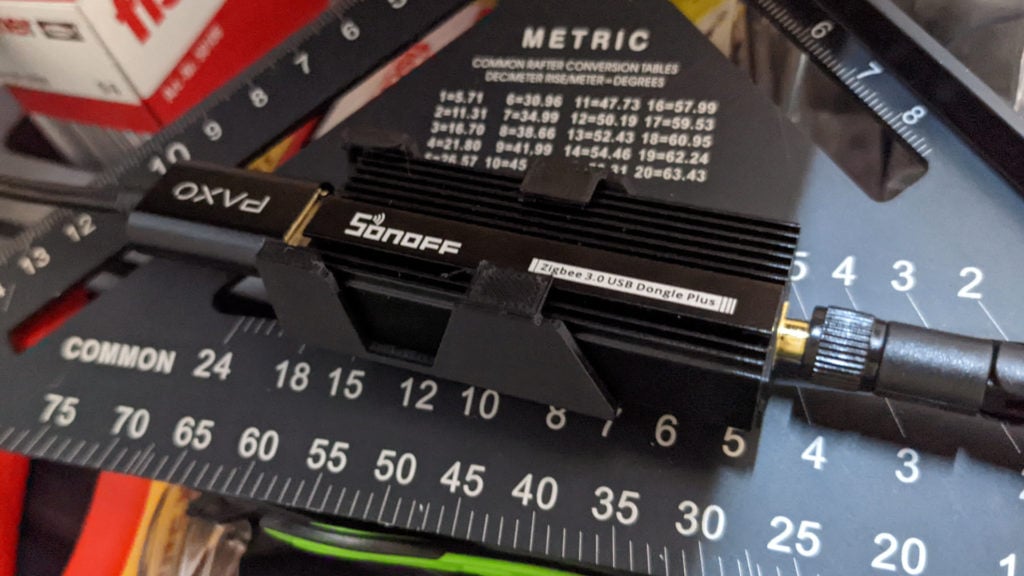
If you are looking to print this yourself too I uploaded the .stl file to printables.com here. For slicer settings I used the default 0.2mm ones and added some supports to hold up the top parts. They are easily removed afterwards.
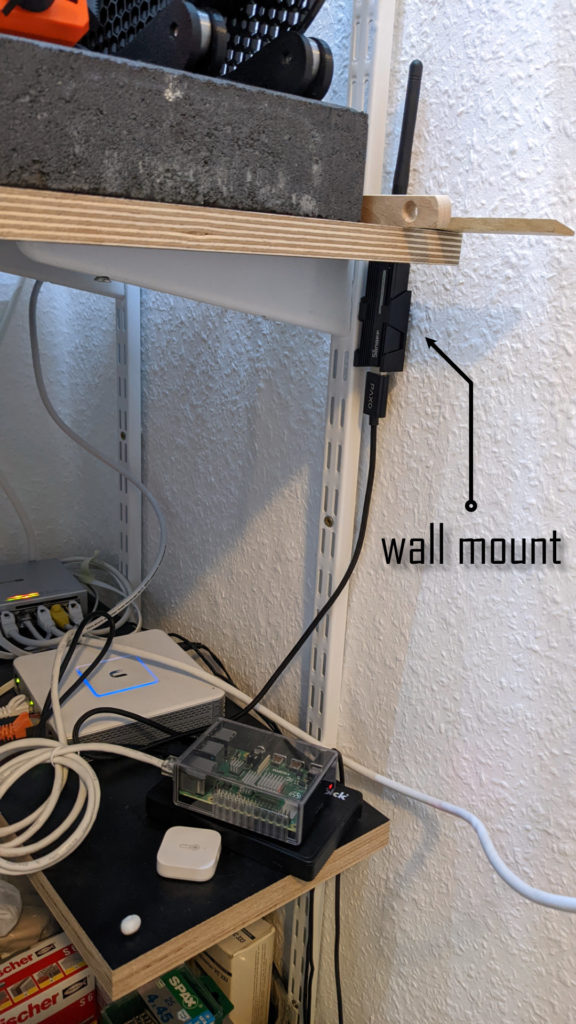
Finally to properly mount the whole thing I used some glue to connect it to a piece of metal some distance away from the Raspberry Pi. It now sits just below my 3D printer. So far this has worked very well. It is now mounted around 20 centimeter away from the Raspberry pi and the antenna is even slightly “shielded” by some thick wood close-by.
Below the Zigbee dongle you can also see some of my Unifi network equipment. While none of that uses Wifi it might also produce some interference.
If I ever need access to the stick it can easily be pushed upwards to remove it from the wallmount and the cable can be disconnected very quickly too.
This is again one of those projects showing just how useful 3D printing can be.
