Moving Docker data to an external SSD – a simple step-by-step guide to more stable & secure Raspberry Pi storage
Moving Docker data to an external SSD fixes a major flaw with my smart home system. Many people out there, including me, are running a small home server on a Raspberry Pi – usually running on a SD card with very limited space and a potentially very limited lifetime. Fortunately it is easy to move that data.
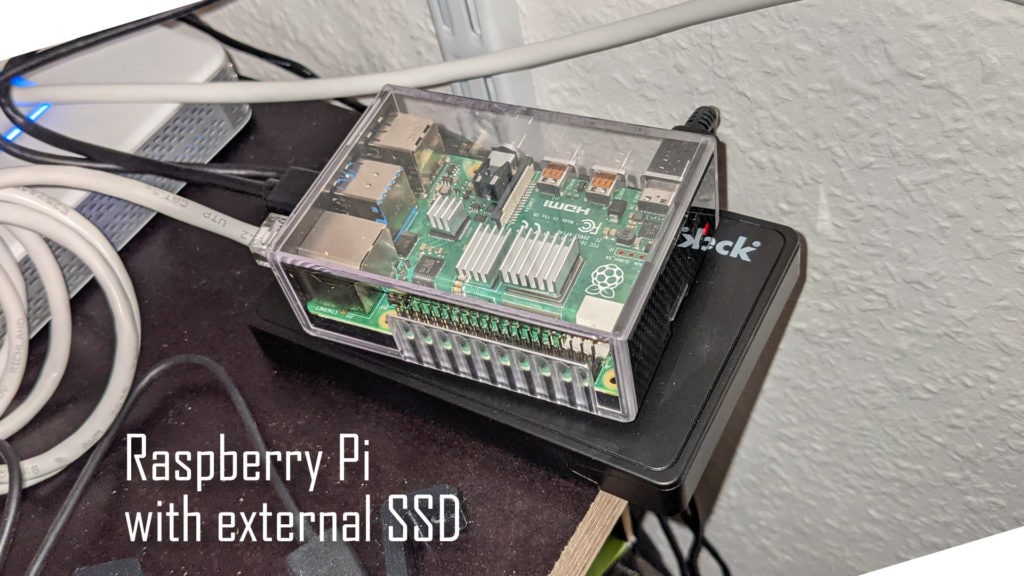
The Raspberry Pi setup
The Raspberry Pi does not have any SATA ports so an adapter is needed to connect the SSD. The newer Pi models do have USB 3 ports though so an USB-Sata adapter will work. Be sure to use a big enough power adapter though as this will use additional energy.
I already use a 3A power supply in my home server setup, so I am good on that front. I bought a USB to SATA adapter for a standard 2.5″ SSD with a case to mount it in. I had an old 120GB Samsung SSD left over from an old PC and decided to use that for my server. SSD’s in that size are really cheap now and easily fast enough for the home server over USB.
The USB to SATA adapter I am using to connect the SSD.
If you are interested in buying the adapter consider doing it via my affiliate links above.
Mounting the SSD is really easy: move the switch at the top of the case to the unlocked position, open the flap at the end and push the SSD in with the Sata connector first. If everything is oriented in the right way the case will close without too much force. Now the USB cable can be connected to the Pi (make sure to use one of the two USB 3 ports!).
The first step is to check if the device was detected. A simple lsusb on the Pi’s console will show the connected USB devices.

The adapter shows up as a SATA 6Gb/s bridge device. Now we need to access the storage.
Formatting the SSD
To use the SSD we first need to create a partition, or clean up existing ones if it has been used before. For partitioning we need to find the right device first. Running sudo lshw -C disk or dmesg will reveal this. In my case it is /dev/sda but it is possible that the device shows up as sdb / sdc / ….
I found that lsblk makes this search even easier.

The partitioning can be done with the fdisk command. Careful though, this will remove all data that is currently on the disk!!
sudo fdisk /dev/sda // make sure to use the right device here!!
n // now press these buttons
p
1
<enter>
<enter>
Afterwards you should see one partition with the full size on the SSD that can be used by the Raspberry Pi.

Now we need to create a new filesystem on this partition that we can then use. ext4 is the standard system for the Pi. It can be created by running mkfs.ext4 /dev/sda1 . If your SSD is connected to sdb then use sdb1 instead here and so on.
Mounting the SSD
Now we need to mount this SSD. You can mount it pretty much anywhere but usually /mnt or /media is used. I decided to use the first one.
sudo mkdir /mnt/extssd //(custom name)
sudo mount /dev/sda1 /mnt/extssd
Now you should be able to read and write from this new file system via /mnt/extssd . Unfortunately the mount will be lost on restart. Therefore we need to make it permanent. As the /dev/sda part might potentially change we can used the disks UUID instead.
ls -l /dev/disk/by-uuid/ // find the one pointing to /dev/sda1 and copy the long UUID string
nano /etc/fstab // and add this to the file:
UUID=3ac19978-702b-4cdd-8aa8-75e5af8f5b73 /mnt/extssd ext4 defaults 0 0
// where the UUID is copied from before and the /mnt/extssd mount point is the one we defined above

// save via ctrl+o and leave with ctrl+x
Now the SSD will be mounted again every time the Pi starts up.
Moving Docker data to an external SSD
Now if you have chosen to use Docker (compose) like I do you are in luck: migration of the actual data is pretty easy. You need to simply track down the place where the data is saved on the SD card currently and point Docker to the new place.
If you are using Docker volumes you need to find those. They can usualy be found at /var/lib/docker/volumes/. If you have gone the same route as I did you are syncing your containers to a certain folder. I had it placed at /dockerData.
To move the data we need to first shut down the running containers, then we will be moving the data to the SSD.
// shut down all containers. For docker compose in my setup
docker-compose -f smarthome.yml down
docker-compose -f hosting.yml down

// now we can copy all data to the new directory
sudo cp -ar /dockerData /mnt/extssd/dockerData
This will move all the data, while preserving all attributes like owner and timestamps. Of course you are free to delete the original data afterwards. Now we need to make sure that the Docker containers use the new directory.
This means updating all volumes. Fortunately in my case this is pretty easy as they all point to an environment variable called DATADIR. So I just need to open the .env file and point DATADIR to /mnt/extssd/dockerData.
All thats left is to start the containers again and check if everything is still running as expected.
// start containers
docker-compose -f smarthome.yml up -d
docker-compose -f hosting.yml up -d

// check logs e.g.
docker-compose -f smarthome.yml logs -f
If everything looks fine and all the application data is still present you are done. If something is not working just point your containers back to the original files and try again.
What this will not do
This procedure will not move the actual operating system to the SSD or prevent any data from being written to the SD card. Thus it may still die at some point. In my experience if you buy good SD cards they will run without problem for quite a long time though. And even if one would die: the recovery is really easy. Just buy a new SD card, install the OS and Docker and run your containers again. The actual data is safe on the SSD.
Of course all of this does not replace an actual backup if you have important data here.