From Design to Functionality: 3D Printing custom Tool Holders
After finally buying some new drills & countersinks, I soon realized the need for a more efficient storage solution. To address this, I created bespoke 3D printed tool holders that would exactly fit the new box allowing me to have the drills neatly arranged and readily available.
I need more tools
I guess every maker knows this feeling, this need for more tools. In some of my recent projects like the magic mirror I needed to drill a lot of wholes and countersink them to hide some screws. Unfortunately I only had some old and cheap countersinks that are not very sharp anymore. To fix this embarrassing hole in my tool selection I bought a set of slightly better ones.
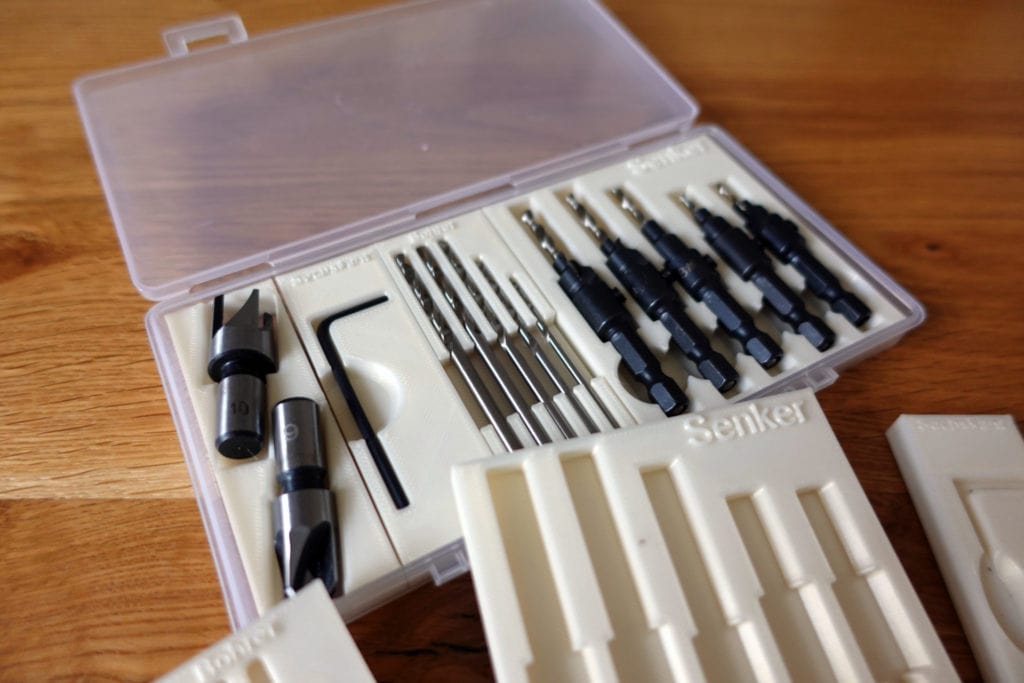
They seem to work well, combining drill and sink in one and even include some additional drillbits and tools to create wooden dowls in the plastic case. Unfortunately that’s where the praise ends: this cheap plastic box has all the tools just moving around. I had to fix that and I do own just the right tool: a 3D printer.
If you want to support the blog and need new tools then consider buying via this affiliate link:
Drill & countersink combo
3D printing bespoke tool holders
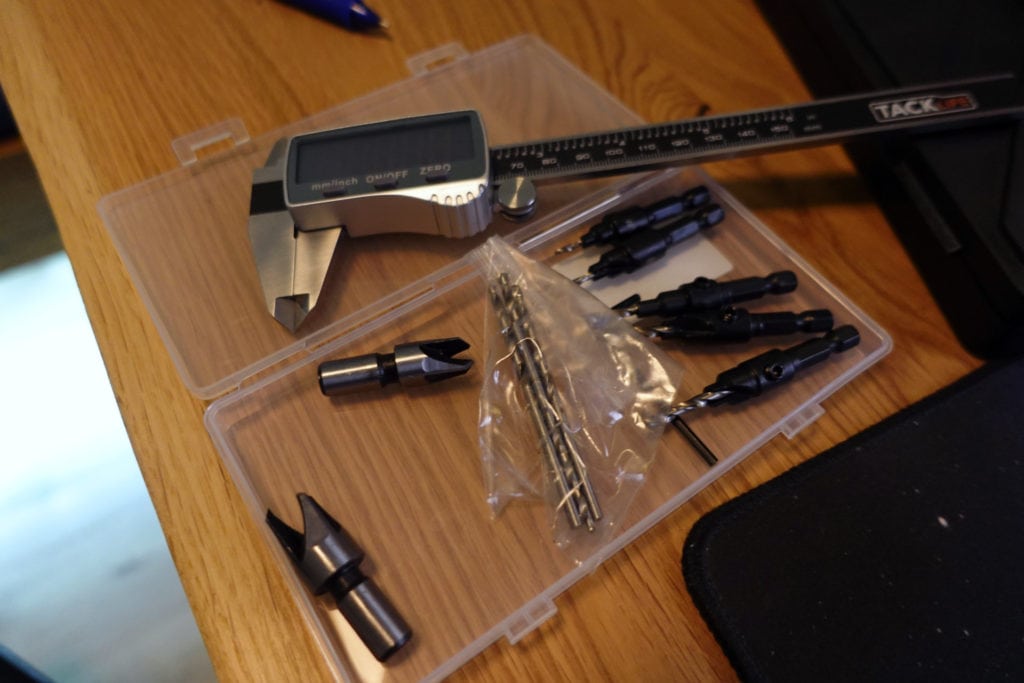
I started by carefully measuring the tool dimensions using calipers and then created some 3D models in my favorite CAD tool. I decided to fill the whole case with the tool holders which gives me plenty space to work with. To make prototyping easier and cause less waste I decided to do the part for each tool separately.
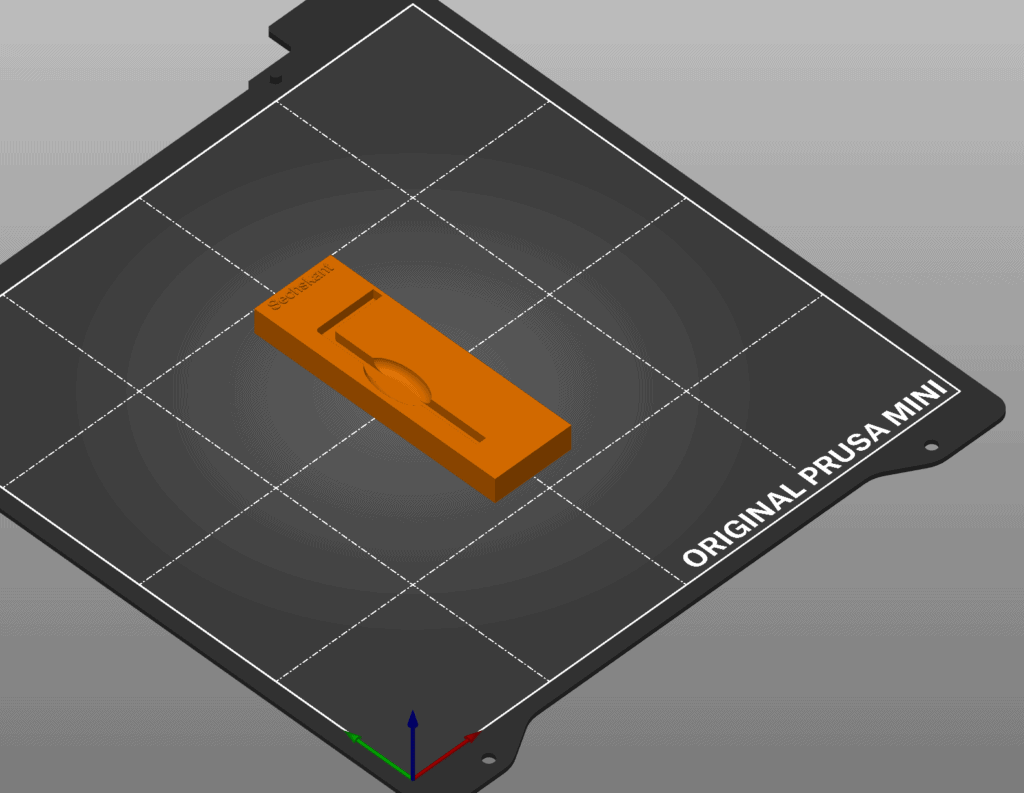
I created one simple part for holding the hex key, one for drills, one for the drills, one for the counter sinks and one for the drills to create dowls (whats the name of that tool?). Each one was designed and then printed on my Prusa mini. Print time is around 1 hour per piece with 10% infill.
If you want to print them too you can find all the models on printables.com here.
Measure once, build twice
Although my measurements were mostly fine I had to reprint three out of the four pieces. The second time I slightly tweaked dimensions for a better fit and optimized the tool holders for better handling. Thats the joy of 3D printing though: iterations are pretty fast and cheap with such small parts.
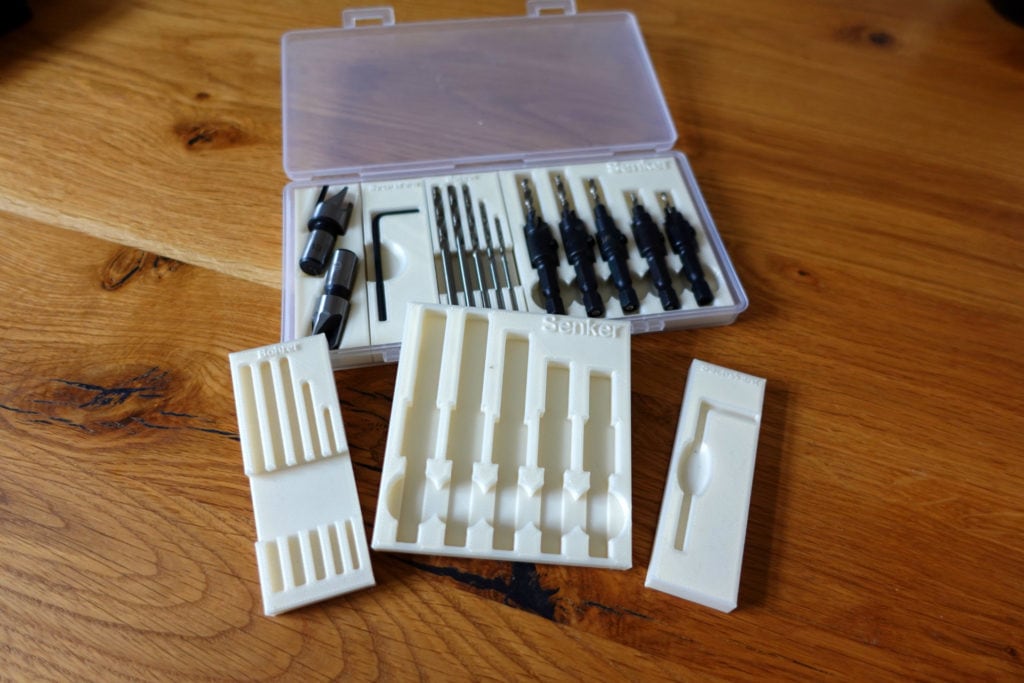
Finally after this process of designing, printing and redesigning I arrived at a well working solution. Four different small tool holders that together perfectly fit into the box. Much better than before! Maybe I spent a bit too much time on this but it was a fun project.