Integrating a smart fan with Home Assistant – how to survive the heat
Summer is here! A fan can help you fight the temperatures, a smart fan can do it even better. Here is how you can integrate Home Assistant with the affordable Xiaomi Mi smart standing fan 1C.
The Xiaomi smart fan
I bought this fan last year and already described how I integrated it with OpenHab 2. I bought it because it is pretty cheap, offers app support (I already use the Mi smart home app for my roborock smart cleaner bot) and looks decent enough.
It runs quiet enough (on the lowest of 3 levels), can swivel and randomly change direction and speed and has a sleep mode. A good enough solution for me to fight the summer heat in Germany.
If you are thinking about getting the same fan consider buying the hardware via my affiliate link(s). It won’t cost you more and pays for my server costs.
Xiaomi Mi Smart fan 1c
Integration with OpenHab worked via the MiiO binding and a custom json configuration. Unfortunately the “Xiaomi Miio” integration for Home Assistant does not support the smart fan yet, but there is another way to integrate it. Actually by now the fan is supported by the “Xiaomi Miio” official integration. All you need to do is install that and it should discover your device. I will leave the rest of the article here anyways a documentation and history.
Integrating the Mi fan 1C with Home Assistant
While the main Xiaomi binding does not support it yet fortunately someone else came up with a custom solution. The xiaomi_fan repository on GitHub provides a custom HACS integration for these fans. After installing HACS just click on “integrations” and search for the “Xiaomi Mi Smart Pedestal Fan Integration”.
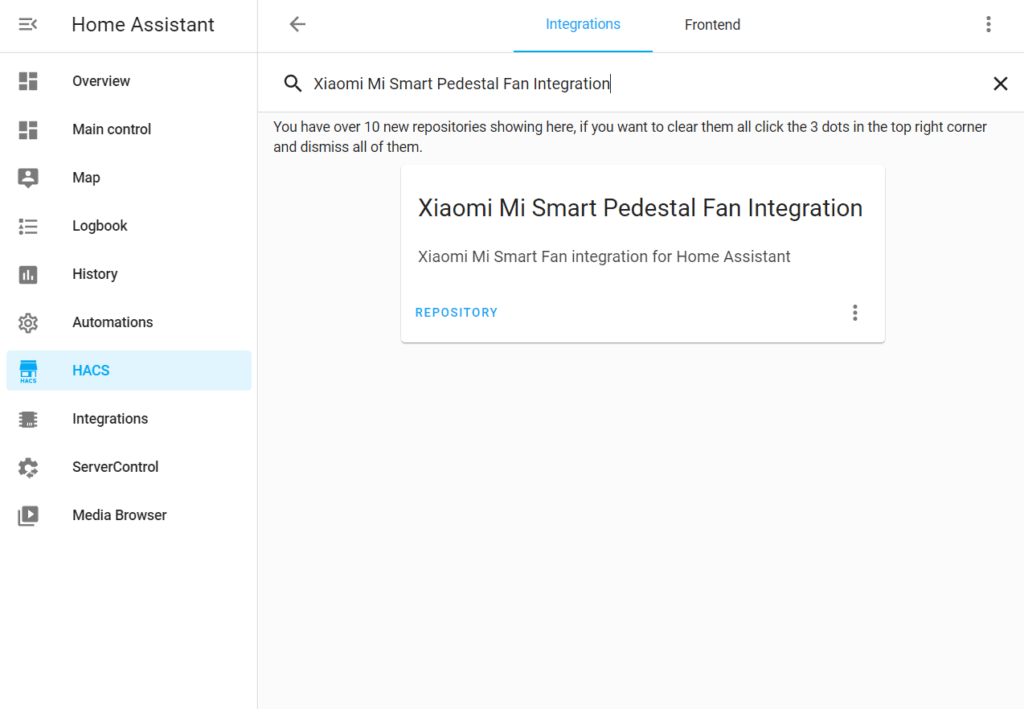
You might need to manually add the repository before by clicking on the 3 dots and selecting “Custom repository”. Just paste https://github.com/syssi/xiaomi_fan/ in there. Afterwards you should be able to find integration.

The installation should just take a couple of seconds, afterwards you just need to restart by going to server controls and then clicking restart. Now we can add the fan. Unfortunately this can not be done via the UI yet but instead you have to add some configuration in the configuration.yaml file. Open you favorite editor and add something like this:
fan:
  - platform: xiaomi_miio_fan
    name: Xiaomi Fan 1C
    host: 192.168.178.123
    model: dmaker.fan.1c
    token: !secret token_fan
Just chose any name you like and find the IP address of the smart fan in your network. The model field is optional but recommended, as the integration supports a range of different fans. The available options can be found here. In my case the dmaker.fan.1c is the right option. You also have to add the token for your device to the secrets.yaml file. Different ways to get this token are described here, I already knew it from my old installation.
Now use the same server controls menu as before, check the configuration and restart Home Assistant. Afterwards your new devices should show up (or some new errors in the log). There will also be a very simple cards for your fan, allowing you to set the different speed modes, (dis)able oscillation and switching the fan on or off.

Using the fan in rules
In OpenHab I created some rules to automate the fan. For now I do not need those but similar rules are of course also possible in Home Assistant. If you go to the developer tools tab in Home Assistant you can see all the different service calls you can use to manipulate the fan.

From toggling to speed settings, everything is there. The states and service calls can then be used for pretty simple automation rules like this:
alias: Fan automation
description: 'Turns the fan on if I am home and the temperature gets higher than 24°C'
trigger:
  - type: temperature
    platform: device
    device_id: yourdeviceId
    entity_id: sensor.yourEntityId
    domain: sensor
    above: 24
condition:
  - condition: state
    entity_id: person.oliver
    state: home
action:
  - service: fan.turn_on
    target:
      entity_id: fan.xiaomi_fan_1c
    data:
      percentage: 33
mode: single
This will turn the fan on automatically if I am home and the temperature sensor reports a temperature of over 24°C. Of course you can build much more complex rules if you want to.
Having full (local) control over the fan is a great feature for a device with a (compared to some known brands) pretty cheap device. Having a working integration makes this process very simple, a big thank you to the author of the integration! The only part about this solution I do not really like is the “card” used to control the fan from the Home Assistant frontend. It does the job but it looks very boring. I am currently working on a custom solution, more about that in a future post!


