Customizing the Home Assistant sidebar by adding 3 convenient shortcuts
Home Assistant has a neat UI but many often needed pages are only accessible via a nested menu. Fortunately the Home Assistant sidebar is customizable with some tricks. I found a solution that allows adding new items for much used pages like integrations and automations.
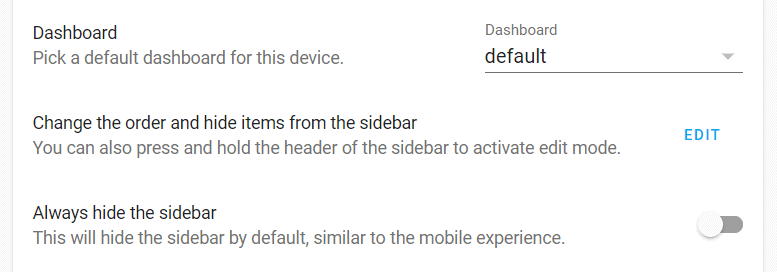
If you are happy with the existing sidebar entries and are just looking to (temporarily) remove some of them or to change their order the Home Assistant UI already has you covered.
Simply click on your username on the bottom left side of the screen to open your personal settings. These should contain a “Change the order and hide items from the sidebar”. Guess what this does 😉
After clicking this button the sidebar will switch to edit mode and the entries will start wiggling. Now you can remove unneeded ones by clicking the x button. All deleted entries move to the bottom of the list where you can (re)add them by clicking the + button at any point.
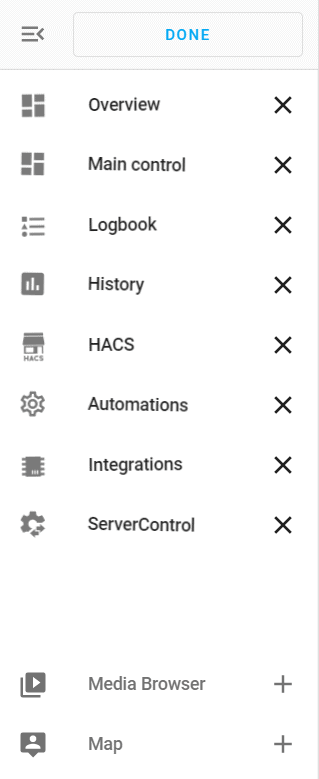
The order of the entries can simply be changed by dragging them around. I have personally removed the media browser and the map entries as I do not use those (no location tracker active right now and Home Assistant is running inside Docker, so not much media to browse).
Once everything is arranged to your liking just click the “DONE” button on top to save everything.
Unfortunately the normal edit mode is limited to a set of preexisting entries. If you are heavily using the UI, especially when you set up a nice Home Assistant instance you might be tired clicking through the same menus time and again though and start wishing for more sidebar entries.
Fortunately with the help of this blog post here I was able to find a way to add sidebar items linking to pretty much any (sub)menu. To do this you need to edit your configuration.yaml file. Either edit your existing panel_custom entry or or create a new one and add this code.
Update: in a new Home Assistant update the menu structure was changed which stops the first entry from working. Read the end of this article to see how to fix this.
panel_custom:
  - name: ha_server_con
    sidebar_title: Server Control
    sidebar_icon: mdi:cog-transfer
    js_url: /api/hassio/app/entrypoint.js
    url_path: 'config/server_control'
    embed_iframe: true
    require_admin: true
    config:
      ingress: core_configurator
  - name: ha_integ
    sidebar_title: Integrations
    sidebar_icon: mdi:chip
    js_url: /api/hassio/app/entrypoint.js
    url_path: 'config/integrations'
    embed_iframe: true
    require_admin: true
    config:
      ingress: core_configurator
  - name: ha_auto
    sidebar_title: Automations
    sidebar_icon: mdi:cog-outline
    js_url: /api/hassio/app/entrypoint.js
    url_path: 'config/automation'
    embed_iframe: true
    require_admin: true
    config:
      ingress: core_configurator
To edit this file you can either use the file editor add-on or just share your Home Assistant configuration path via samba (if you are running on a Raspberry Pi for example). Then you can use any text editor (I prefer Visual Studio Code or Sublime text) to edit the file.
These three entries are adding the “Automation“, “Integrations” and “ServerControl” sidebar items you can see in the screenshot above. Each one is very similar. If you want to add a new one you just copy one of them and edit a couple of attributes.
The sidebar_title is the String that will be displayed in the sidebar later and the sidebar_icon the icon beside it. You can choose any material icon; if you are unsure which ones are available check this website.
You need to also change the url_path. This path decides where the entry will be linking too. To find the right one for automations I used the menu to navigate to the automations and checked the URL in the browser.

Using this I was able to set the url_path to config/automation, which works just fine. This way you should be able to find and add any (sub)menu you like to the sidebar.
For me these three configuration pages were the most important ones but of course you can add links to pretty much any other part of Home Assistan in the same way.
This may be a small change but it definitely make Home Assistant a whole lot better for me. If you are starting to use Home Assistant too you might be interested in my experiences so far.
One more thing
I recently added another shortcut for helpers (usually found via Configuration – Helpers) to my sidebar. Those are very handy litte … well helpers… that can be used to enhance your automations. The method is the same, the code:
- name: ha_helpers
    sidebar_title: Helpers
    sidebar_icon: mdi:toggle-switch
    js_url: /api/hassio/app/entrypoint.js
    url_path: 'config/helpers'
    embed_iframe: true
    require_admin: true
    config:
      ingress: core_configurator
The Home Assistant 2022.5.x update
In this update (and in some cases also the one before that) Home Assistant update the way its menus are structured. While this way of adding shortcuts still works some of the URLs have changed. I had to update the one for server controls because that section was moved.
// new server control (yaml check and restart) shortcut
- name: ha_server_con
    sidebar_title: Yaml & Restart
    sidebar_icon: mdi:cog-transfer
    js_url: /api/hassio/app/entrypoint.js
    url_path: 'developer-tools/yaml'
    embed_iframe: true
    require_admin: true
    config:
      ingress: core_configurator
The actual logs can be found via config/logs if you want to link to them (replace the url_path). If you need to find a new URL just use the settings menu to navigate to that menu and copy the URL path after the first slash /.


