Shrinking a living wall & some tips on maintenance
In the past I have built a wall mounted garden – a living wall. Now I have built a small version of that and I also have some clues to share on how to keep your plants alive.
How is my living wall doing?
In the first built here and here I described in detail how I built and automated the living wall for my living room. The frame itself worked out great. It still looks very nice and shows no signs of any instability or other problems.

Before I get to how I built another, smaller, version of this here is what I learned from this big one. I have done some upgrades to the watering solution, will update the lights and have learned quite a bit about the flowers themselves.
Overall only about half of the original plants are still alive. One or two did not really survive the move to their new home but the rest were doing fine for some time. More on that in a second. I also notice that over time the water will start staining the felt pockets with particles of dirt. You should regularly remove those with a damp cloth to avoid lasting changes.

Unfortunately I lost some plants during a vacation where I underestimated the amout of water needed to keep the pump running for two weeks. There is also some difference between how much water reaches the plants that are directly next to a dripper and those on the row below. Some get too much, some not enough. You need to figure out where to best place which kind of flowers.
Upgrade 1 – better drippers
The automatic watering solution for the green wall uses a big “tank” of water at the bottom with a pump that pumps water through small pipes right to the plants. It is distributes via small drippers to avoid flooding the plants. Turns out that those drippers I originally used are really not high quality products. After less than a year they started clogging up.
I was able to clean some of them with the included tool but some of them were beyond recovery. I also want to avoid regular cleaning for those (especially because they start restricting water flow even earlier). Instead I upgraded to a better set of compatible and self cleaning drippers. So far there have been no problems at all with those.
If you are planning to built something similar and want to support this blog consider buying the hardware via this affiliate link:
Gardena self cleaning drippers
Upgrade 2 – better light
Flowers need water and they need daylight. Unfortunately the position where the green wall is mounted does not get enough regular sunlight. To fix that problem I installed special LEDs made for flowers on top. They come with an automatic timer and have been working great so far.
The problem with those lights, especially during winter, is that the light they produce is very unpleasant to look at. It is tinted red and blue and hurts the eye a bit. It has to be on for 8 – 12 hours a day though so that gets annoying quite quickly.
With the smaller version of the living wall, more on that in a second, we used a different lamp that produces more natural looking light while still keeping the plant alive. I will also switch to that one soon.
If you are planning to built something similar and want to support this blog consider buying the hardware via this affiliate link:
More natural looking light
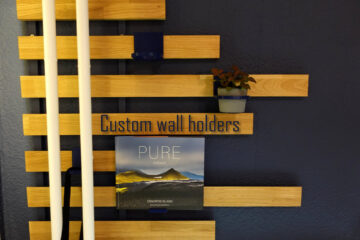
Upgrade 3 – holder for the tubes
The water is transported through a couple of small tubes to the drippers next to the plants. There is one tube per two rows of plants, so three overall. To clean up the look a bit I decided to model and 3D print some holders for those tubes.
 You can find the models here. As always, and as with all of my other 3D printing projects, it is just fascinating to be able to design something quickly on the computer and then see it being made by a machine just like that.
This is not a needed upgrade but improves the design a bit.
A smaller green wall
As I already mentioned I have since built a smaller version of this living wall. It was a gift for someone else with not as much free wall space so I made it smaller. There was also no need for automated watering of the flowers this time.
I found a smaller version of the felt pockets online with just three rows of three flowers each and based my measurements on that. The frame is exactly the same as with the original but half as wide and also much smaller in height. The height is not halved because I still need the same space for the water tank at the bottom. You could build this with a smaller version of the tank but the one I used is very cheap and easy to get.

No water reservoir is needed without a pump but there should still be something at the bottom to catch overflowing water (although that does not happen as often with manual watering). Because of the smaller size of the whole platform I decided to also use a thinner backplate (only 6mm material this time) which makes the whole thing way easier to handle.

I also used a different wood this time (beech) to better match the existing furniture. I quite like the result – it looks cuter in this size but still very nice with all of that wood and the black as contrast. If I do this again I might replace the tank with a smaller one too, the bottom part looks a bit more oversized in this case.

The new flowers will take some time to start growing but this will look very nice in the future, I am sure about that. I am also already planning another version in a totally different form…