Roborock S50 – simple fix for error 2
My Roborock S50 robot vacuum has maybe been my best smart home purchase so far but recently an error 2 message stopped it from working properly. Here is how to fix the error 2 and how to clean the underside of the robot.
Error 2 – bumper stuck
The S50 robot vacuum navigates using a couple of different sensors. Any object that is high enough of the ground is detected by the LIDAR sensor tower on top. Smaller obstacles are detected by the frontplate. The whole front is movable – this bumper plate presses down on a set of buttons beneath when the robot his an obstacle. This helps it to learn navigating around them.
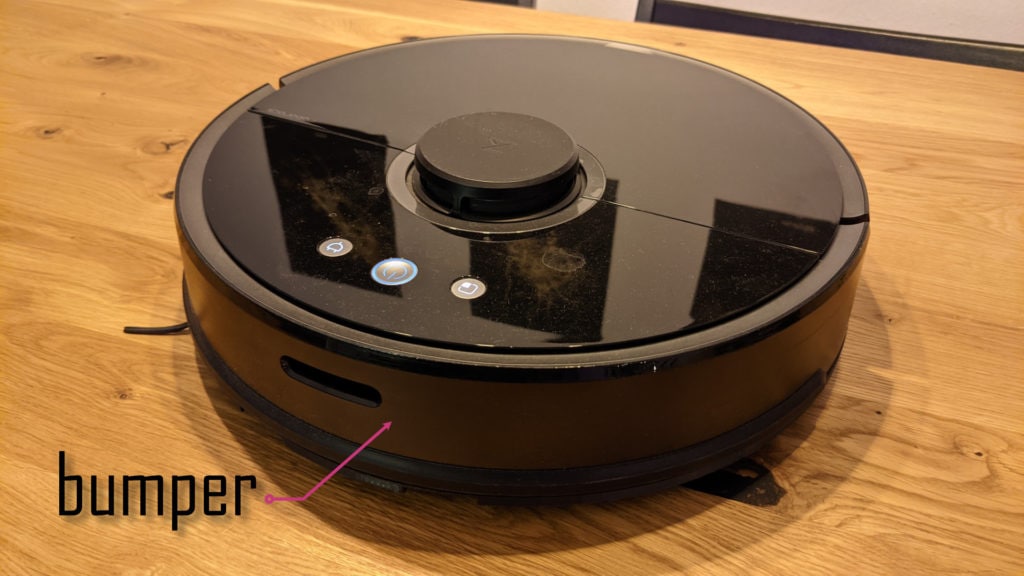
Usually the bumper should reset after driving backwards for a bit by a metal spring underneath that pushes it away from the robot. It looks like this spring looses some of its power over time though. If the robot runs into an obstacle with too much speed it seems like the front sometimes gets stuck with the metal spring unable to push it back out again. As this means the robot is unable to detect new obstacles it will stop with an error message – error 2 and something about “bumper is stuck”.
Fixing the error 2 – opening the S50
I was able to solve this problem (at least for some time) by opening up the robot and bending the spring forward to give it (back) some more power. The S50, as well as similar models, seem to be build very well and are quite easy to open and service. I also recommend to use this opportunity to clean the underside of the robot. Over time quite a bit of dirt will accumulate there.
All the steps here have worked for me but do this at your own risk! Be careful not to damage any (electrical) parts and be aware that you might void your warranty.
If you are looking to also get the Roborock S50 consider buying it via my affiliate link here. No additional costs for you and I get to pay the servers 🙂
Disassembling the front
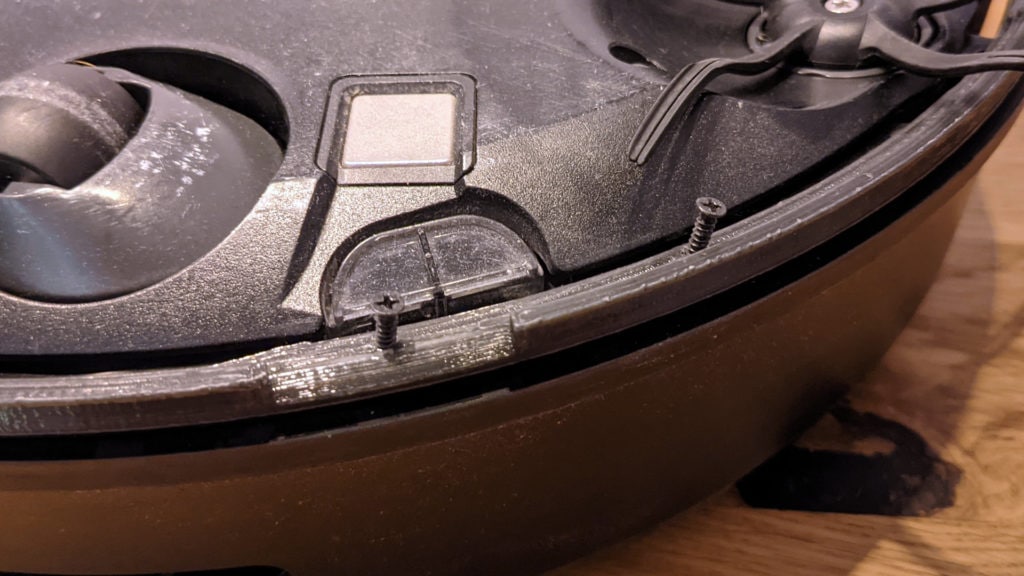
To reach the metal spring behind the bumper you first have to remove the bumper itself. To do that just turn the S5 on its back and remove the screws holding the front. I have added an extension to the bumper so that the robot does not get stuck on high(er) obstacles. If you have a similar setup you need to remove the six circled screws first, then remove the extension and finally remove the two screws with the dotted circle. Otherwise just remove all of them, the setup should look largely similar.

You should now be able to just slide off the front bumper piece. This is a good time to start cleaning this piece as well as the sensors on the robot bottom and the front. Just be sure to keep track of the screws as you will need all of them to put the robot back together 😉

These small screws need to go 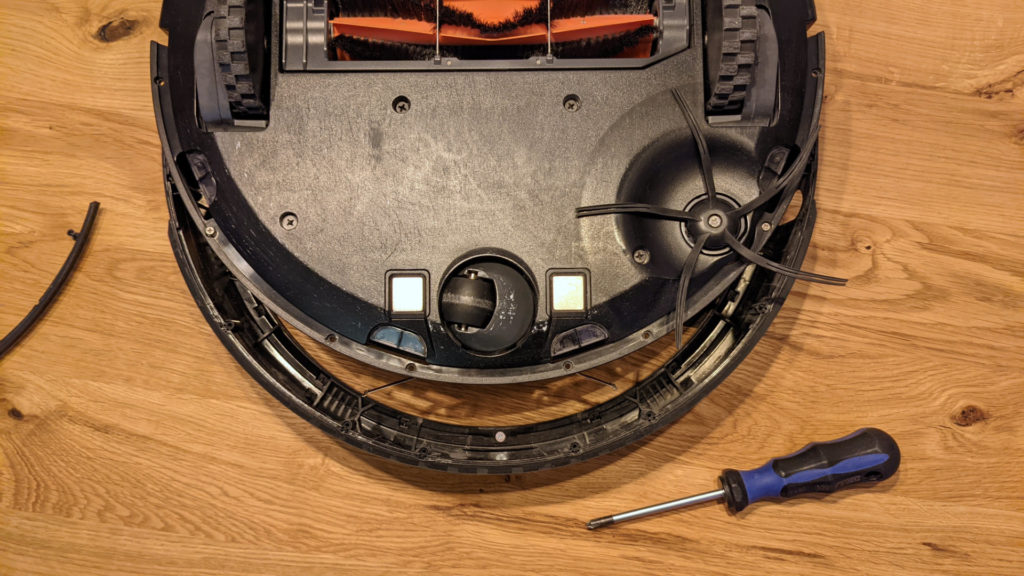
Disassembled front
Fixing the bumper spring
Once you remove the front fixing the bumper issue was pretty simple. First you should check if there is any dirt or particles blocking any of the moving parts. Be sure to also check if the big metal piece in the center – that is the spring – is properly mounted to the main body by the small metal pieces at the bottom.
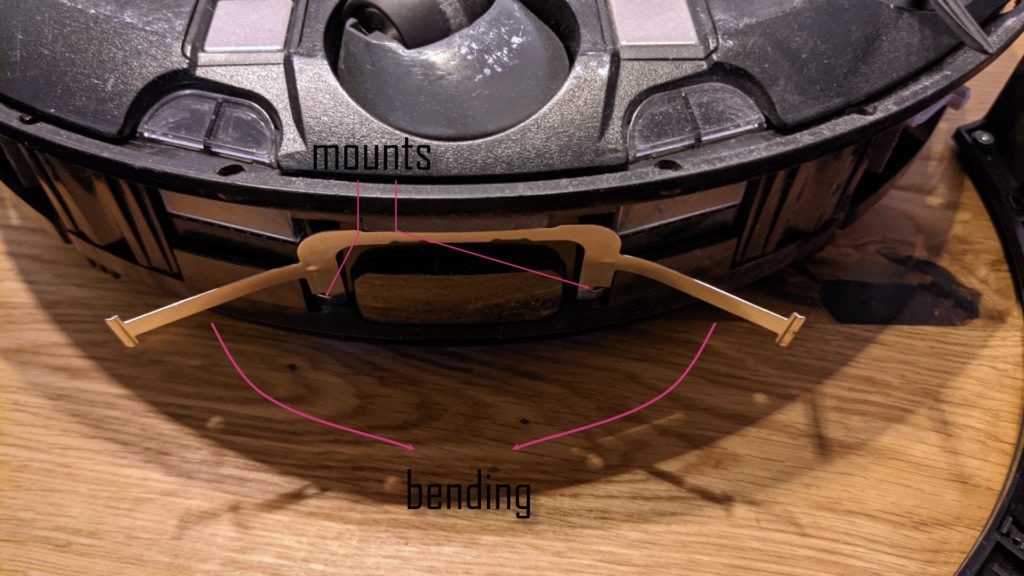
If all of that looks normal all you need to do is making the spring push strong again by bending both legs outwards away from the main body of the robot. Don’t put too much pressure on it but I was able to bend it to around 45°. Make sure to check again if the mounts are still connected afterwards.
Now you are done and could reassemble the robot by simply adding back all the screws. I recommend taking some more time though and actually clean the robot a bit further.
Cleaning the underside of the Roborock S50
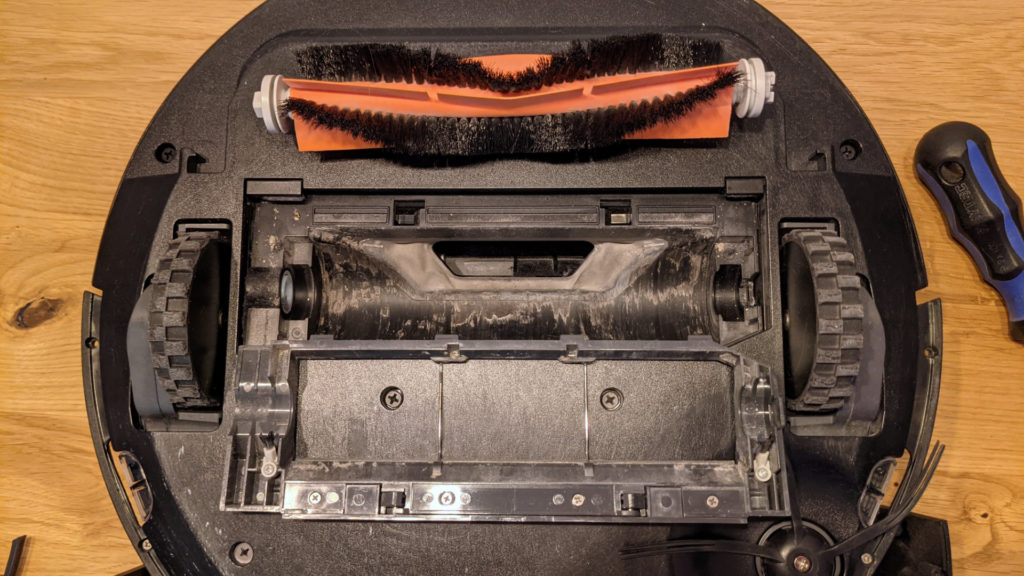
If you open the underside of the robot you are able to clean quite a lot of dirt from around the wheels and some other parts that are usually hard to reach. Fortunately this is also quite easy to open so lets get to it. First you should remove the main brush by pressing the the two marked handles together. The cover should pop right out. Then you can remove the actual brush by pulling it up on one side (on the right in the picture). Take some time to clean the brush with the tool that is part of the robot and remove dirt from the case here.
To remove the rest of the bottom plate you need to loosen some more screws. These are a bit bigger and spread over the full size of the robot. You will also need to remove the smaller side brush that is mounted with one smaller screw in the center. This can be a bit tricky as you need to hold the brush in one hand to stop it from spinning while unscrewing it with the other.
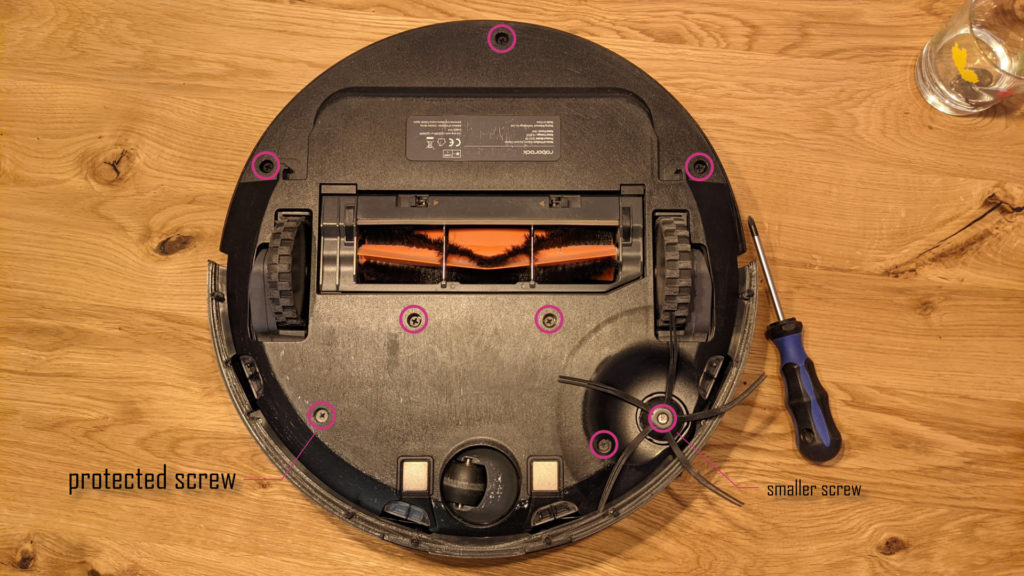
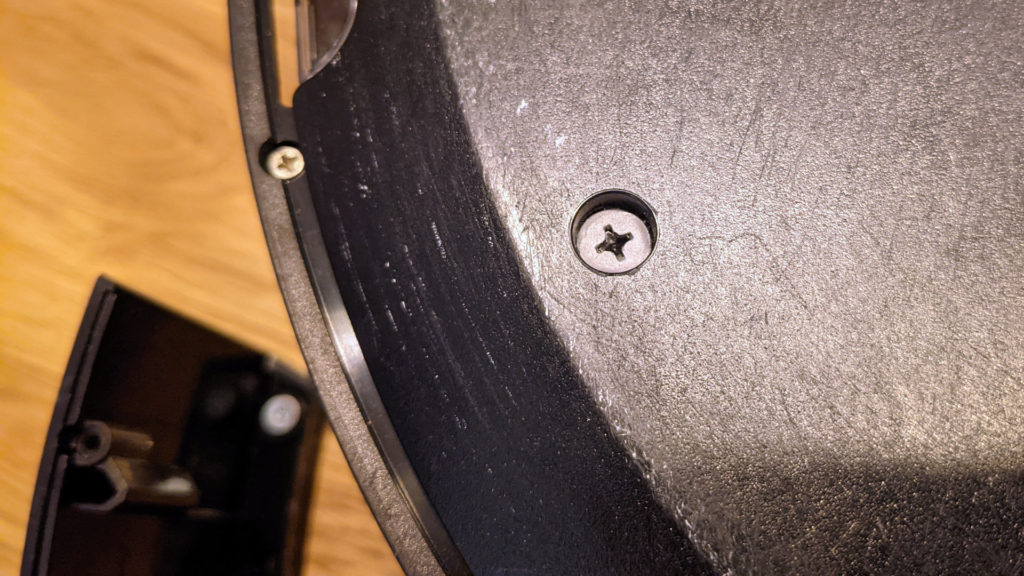
Be aware that at least in my case one of the screws had a kind of paper cover that I assume is there to detect whether the robot was opened. You can just push the screwdriver through it but that might void your warranty.
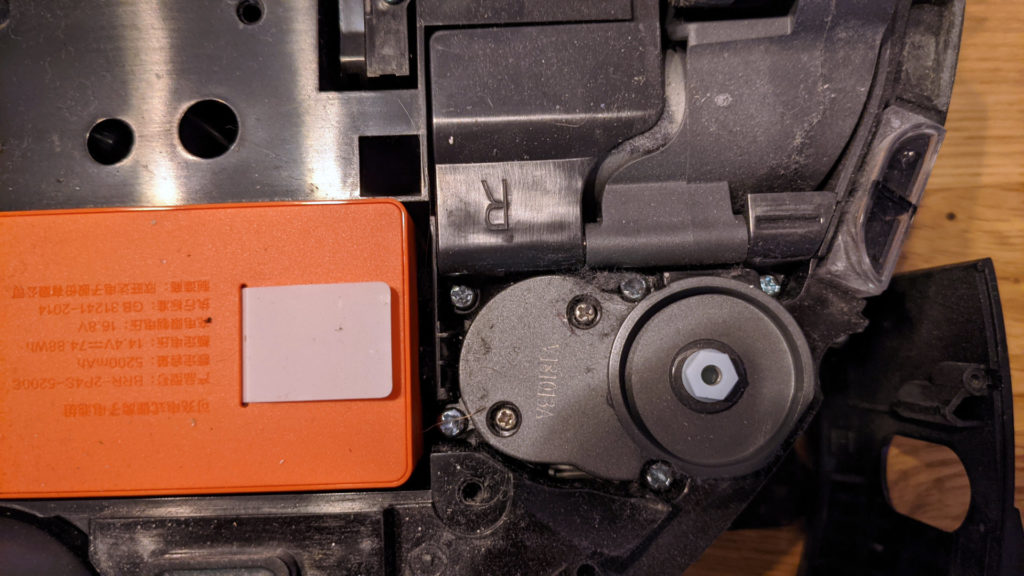
After removing all the screws you should be able to just pop of the bottom plate and open the robot. Once that is done you can see a lot of interesting components. You will be able to reach the spring loaded wheels, see the side brush motor and the main battery (orange). Small detail: the battery can easily be pulled out of the robot with the small plastic lips and is only connected with a plug. Very neat, as this makes it easy to replace!
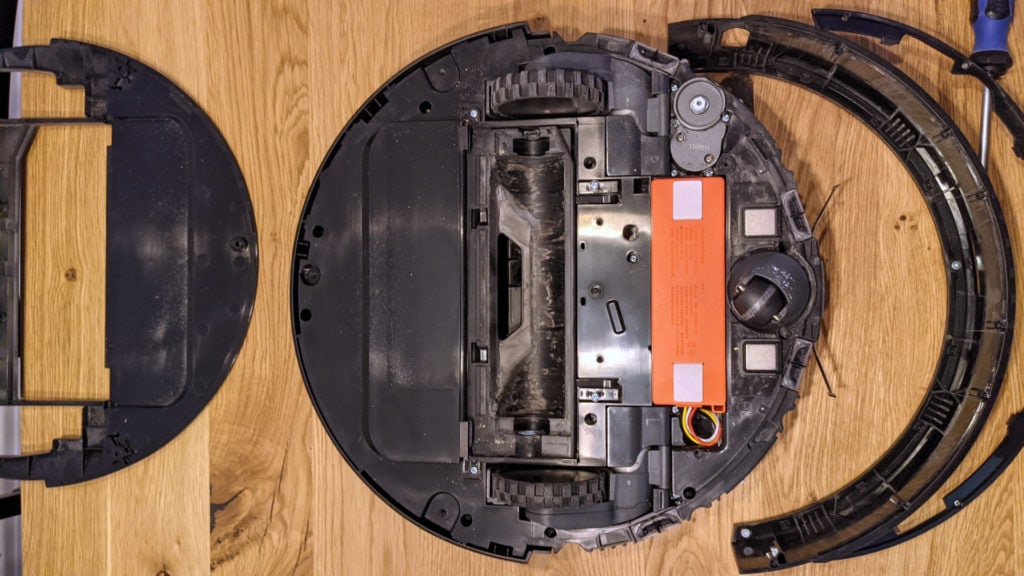
If you haven’t opened the robot before you will most likely see a lot of dirt in these small spaces between the components that you usually can not reach. This is a good time to remove all of that.
Once you are happy with the results you can simply reassemble the robot by doing all the steps in reverse. This should be quite simple the only tricky part is reattaching the front. I suggest adding one screw on each side first to hold everything in place. Then adjust the plate and add the rest of the screws.
Bending the metal spring outwards fixed all the issues with this “error 2” for me and I am sure the cleaning will not hurt either. I am looking forward to some more years of cleaning from my robot now 🙂