What can you do with old T-shirts? Make awesome pictures for your wall
I collect T-shirts as a souvenir from most countries/cities I travel to. After some time the old T-shirts get worn down but still have some sentimental value. To keep them around I made picture frames from those old shirts.
T-shirts as souvenirs
There are lots of ways you can remember your vacations – from pictures to coffee pots, whatever you prefer. I have been buying T-shirts with interesting and iconic themes in pretty much all the places I have been. For me it is a great keepsake – and something that is actually useful and something I will look at regularly.
Unfortunately over time shirts get worn down, change size or the print starts to flake of. Therefore I had a bunch of shirts around that I am not actually wearing anymore but that I also do not want to get rid of. After thinking about it for some time I found a great way of recycling those shirts.
Picture frames from old T-shirts
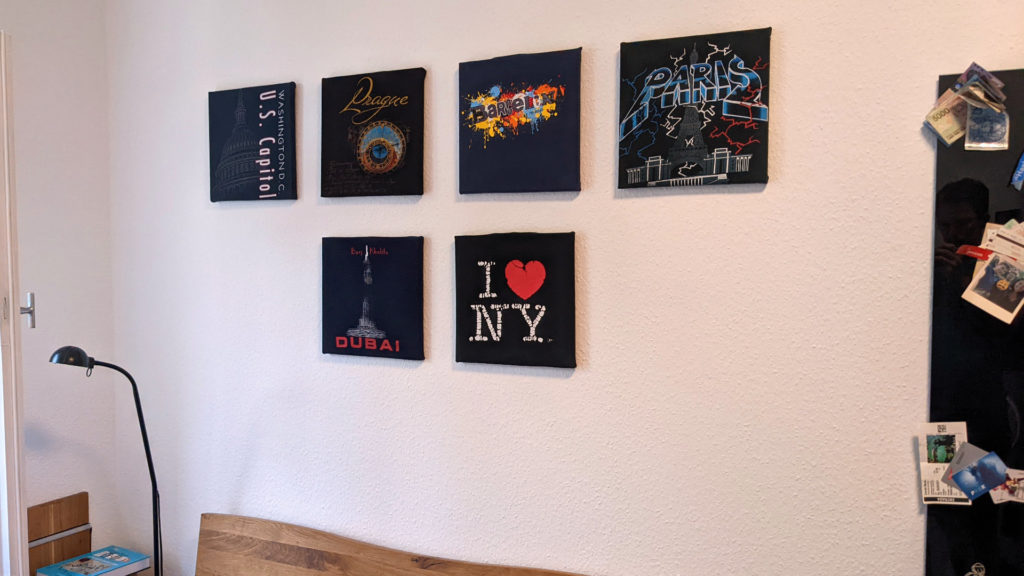
The way I decided to recycle the shirts is by putting them on a wall. I thought about a couple of different ways, just hanging them from a small screw or putting them behind a glass picture frame but I did not like any of those solutions very much. In the I found one where I really like the look: stretching the shirt of a canvas and placing that on the wall.
Materials for this are pretty cheap. You need – of course – the shirts and then some inexpensive canvases in the right size. They should be as big as the front of the shirt. In my case 30x30cm worked well but in some cases you might need a bigger canvas.

If you are looking to build something similar consider buying via these affiliate links to support the blog
Set of canvases
Tacks
I really recommend using a canvas on (soft) wood because then you can use simple tacks (“Reißnagel” in german) to keep them in place. The only additional tools I used are scissor to cut the shirt to size and a hammer + nail to get the canvases onto the wall.
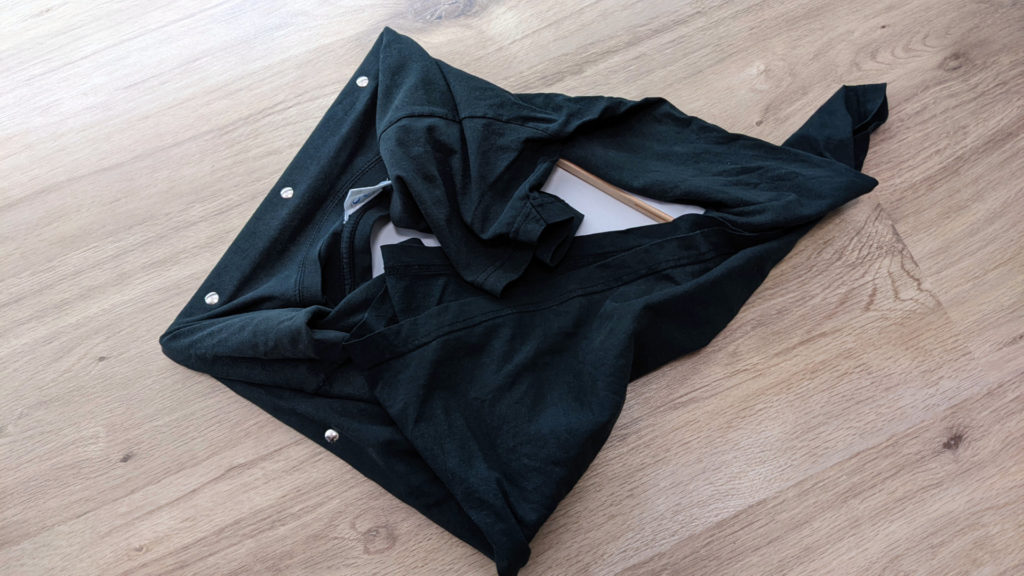
To get started put the shirt on the front of the canvas and move it into the right position. This is an important step as you won’t be moving it much anymore later on. So make sure everything is square. Then I started by putting two to three tacks into each side of the shirts (from the back of the canvas of course) to fix the shirt in place. Make sure to keep pulling a bit on the shirt before adding the tacks – that way you avoid wrinkles.

The next step is optional and will damage the shirt (with more than just a couple of small holes). I wanted the whole canvas to be flush with the wall so I decided to remove the parts of the shirt not needed anymore and just cut everything away. In the picture above you can see the rest. This makes it much easier to handle.
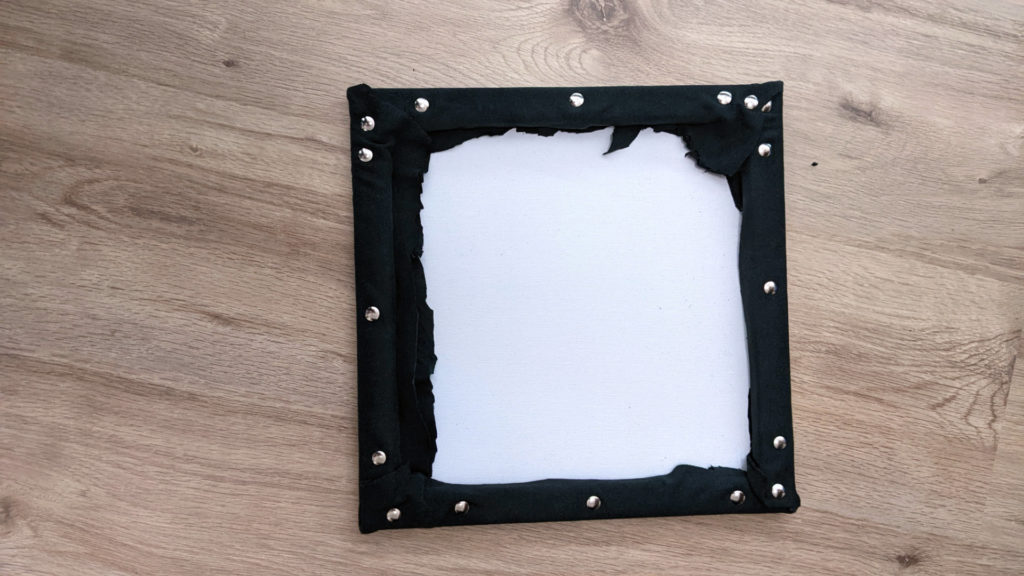
Finally I cut away some more material at the corners and attached them to the frame too with some more tacks. Make sure to carefully fold them one over another here to avoid big bumps of material there. Finally I tucked the rest of the sides of the shirt under the wooden frame (inside) to keep it out of the way.
That’s it, the picture frames are done. Now its time to mount them to the wall. In my case some simple nails were enough. I am quite happy with the result for such a quick project.